Car Front Glass Scratch Repair: What You Can Fix Yourself and When to Stop
The Short Answer
Light surface scratches on a windshield can often be reduced or removed at home with a glass polishing kit, usually based on a fine cerium oxide compound applied with a rotary tool or drill. Deeper scratches are a different matter. If a scratch is deep enough to catch your fingernail, polishing it out means removing a noticeable amount of glass, which can leave a wavy, lens-like distortion. On the driver's side of a windshield, that distortion can be worse for visibility than the original scratch. In that case, professional assessment or windshield replacement is usually the sensible next step.
Two conditions change the answer. First, a chip, star break or crack is not a scratch. It needs a resin repair or replacement, not polishing. Second, if your vehicle has a forward-facing camera or sensor behind the windshield for driver assistance features, work near that area deserves extra caution, because optical distortion there can affect how the system sees the road.
Scratch, Chip or Crack: Identify the Damage First
Many products sold as windshield repair kits are made for chips and short cracks, not scratches. They inject resin into a break in the outer layer of laminated glass. Resin does little for a scratch, which is a groove worn into the surface. Choosing the right kit starts with naming the damage correctly.
Damage type | What it looks like | Typical DIY option | Usually needs a professional when; Light scratch or haze | Fine lines, often visible only at certain angles or in sunlight | Glass polishing kit | It does not improve after careful polishing; Deep scratch | Groove that catches a fingernail | Generally not a good DIY candidate | It sits in the driver's line of sight; Chip or bullseye | Small impact point, sometimes with a circular break | Resin chip repair kit | It is large, at the edge of the glass, or in the driver's view; Crack | A line running through the glass, may grow over time | Limited; short cracks sometimes take resin | It is long, spreading, or reaches the edge; Scratched film | Damage that is on the inside surface, on a tint film | Replace the film, not the glass | Not applicable
The Fingernail Test and Other Quick Checks
Before buying anything, clean the glass thoroughly and dry it. Dirt and wax residue can look like scratches, and some marks disappear once the surface is properly cleaned. Then run through these checks:
Drag a fingernail gently across the scratch. If it glides over, the scratch is likely shallow enough for polishing. If it catches, the scratch is probably too deep for a good DIY result. Check which side the damage is on. Wet the outside surface; if the scratch seems to vanish while wet, it is likely on the outside. If it stays the same, check the inside, where tint film or interior cleaning damage may be the cause. Note the location. Scratches in the area swept by the driver's wiper deserve the most caution, because any polishing distortion there affects your view directly. Look for a pattern. Curved arcs that follow the wiper path point toward worn wiper blades or grit trapped under them. Look behind the mirror area for a camera or sensor housing. If one is there, avoid aggressive polishing in front of it.
What Causes Windshield Scratches
Knowing the likely cause matters because a repair will not last if the cause continues. Common sources include:
Worn or damaged wiper blades, especially when the rubber has split and the metal frame contacts the glass; Sand and grit dragged across a dry windshield by the wipers; Ice scrapers used on dirty glass or with damaged edges; Abrasive pads, steel wool or rough cloths used during cleaning; Road debris and sandblasting from gravel over time, which tends to cause general haze rather than single lines
If the scratches follow the wiper arc, replace the blades before or right after polishing. Otherwise the same damage will return.
How Glass Polishing Kits Work
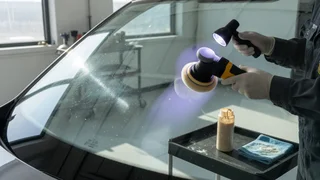
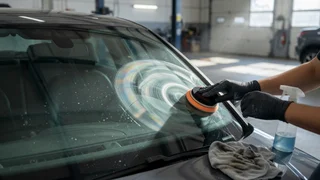
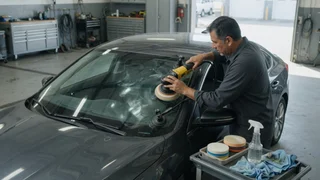
Glass is much harder than automotive paint, so the scratch removers that work on clear coat do very little on glass. Glass polishing kits rely on a polishing compound designed for glass, most commonly cerium oxide, worked into the surface with a felt or similar pad. The compound gradually levels the surface around the scratch so the groove becomes shallower and less visible. This removes glass, which is why depth matters so much: the deeper the scratch, the more material has to be removed over a wider area to blend it in.
Some kits are built around a drill attachment, while others assume a dedicated polisher. Hand application is possible for very light marks but is slow and usually less effective.
What to Check When Choosing a Kit
Kits sold under names like windshield scratch repair, glass scratch remover or glass polishing DIY kits vary in what they include and how they are meant to be used. Retailers in different countries, such as hardware and automotive chains, may stock different brands, and a product code you saw from one retailer or region may not be available everywhere. Rather than relying on a product name, compare kits on these points:
Intended damage: confirm the kit is for scratches and polishing, not a resin kit for chips and cracks. Compound type: look for a compound described as suitable for glass, such as cerium oxide. Pads and backing: check whether polishing pads and a backing plate are included and whether they fit a standard drill chuck or require a specific polisher. Tool requirements: note any recommended speed range. Many glass polishing instructions favor moderate speeds to limit heat. Coverage: some kits are sized for small spot repairs, others for treating a full windshield or haze. Instructions: clear guidance on heat, moisture and keeping the pad moving is a good sign. Suitability for deeper scratches: some kit systems use coarser abrasive discs before polishing. These remove glass faster and carry a higher risk of distortion; treat them as a tool for experienced users.
How to Polish a Light Scratch Safely
Always follow the kit's own instructions where they differ from the general steps below.
Wash and dry the glass, then clean the scratched area with a glass cleaner to remove wax, oils and coatings. Mark the scratch from the inside with a washable marker or tape so you can find it once compound is spread across the surface. Mask off nearby trim, rubber seals and paint. Polishing compound can be hard to remove from textured plastic. Mix or apply the compound as directed. Cerium oxide is commonly used as a slurry with water. Work a small area at a time, keeping the pad flat and moving continuously in overlapping passes. Extend the working area well beyond the scratch so the surface blends gradually rather than forming a dip. Keep the surface damp and check temperature frequently with the back of your hand. Stop and let the glass cool if it feels more than warm. Wipe clean regularly and inspect the area from the driver's seat and from several angles. When finished, clean the glass fully, inspect for distortion, and reapply any water-repellent coating if you use one, since polishing removes it.
When to Stop
Stop polishing and reassess if any of the following happens:
The glass becomes hot to the touch. Uneven heating can stress glass and, in the worst case, cause it to crack, especially if there is an existing chip nearby or the weather is cold. You notice waviness or distortion when looking through the area, particularly from the driver's position. The scratch is not getting noticeably lighter after several careful passes. Continuing usually means removing more glass for little benefit. A chip or crack near the scratch starts to grow. You are working near a driver assistance camera and are unsure how much distortion is acceptable.
Side Windows, Rear Glass and Tinted Glass
Side and rear windows are usually tempered glass rather than the laminated glass used in windshields, but the same polishing principles apply. Avoid polishing over the heating lines on a rear window, because abrasion can damage the defroster elements. If a window has aftermarket tint film on the inside, scratches there are in the film itself; polishing will damage it further, and replacing the film is the fix. Some vehicles also have factory coatings or embedded features in the glass, so be cautious with anything that looks like a printed or tinted band.
DIY Repair, Professional Polishing or Replacement
Situation | Reasonable next step; Light scratches or wiper haze that a fingernail does not catch | Try a glass polishing kit and replace worn wipers; Moderate scratches outside the driver's main view | DIY polishing with care, or a professional glass repair shop if you want lower risk; Deep scratch that catches a fingernail | Get a professional opinion; replacement is often more practical; Any scratch in the driver's direct line of sight where polishing causes distortion | Stop and consider replacement; Chip or short crack | Resin repair kit or professional chip repair, ideally done soon to limit spreading; Scratch on inside tint film | Replace the film
If replacement becomes necessary on a vehicle with a windshield-mounted camera, ask whether recalibration of the driver assistance system is included, since many systems require it after the glass is changed. It is also worth checking whether your auto insurance policy covers glass repair or replacement, and whether your state has inspection rules about damage in the driver's field of view, because these vary by policy and location.
Preventing New Scratches
Replace wiper blades as soon as they streak, chatter or show split rubber. Use washer fluid before running the wipers on a dusty or sandy windshield. Clear heavy snow with a brush before scraping, and keep ice scraper edges clean and undamaged. Use clean microfiber cloths for glass and keep them separate from cloths used on wheels or lower body panels. Avoid abrasive pads and steel wool on any automotive glass unless a product is specifically intended for that use.