Remove Scratches From Auto Glass: What an AutoZone-Type Scratch Remover Can and Can't Fix
The short answer
A glass scratch remover kit from an auto parts store such as AutoZone can reduce or remove light surface scratches and wiper haze on car glass. It will not fix deep scratches, chips or cracks. Before buying anything, run your fingernail across the scratch. If your nail glides over it, polishing is a reasonable first step. If your nail catches in the groove, the scratch is likely too deep to polish out safely, and a glass repair shop is the better next step.
Two other conditions change the answer. First, if the scratch sits directly in the driver's line of sight on the windshield, aggressive polishing can create visible distortion, which may be worse than the scratch itself. Second, if the scratch is on the inside of a side or rear window that has aftermarket tint film, the scratch is probably in the film, not the glass, and a glass polish will not help; the film itself would need replacing.
What these products actually are
Most products sold for removing scratches from glass are polishing compounds, commonly based on cerium oxide, a fine abrasive powder used for polishing glass. They work by removing a very thin layer of glass around the scratch so the surface becomes level again. Because the process removes material, it has limits: the deeper the scratch, the more glass has to come off, and the greater the risk of uneven thickness that bends light.
When shopping, check that the label says it is meant for glass. Paint scratch removers and general-purpose rubbing compounds are formulated for clear coat, not glass, and glass cleaners that promise to remove haze clean the surface but do not level scratches. This article does not include current AutoZone product listings, prices or in-store availability, so confirm those with the retailer directly before going to the store.
Before you start: check whether DIY is appropriate
Do the fingernail test. A catching nail means the scratch is likely beyond polishing. Look for chips, star breaks or cracks. These are not scratches and need repair resin or replacement, not polishing. Note the location. Scratches in the driver's primary viewing area on the windshield carry the highest risk if distortion develops. Check for camera or sensor housings near the scratch. Many newer vehicles mount driver-assistance cameras behind the windshield, and glass replacement on these vehicles typically requires camera calibration, so avoid damaging the glass in that area. Check for heating elements or antenna lines. Rear windows often have defroster lines, and some windshields have embedded heating or antenna elements. Do not polish over printed lines on the inside surface. Identify tint film. If the scratch is on the inside of a tinted window, determine whether the tint is film or factory-tinted glass before applying any abrasive.
What you will need
A glass polishing kit, usually containing cerium oxide powder or pre-mixed compound and a felt polishing pad; A corded or cordless drill or rotary polisher compatible with the kit's pad attachment, if the kit is designed for power use; A spray bottle of clean water to keep the surface wet; Glass cleaner and lint-free microfiber cloths; Painter's tape and plastic sheeting or old towels to protect paint, trim and the cowl area; A dry-erase or washable marker; Eye protection and gloves
Step-by-step: polishing a light scratch out of car glass
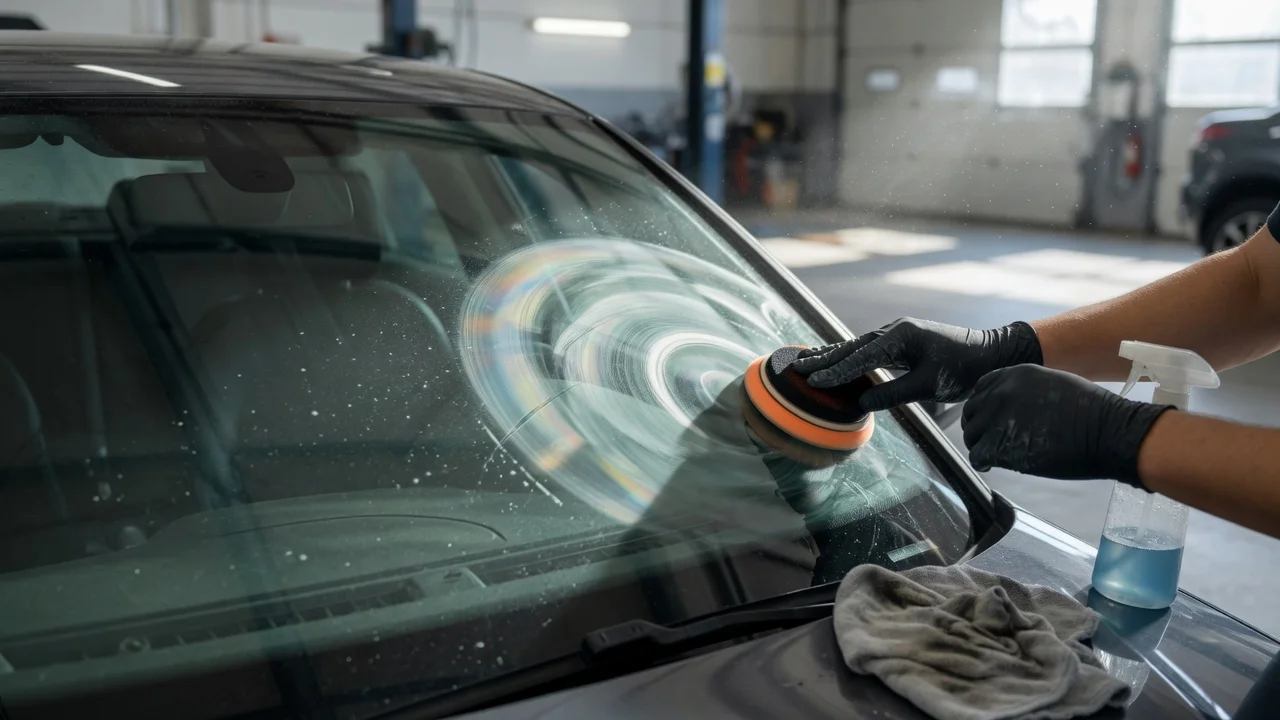
1) Work in the shade on cool glass. Clean the entire window thoroughly so loose grit does not get dragged around by the pad and cause new scratches. 2) Mark the scratch from the opposite side of the glass with a washable marker so you can still see its location once the polish covers the surface. 3) Mask off nearby paint, rubber seals and trim with painter's tape, and cover the hood and cowl to catch slurry. 4) Prepare the compound according to the kit's instructions. If it is a powder, mix it with water to the consistency the kit specifies. 5) Apply compound to the pad and to the glass. If using a drill, follow the kit's speed guidance rather than running the tool at full speed. 6) Polish a small area at a time, keeping the pad flat and moving continuously in overlapping passes. Extend the work area somewhat beyond the scratch so you are not creating a localized dip in the glass. 7) Keep the surface wet with the spray bottle. Do not let the compound dry out, and do not let the pad sit in one spot, because friction heat can build up quickly and heat stress can crack glass. 8) Stop periodically, wipe the area clean and inspect. Feel the glass with your hand to check for warmth, and let it cool if it feels hot. 9) Repeat short polishing cycles only as needed. If the scratch is not improving after several cycles, stop rather than continuing to remove glass. 10) When finished, remove the tape, clean the glass and surrounding surfaces of all residue, and clean the window again with glass cleaner.
How to tell if the job is done correctly
Clean and dry the glass, then check it from the position you normally view through it. For a windshield, sit in the driver's seat and look through the polished area at straight lines in the distance, such as a building edge, a fence or road markings. Move your head slightly side to side. If the lines appear to bend, ripple or shimmer as they pass through the polished zone, distortion has developed. Also check the area at night or with oncoming headlights if possible, since light scratches and haze often show most clearly under glare.
A successful result is a scratch that is gone or noticeably faded, with no change in how the scene looks through the glass. Some fine scratches may only partially fade; that can still be acceptable if visibility is clear and undistorted.
When to stop and get professional help
Your fingernail catches in the scratch, either before you start or after several polishing cycles. You see distortion or a wavy effect when looking through the polished area. Further polishing will usually make it worse. The damage turns out to be a chip, crack or star break, or a crack appears during polishing. The scratch is in front of a driver-assistance camera or sensor, or crosses embedded heating or antenna elements. The scratch is in the driver's critical viewing area and you are unsure whether polishing could affect visibility. The damage is on the inside of a window with tint film; a tint installer can replace the film. The glass becomes hot to the touch during polishing and does not cool quickly.
A glass shop can assess whether professional polishing, repair or replacement is appropriate. If the windshield needs replacing on a vehicle equipped with driver-assistance cameras, ask whether the shop performs the calibration the vehicle manufacturer specifies for that model year and trim, since requirements vary between vehicles. Rules on acceptable windshield damage in the driver's view also differ by jurisdiction, so check local inspection requirements if the scratch is significant.
Preventing new scratches
Many windshield scratches come from worn wiper blades, where the rubber wears away and the metal frame contacts the glass, or from wiping a dry, dirty windshield. Replacing worn blades, using washer fluid before running the wipers on dusty glass, and avoiding scraping with hard or gritty tools in winter all reduce the chance of new damage.
Gaps in this guide
No specific product data, prices, store availability, drill speed values or test results were available for this article. Follow the instructions supplied with whichever glass polishing kit you buy, and confirm current product options and pricing with the retailer.