Remove scratches from auto glass
A light scratch in a windshield or side window is distracting because it catches sunlight and bends the view at the worst moment. The right auto glass scratch remover from a retailer such as AutoZone can reduce or remove shallow marks, but the result depends on glass type, scratch depth, and the polishing approach. Surface haze from wipers, fine rings, and minor scuffs often respond well. Damage that catches a fingernail may require professional evaluation because aggressive correction can distort visibility. Understanding when a product is appropriate protects the sealing surface and keeps the glass specification intact.
The direct answer
A mild glass polish or scratch-removal kit sold for automotive windows is usually the correct first step for shallow surface marks. Products marketed as auto glass scratch remover at AutoZone are formulated to level a very thin layer around the defect and restore a clearer optical surface. The material is effective only when the scratch sits in the outer glass, not when it reaches deep into the laminate or tempered layer. Light wiper haze, water spots with fine texture, and faint rings around the wiper sweep are realistic candidates. Deeper grooves that catch a fingernail rarely buff out safely with a consumer kit.
The condition that materially changes the answer is visibility distortion. If the scratch sits in the driver's direct sight line and polishing widens the area into a shallow lens effect, the repair may be worse than the original line. Glass has a specific optical specification, and heat-strengthened or laminated panels can respond differently at the surface. Any product used near edges or mounting points must also preserve adhesive compatibility and the sealing surface. For small shallow marks outside the critical viewing area, a retail scratch remover is a practical low-risk option.
Carrying out the task
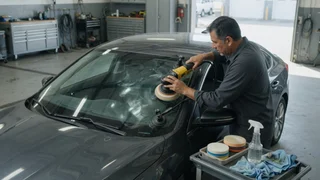
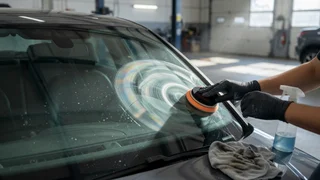
Start by cleaning the glass thoroughly so the pad does not grind road grit into the surface. Mask surrounding paint and trim, then inspect the scratch with a fingernail and in direct low-angle light. Wet the supplied backing pad or use the polish according to the product's automotive glass directions. Work a small test spot away from the driver's main sight line first. Keep the pad moving to avoid building excessive heat in one area. The goal is controlled material removal, not aggressive grinding, because automotive glass must remain smooth enough for clear vision and proper wiper contact.
Stop periodically, wipe the area clean, and check the reflection from several angles. If the mark becomes less visible without creating a new depression, continue with light pressure. Discontinue polishing if the glass surface begins to distort objects behind it, if the scratch deepens, or if the area is over a defroster grid, antenna path, or near a mounting point. Some glasses have surface treatments or coatings that alter adhesion and clarity; confirm the product is suitable before applying it broadly. A finishing pass with a clean pad and glass cleaner helps remove polishing residue from the sealing surface and edges.