How to Flush a Transmission Cooler: When, What You Need and How It Is Done
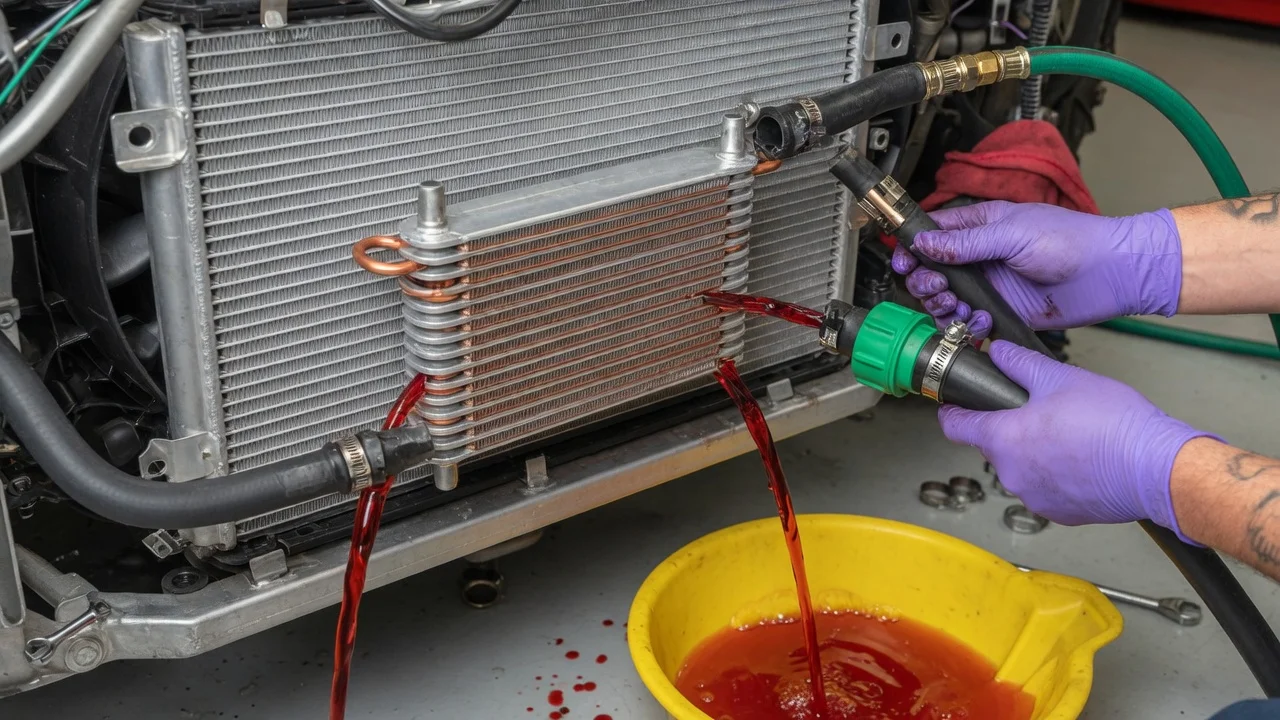
A transmission cooler flush removes old fluid, varnish and debris from the cooler and its lines so contamination does not return to the transmission. It is most often done after an internal failure, rebuild or replacement, because metal particles and friction material can hide in the cooler passages. The right approach depends on the transmission type, the cooler design and the manufacturer's instructions. Identify the vehicle's configuration before starting, and treat any symptom as a reason to diagnose, not as proof of a failed part.
Decide when service is needed
Start with the manufacturer's maintenance schedule and service information. Many schedules list transmission fluid service but do not call for a separate cooler flush during routine maintenance, and some sealed transmissions have no routine fluid interval at all under normal use. Severe-service conditions such as towing, frequent short trips, mountain driving, extreme heat or commercial use may shorten fluid intervals. Whether that also calls for cooler attention depends on the published instructions for that vehicle, not on a general rule.
Condition-based reasons are the most common trigger. Cleaning the cooler is usually part of the job after a transmission overhaul, a replacement unit installation, or a failure that left metal or friction debris in the pan. Remanufacturers and warranty providers often require a documented cooler flush, or a new cooler, before they will cover a replacement unit. Other reasons for inspection include dark or burnt-smelling fluid, overheating warnings, restricted flow found during testing, or debris discovered during a fluid and filter service. Milky, pink or foamy fluid can indicate coolant mixing through an in-radiator cooler; that calls for diagnosis and likely radiator or cooler replacement, not a flush alone. Review the service history so you know what has already been done and which fluid was used.
Some cooler designs cannot be cleaned reliably. Plate-type and fin-type coolers with internal turbulators can trap particles that solvent and air will not dislodge, and some manufacturers direct technicians to replace the cooler rather than flush it after a major failure. Check the repair instructions for your vehicle before choosing between flushing and replacement.
Identify the correct materials
Confirm the exact transmission model and cooler layout. Vehicles may use a cooler built into the radiator tank, an auxiliary air-to-oil cooler in front of the radiator, a coolant-to-oil heat exchanger mounted on or near the transmission, or a combination of these. Some systems include a thermostatic bypass valve, an inline filter or check valve, and quick-connect fittings that need a specific release tool. Fitment matters if you replace lines, fittings or an inline filter, so match parts to the vehicle's production details rather than its model name alone.
Use only the fluid specification listed for that transmission. Conventional automatics, CVTs and dual-clutch units often require different fluids, and the wrong one can affect shift behavior and component life. Buy enough for flushing and the final fill; the published capacity and fill procedure are in the service information and should not be guessed. For cleaning, use a solvent made for transmission cooler flushing and compatible with the cooler materials, or a dedicated cooler flushing machine. Typical tools include line wrenches or disconnect tools, a drain pan, a funnel and hose sized to the lines, a regulated low-pressure air supply with a rubber-tipped nozzle, clean caps or plugs, shop towels, and a way to read fluid temperature, such as a scan tool, if the level check requires it.
Prepare safely
Work on a cool or warm vehicle, not a hot one. Transmission fluid and coolant can cause burns, and the radiator area may stay hot after the engine is off. Park on level ground, set the parking brake, chock the wheels and support the vehicle on rated jack stands if you need to get underneath. Wear eye protection and chemical-resistant gloves, because solvent and fluid can spray when lines are disconnected or air is applied.
Flushing solvents are often flammable, so keep sparks, open flames and hot exhaust parts away and ventilate the work area. Disconnect the battery if your tools will be near electrical connectors or an electric cooling fan could start. Mark or photograph which line is the supply and which is the return before disconnecting anything, since flow direction matters during cleaning and on reassembly. Keep open fittings capped to stop dirt from entering. Collect used fluid and solvent in sealed containers and take them to a facility that accepts automotive fluids; never pour them on the ground or into drains.
Carry out the service
Disconnect the cooler lines at the transmission end, or where the service manual specifies, and route them into a drain pan. Many technicians clean in the reverse direction first, introducing solvent through the return line so debris is pushed back out the way it entered. With a machine, follow its instructions for connection, cycle time and direction changes. With an aerosol or hand method, introduce the solvent, let it work for the time stated on its label, then use low-pressure regulated air to push it out. Repeat until the solvent comes out clear and free of particles. Excessive air pressure can damage some coolers, so stay within the product and cooler maker's limits.
Clean the lines as well as the cooler itself, and service each section separately when the system has both a radiator cooler and an auxiliary cooler. If there is a thermostatic bypass valve, consult the service information; some must be removed or replaced to clean the full circuit. After the solvent stage, push fresh fluid of the correct specification through the system to displace remaining solvent, then clear it with low-pressure air. Solvent left behind can contaminate the new fluid.
Reconnect the lines using the correct fittings and any new seals or clips, tightening to the published values. If a replacement transmission or rebuild is part of the job, install any inline filter the rebuilder recommends. Fill the transmission according to the manufacturer's procedure, which may require the engine running, a specific fluid temperature, cycling through the gear positions, or a level plug check instead of a dipstick.
Verify and record the result
Confirm flow before calling the job done. A common method, done only after the transmission has been filled and only for the short time the service information allows so the unit is not run low, is to direct the return line or a test hose into a container, run the engine at idle and watch for a steady, strong stream. Compare the result with the flow figure or method given by the manufacturer or rebuilder. Weak or pulsing flow suggests a remaining restriction, a misrouted line or a pump-side issue and needs diagnosis before the vehicle returns to service. Afterward, recheck fluid level, inspect every fitting for leaks, and look for fluid that is cloudy, foamy or carrying debris.
Road test the vehicle and watch shift behavior, temperature readings if available, and any warning lights. Scan for diagnostic codes before and after the work so new faults are not confused with old ones. If overheating, harsh shifts, slipping or leaks appear, stop and diagnose; repair options may include cooler or line replacement, but a symptom alone does not confirm which part failed. Record the date, mileage, cleaning method and solvent used, fluid specification and quantity, flow observations and any parts replaced. That record supports warranty claims and makes future diagnosis easier.