How to Flush Transmission Cooler Lines
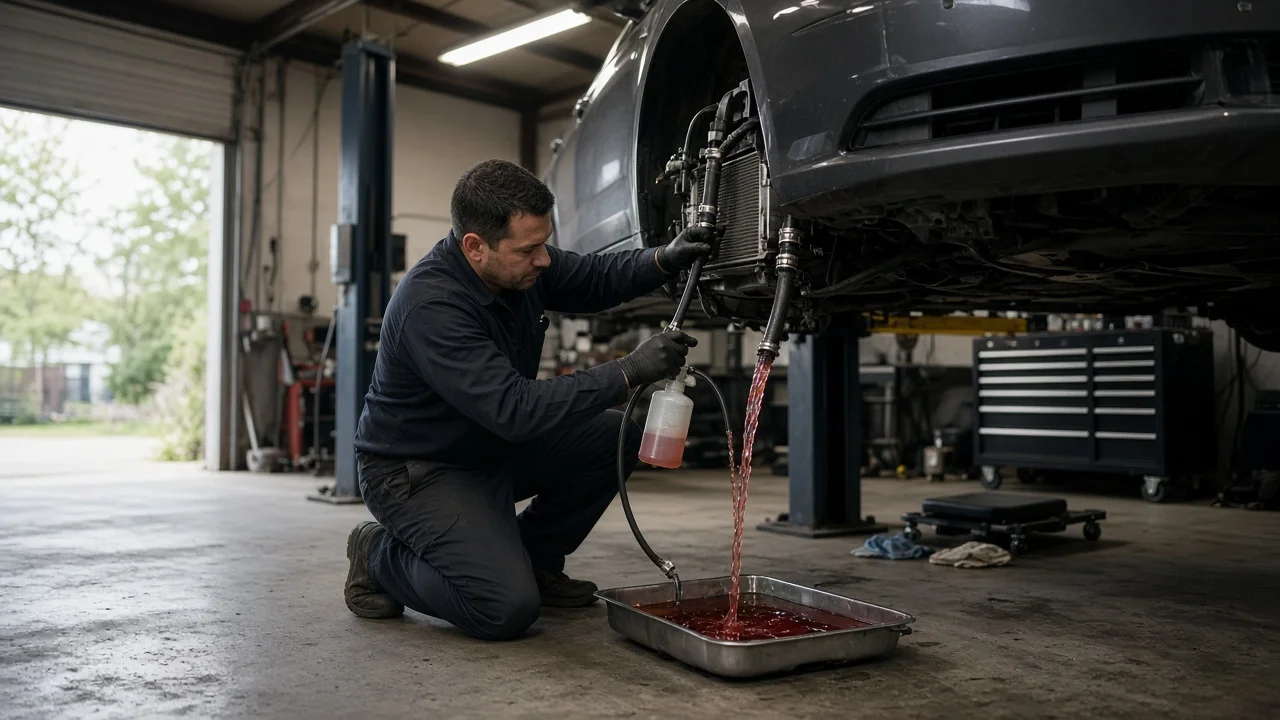
Flushing transmission cooler lines clears old fluid, debris and contamination from the tubes and heat exchanger that carry fluid between the transmission and its cooler. The job matters most after an internal failure or a rebuild. If clutch material and metal particles stay in the circuit, the pump can push them straight back into a fresh unit. This guide covers when the work is warranted, what to gather, and how to complete and confirm it.
Decide when service is needed
Most manufacturers do not list cooler line flushing as a separate maintenance item. Their schedules cover fluid and filter changes, often with one interval for normal driving and a shorter one for severe use. Severe use typically includes towing, frequent short trips, hot climates and heavy stop-and-go traffic. Check the maintenance schedule for your transmission type. Some units are described as filled for life under normal conditions but still carry a severe-service interval. Severe use shortens fluid service, but it does not by itself mean the cooler circuit needs cleaning.
Condition-based reasons are the usual trigger. The most common is installing a rebuilt or replacement transmission. Many rebuilders require the cooler to be flushed or replaced as a warranty condition, because debris from the old unit can collect in the cooler. Other reasons include metal particles or heavy friction material in the fluid or pan, and burnt fluid after overheating. Coolant intrusion from a failed radiator-mounted cooler is another, and it often makes the fluid look milky or pink. In that case, flushing the lines is only part of the repair. The leaking cooler or radiator must be replaced, and the transmission usually needs to be inspected for damage.
Symptoms such as harsh or slipping shift behavior, overheating warnings or stored diagnostic codes show that something needs attention. They do not prove the cooler or its lines are restricted. Before deciding on a flush, read the codes, check fluid level and condition, and review the service history. A cooler flow test, where the manufacturer provides one, is the reliable way to confirm a restriction.
Identify the correct materials
Start by confirming the exact transmission. It may be a conventional automatic, a CVT or a dual-clutch unit, and you can identify the model from its tag or from service information looked up by VIN. Cooler layouts vary. The cooler may sit inside the radiator tank, be a separate auxiliary cooler added with a towing package, or be a fluid-to-coolant heat exchanger mounted on the transmission itself. Some circuits also include a thermostatic bypass valve. Fine-passage stacked-plate and some tube-and-fin coolers cannot be reliably cleaned, so service information or the rebuilder may require replacement instead. If you replace a cooler or line, confirm fitment by part number for your specific vehicle version.
Buy fluid that meets the manufacturer's fluid specification exactly. Different automatic, CVT and dual-clutch fluids are not interchangeable, and the wrong one can change friction behavior. For cleaning, use either a dedicated transmission cooler flushing solvent made to rinse or evaporate cleanly, or a purpose-built cooler flushing machine. Avoid general solvents that leave residue or attack seals. Get any replacement O-rings, sealing washers or retaining clips the procedure calls for. An in-line filter on the return line is worth considering after a major failure, if it suits the system.
Useful tools include the following: disconnect tools sized for quick-connect fittings, flare-nut wrenches for threaded fittings, and a hand pump or flushing gun. You will also want regulated low-pressure compressed air, a length of clear hose to direct the discharge, drain pans and a fill funnel or adapter. Add rated jack stands, rags and tape for labeling. A scan tool is needed if the level check depends on reading fluid temperature.
Prepare safely
Let the vehicle cool before starting. Transmission fluid at operating temperature can cause burns, and cooler lines run close to the radiator and exhaust. Park on level ground, set the parking brake and chock the wheels. If you raise the vehicle, support it on rated jack stands and never rely on a jack alone. Keep hands away from the radiator fan, because on some vehicles electric cooling fans can start with the ignition off. Disconnect the battery if the service information calls for it.
Wear eye protection and chemical-resistant gloves. Fluid often sprays when lines are released, and solvent under pressure can atomize. Work in a well-ventilated area away from sparks and open flames, since many flushing solvents are flammable. Before disconnecting anything, label each line as supply or return. Cap the open ports on the transmission so dirt cannot enter while the lines are off.
Plan for disposal before fluid starts draining. Keep used fluid and solvent in sealed, labeled containers and take them to a used oil or household hazardous waste collection point. Many collection points refuse oil mixed with solvent, so keep the two separate. Wipe up spills promptly, because transmission fluid makes floors slippery.
Carry out the service
Locate both cooler lines at the transmission and at the cooler. Find the normal flow direction in the service information. It differs between transmissions and cannot be safely guessed from which fitting sits higher. Disconnect the lines at the transmission and catch the fluid. If an auxiliary cooler or thermostatic bypass valve is in the circuit, follow the manufacturer's procedure. Some valves block flow when cold, so certain procedures flush each section separately.
Reverse flush first by pushing solvent into the line that normally returns fluid to the transmission. Working against normal flow drives debris back out of the cooler inlet, where it tends to lodge. Route the discharge through clear hose into a container so you can watch what comes out. Alternate pulses of solvent and low-pressure air until the discharge runs clear with no visible particles, then repeat in the normal flow direction. Excessive air pressure can damage cooler cores, so stay within the flushing tool maker's limits.
Next, remove all solvent residue. Blow the lines dry with low-pressure air, then push fresh specified fluid through until it comes out clean, since leftover solvent can contaminate the new fill. Inspect the lines for kinks, cracks, corrosion and chafed rubber sections. Reconnect them with new seals where required. Confirm each quick-connect fitting clicks into place and passes a firm pull test, and tighten threaded fittings to the specified torque. Fit any in-line filter facing the correct direction. If debris keeps appearing or flow stays weak, replace the cooler rather than flushing again.
Verify and record the result
Refill the transmission following the service procedure. Many current transmissions have no dipstick. Their level is checked at a fill or check plug with the engine running and the fluid at a specified temperature, which often requires a scan tool. If the manufacturer provides a cooler flow test, perform it as written and compare the result with the published figure. Check every connection for leaks, then recheck the fluid level after a test drive.
Watch for warning signs afterward. These include leaks, a falling fluid level, overheating messages, new diagnostic codes, delayed engagement and changes in shift behavior. If any appear, stop and diagnose before driving further. Debris that returns to the fluid or filter soon after the job means the source is still there. Either the cooler was not fully cleaned or an internal fault is continuing. Repair options then include replacing the cooler or inspecting the transmission further.
Write down the date, mileage and reason for the flush. Also record the fluid specification and amount added, the flushing method and solvent used, any parts replaced, the flow test result and any codes present before or after. This service history makes later diagnosis faster and supports warranty claims on a rebuilt or replacement transmission.