Choosing a Fan for a Transmission Cooler
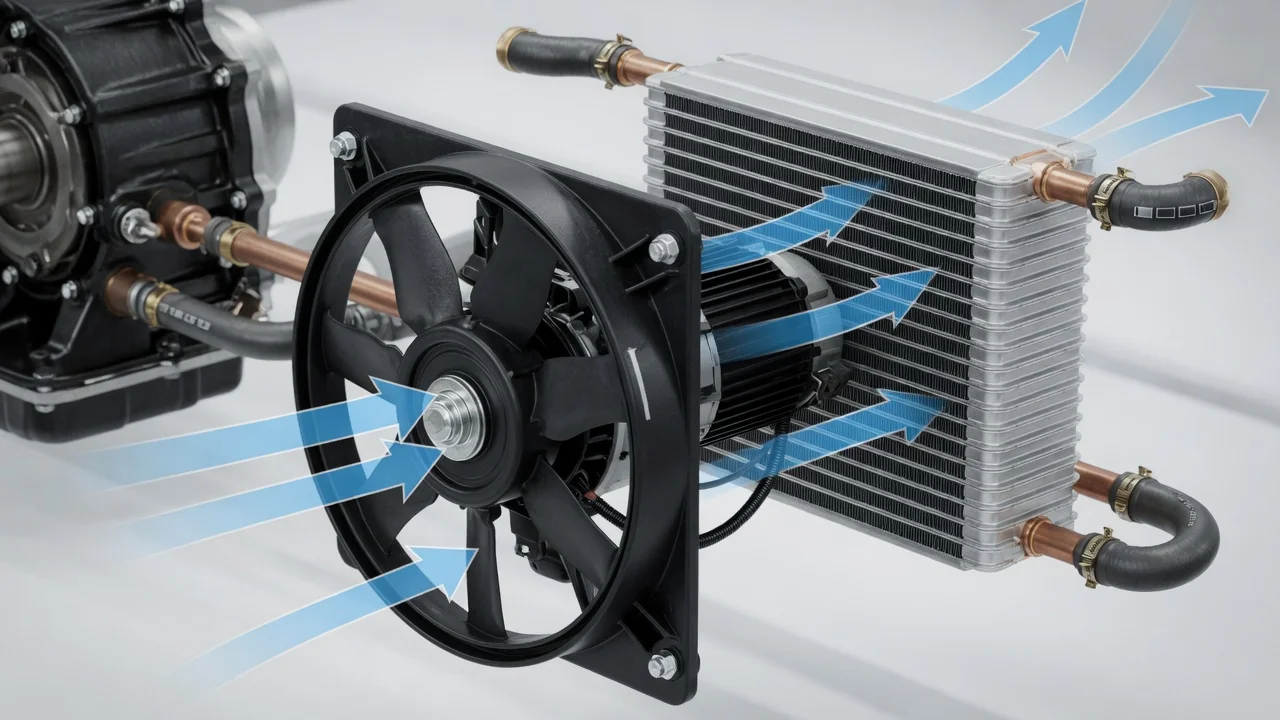
An electric fan can help a transmission cooler at low speed, while towing or in traffic, when little air moves through the core. The right fan depends on your transmission type, the cooler you already have, where it is mounted and how you drive. This guide covers what to confirm before buying, how to check fitment, which features matter and what a fan cannot fix.
Define the job the product must do
Start with the situation where the fluid runs hot. Fans are most useful at idle and low speed. Common examples are towing up long grades at modest speed, crawling off-road, stop-and-go traffic with a heavy load in hot weather, and auxiliary coolers mounted where ram air is weak, such as behind other heat exchangers, in a wheel well or under the vehicle. At steady highway speed, air from the vehicle's motion usually does most of the work, so a fan adds less there. Also decide whether you are adding a fan to a cooler you already have or buying a transmission cooler with a fan as one assembly.
Identify the transmission type and how the factory cooling system is laid out. A conventional automatic, a CVT and a dual-clutch unit can all handle cooling differently. The fluid may pass through a radiator tank cooler, a separate fluid-to-air cooler or a coolant-to-fluid heat exchanger. Some designs warm the fluid quickly on purpose and use a thermal bypass valve, and added cooling can interact with that strategy. Check the service information for your exact model and note the fluid specification before changing anything.
Confirm the problem before you buy. A high temperature reading, a warning message, stored diagnostic codes or a change in shift behavior can come from many causes. These include low or degraded fluid, a restricted cooler or line, a faulty bypass valve, internal slipping or a sensor fault. A fan only addresses a lack of airflow across the cooler. Review the service history and get a proper diagnosis rather than treating a symptom as proof that more airflow is the answer.
Check compatibility
Measure the cooler core's face, height and width, plus its thickness. Choose a fan whose swept area covers as much of the core as practical. Then measure the depth available between the core and the grille, bumper or nearby components, including room for the motor housing. Check for interference from hoses, fittings, brackets, horns, sensors and air-conditioning lines. A vehicle-specific fitment listing is a useful starting point, but compare it against your own measurements, especially with an aftermarket bumper, a lift or a non-standard cooler location.
Decide on airflow direction. A puller mounts on the downstream side and draws air through the core. A pusher mounts on the upstream side and blows air into it. Some fans can be set up either way, but only when the manufacturer supports it, because blades shaped for one direction move much less air when run backwards. In either layout, the fan's airflow should match the direction of air entering from the vehicle's motion, not fight it.
Check the electrical side: the fan's stated current draw, the recommended wire gauge, fuse and relay, the connector type and whether a harness is included. Plan a switched power source so the fan cannot drain the battery when parked. If you are buying a transmission cooler and fan together, also confirm three things. The fittings or hose size must match your lines. The supplied hose and clamps must be rated for transmission fluid at operating temperature. And the plumbing order relative to any factory cooler must follow the kit maker's and vehicle maker's guidance.
Features that affect the choice
Airflow ratings are the most quoted number and the easiest to misread. Some figures are measured in free air, with no core in front of the fan, and brands may not test the same way. Treat a rating as a rough guide unless the maker states the test conditions, the current draw at that rating and whether it applies in pusher or puller mode. Labels such as heavy duty, high performance or racing say nothing specific without specifications behind them.
Look at the motor and build quality. Brushless motors have no brushes to wear and usually cost more. Brushed motors are common and less expensive. The fan sits in road spray, so look for a stated water and dust resistance rating where one is published, a sealed connector and corrosion-resistant hardware. A shroud helps the fan draw air across the whole core instead of only the circle under the blades. Some shrouds add flaps that open at speed to reduce restriction.
Control options include a manual switch, a thermostatic switch with a fixed turn-on point, and an adjustable controller with a temperature probe. A manual switch is simple but depends on you remembering to use it. Sensor placement matters, because a probe on a line or in the fins reads differently from fluid temperature inside the transmission. Set activation to suit your transmission's normal operating range. Avoid wiring the fan to run constantly if that keeps the fluid from warming up in cold weather.
Limitations and ownership costs
A fan cannot make up for an undersized cooler, an internally clogged core, a kinked line, low or incorrect fluid, or heat produced by internal slipping. Its benefit drops at highway speed, and the motor hub and blades cover part of the core, so a poorly matched or unshrouded fan may add little. If diagnosis points to the cooler itself, a larger cooler or one with an integrated fan may be a better repair option than a fan alone. If it points inside the transmission, fix that first.
Budget for more than the fan. Wiring needs a relay, fuse, wire, terminals and loom, and you may also need mounting brackets, a controller and a probe. If a cooler is installed or lines are opened, add fluid that meets the correct specification. Then check the level using your vehicle's procedure, which may rely on a dipstick, a fill plug, a specific fluid temperature or a scan tool. Inspect every connection for leaks after the first drive. Professional installation adds labor that varies by vehicle and shop.
Maintenance is simple but easy to skip. Clear bugs and debris from the fins gently. Check that mounting hardware stays tight and that wiring is not chafing or corroding. Listen for bearing noise or blades touching anything, and confirm the fan switches on when expected. Record the fan, its wiring and its controller in the service history so later technicians know an added component is there.
Build a practical shortlist
Start with a confirmed need and your transmission details, then compare each candidate on the same points. Check core coverage and depth against your measured space, and confirm the fan supports the pusher or puller layout you need. Look for airflow figures with stated test conditions, current draw and whether wiring is included. Compare water resistance, hardware quality, control method and adjustable set point, and whether a shroud is included. For combined kits, confirm fitting and hose compatibility. Finally, weigh warranty terms and whether replacement parts are available.
Narrow the list to fans that clearly fit and can be wired correctly before comparing price or headline airflow. A modest fan that covers the core, moves air in the right direction and switches on at a sensible temperature will usually do more than a larger unit that is hard to mount or poorly controlled. If two options look equal on paper, prefer the one whose maker publishes complete specifications and installation instructions.