Choosing a Transmission Cooler Kit: Fitment, Features and Trade-Offs
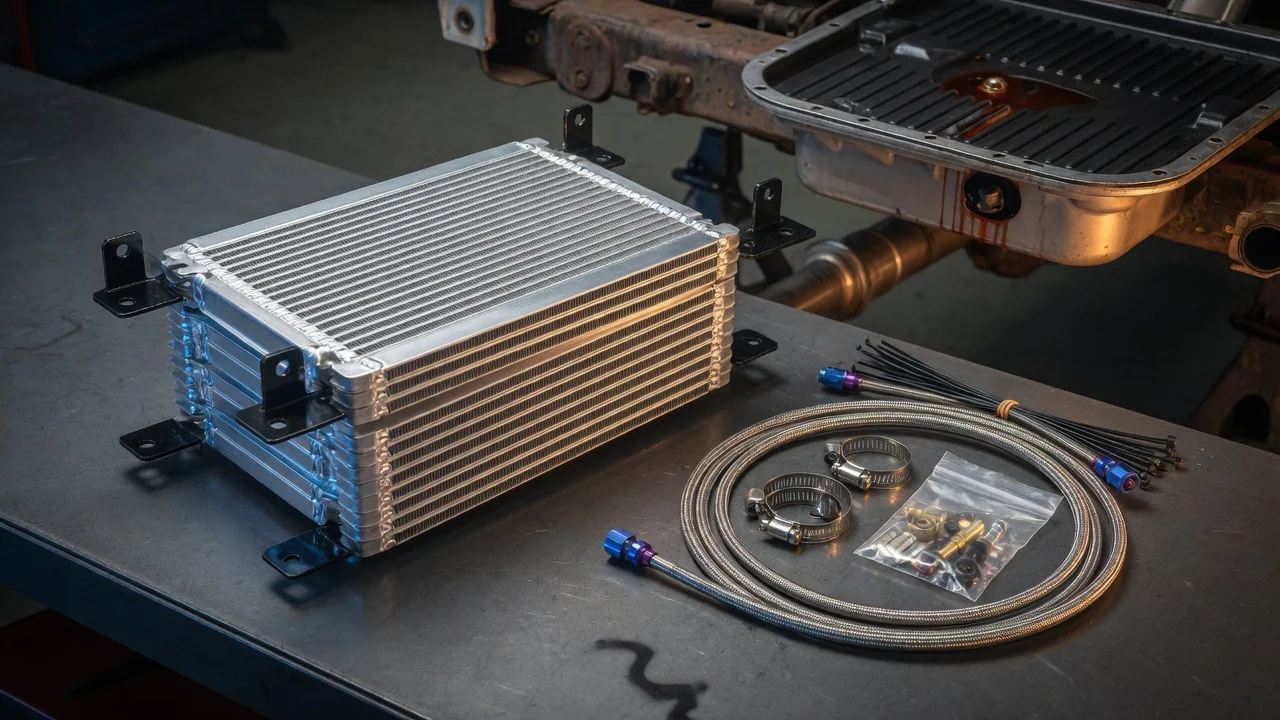
An auxiliary transmission cooler kit adds a heat exchanger to the fluid circuit to help the transmission run cooler under load. It can be a sensible upgrade for towing, hauling or hard daily use, but it is not a universal fix. The right kit depends on your transmission type, its existing cooling setup and how the vehicle is actually driven. The steps below help you narrow the options before you buy.
Define the job the product must do
Start with how the vehicle works. Towing a trailer, carrying heavy loads, climbing long grades, crawling off-road, sitting in stop-and-go traffic in hot weather and sustained high-speed driving all push more heat into automatic transmission fluid. Hot fluid oxidizes faster and loses its protective qualities, and extra cooling capacity targets those conditions. A vehicle that commutes lightly in mild weather may gain little from transmission cooler kits. Some vehicles already have a factory auxiliary cooler as part of a tow package, so check what is installed before assuming you need one.
Be clear about whether you are adding margin or chasing a symptom. A temperature warning, a burnt smell, dark fluid or harsh shift behavior can point to heat. They can also come from low fluid level, the wrong fluid, a restricted cooler line, a torque converter clutch problem, internal wear or a control fault. Read any diagnostic codes, check fluid level and condition using the correct procedure for your transmission, and review the service history first. If the transmission already slips or flares between gears, a cooler will not reverse that damage, and repair options should come before upgrades.
Check compatibility
Confirm the exact transmission model and configuration, not just the vehicle make and year. Conventional automatics, CVTs and dual-clutch units manage temperature differently. Some modern designs route fluid through a coolant-to-fluid heat exchanger with a thermostatic valve that also warms the fluid quickly after a cold start. Adding an air-to-fluid cooler to a system like this can change how quickly the fluid reaches its intended operating range. Look for a kit listed for your transmission or one that includes a thermostatic bypass. Some CVT and dual-clutch applications are sensitive to fluid temperature, so check whether the vehicle manufacturer or the kit maker supports an auxiliary cooler for that unit at all.
Next, look at the plumbing. Identify the cooler line size, where the lines run and how they connect: rubber hose sections with clamps, quick-connect fittings or threaded fittings. Universal kits usually rely on cutting into a line and using barbed connections with hose clamps, while vehicle-specific kits may supply adapters that plug into factory quick-connects. Determine which line returns fluid to the transmission. The auxiliary cooler is commonly plumbed in series after the factory cooler on the return side, but follow the kit and vehicle instructions. Confirm the hose is rated for transmission fluid and the temperatures involved, and plan a route away from exhaust parts and sharp edges.
Then check physical fitment. Measure the open area in front of the radiator or AC condenser, or another location with good airflow, and make sure the cooler will not block a large share of the condenser or radiator face. Note grille openings, bumper structure, active grille shutters, sensors and any intercooler. Brackets that bolt to the radiator support are generally preferable to plastic rods pushed through the radiator fins, which can damage the core if overtightened or if the cooler vibrates.
Features that affect the choice
Cooler cores come in a few common designs. Tube-and-fin coolers are simple and inexpensive but generally less efficient for their size. Plate-and-fin and stacked-plate designs typically transfer more heat in a given footprint and are favored for heavier duty, at a higher price. Larger is not automatically better: an oversized cooler may be harder to fit, adds fluid volume and can overcool in cold climates without a thermostat. Capacity ratings, often expressed against a vehicle weight or towing figure, are each maker's own guidance rather than a standardized test, so treat them as a sizing starting point, not proof of performance.
A few features matter more than the label. A thermostatic bypass lets fluid skip the cooler until it warms up, which helps in winter and with transmissions that depend on reaching temperature for correct shift behavior. Fan-assisted coolers help where airflow is poor, such as slow towing, crawling or mounting locations away from the grille, but they add wiring and another part that can fail. If your vehicle does not display transmission temperature, a gauge or scan-tool readout shows whether the cooler is doing its job instead of leaving you to guess.
Kit contents vary widely. Look at hose quality, clamp type, whether the fittings match your lines without improvised adapters, and how complete the mounting hardware is. Phrases such as heavy duty, maximum cooling or universal fit say little on their own; dimensions, core type, fitting sizes, included parts and clear instructions are the useful evidence.
Limitations and ownership costs
Installation means opening the fluid circuit, so plan for fluid loss and for refilling with the exact fluid specification your transmission requires. The added cooler and hose increase total fluid capacity, so the level must be rechecked afterward. Many current transmissions have no dipstick and use a fill-plug procedure that depends on fluid temperature, sometimes requiring a scan tool to read it; getting this wrong can leave the unit overfilled or underfilled. Budget for fluid, any adapters or brackets, and shop labor if you are not equipped for that procedure.
Every added connection is a potential leak point, so inspect hoses, clamps and fittings periodically and keep the cooler fins clear of bugs, mud and road debris. A cooler cannot clean contaminated fluid, fix low line pressure, correct a solenoid fault or repair worn clutches. After an internal transmission failure, debris can lodge in coolers and lines, so follow the rebuilder's or manufacturer's guidance on flushing or replacing coolers rather than adding a new one to a contaminated system. Also check whether warranty terms on the vehicle or a rebuilt transmission address aftermarket cooling modifications.
Build a practical shortlist
Narrow the field with a short checklist. First, confirm your transmission type, configuration and existing cooling setup, including any factory auxiliary cooler or thermostatic heat exchanger. Second, confirm fitment: line size and connection style, which line is the return, available mounting space and bracket options. Third, match core type and size to the work the vehicle does, and decide whether you need a thermostatic bypass or a fan. Fourth, review the included hose, clamps, fittings and instructions so you know what else to buy. Fifth, account for the correct fluid, the level-check procedure and a way to monitor temperature.
Compare two or three kits side by side on those points rather than on rated capacity alone. If a listing does not state dimensions, fitting sizes or what is in the box, treat that as a gap to resolve before ordering. If the vehicle already shows diagnostic codes or abnormal shifting, have it diagnosed first; choosing the right cooler is easier once you know the transmission itself is healthy.