Choose a brake bleeder kit
The short answer
For most home mechanics, the choice comes down to how often you bleed brakes, whether you work alone, and what your vehicle needs. Occasional fluid flushes on a single car can be done with the two-person pedal method or a simple one-person check-valve bottle. If you bleed brakes often or work on several vehicles, a pressure bleeder fitted to your master cylinder reservoir is the most consistent of the do-it-yourself options. Vacuum bleeders are convenient, but they tend to pull air in around the bleeder screw threads, which makes the bubbles in the hose an unreliable sign of whether air is still in the system.
One qualification changes the answer for many modern cars: on vehicles with anti-lock brakes (ABS), air that has entered the ABS hydraulic unit may not come out with any bleeder kit alone. Some vehicles require a scan tool that can cycle the ABS pump and valves during bleeding. Whether yours does depends on the make, model and model year, so check the service information for your specific vehicle before buying a kit and assuming it will cover the whole job.
What a brake bleeder kit actually does
Bleeding removes air and old fluid from the hydraulic brake lines. Air compresses where brake fluid does not, so trapped air causes a soft or spongy pedal. Glycol-based brake fluids also absorb moisture over time, which is why periodic flushing is recommended by many manufacturers. A bleeder kit is any tool that moves fluid through the system and out of the bleeder screw at each brake caliper or wheel cylinder without letting air back in.
The main options compared
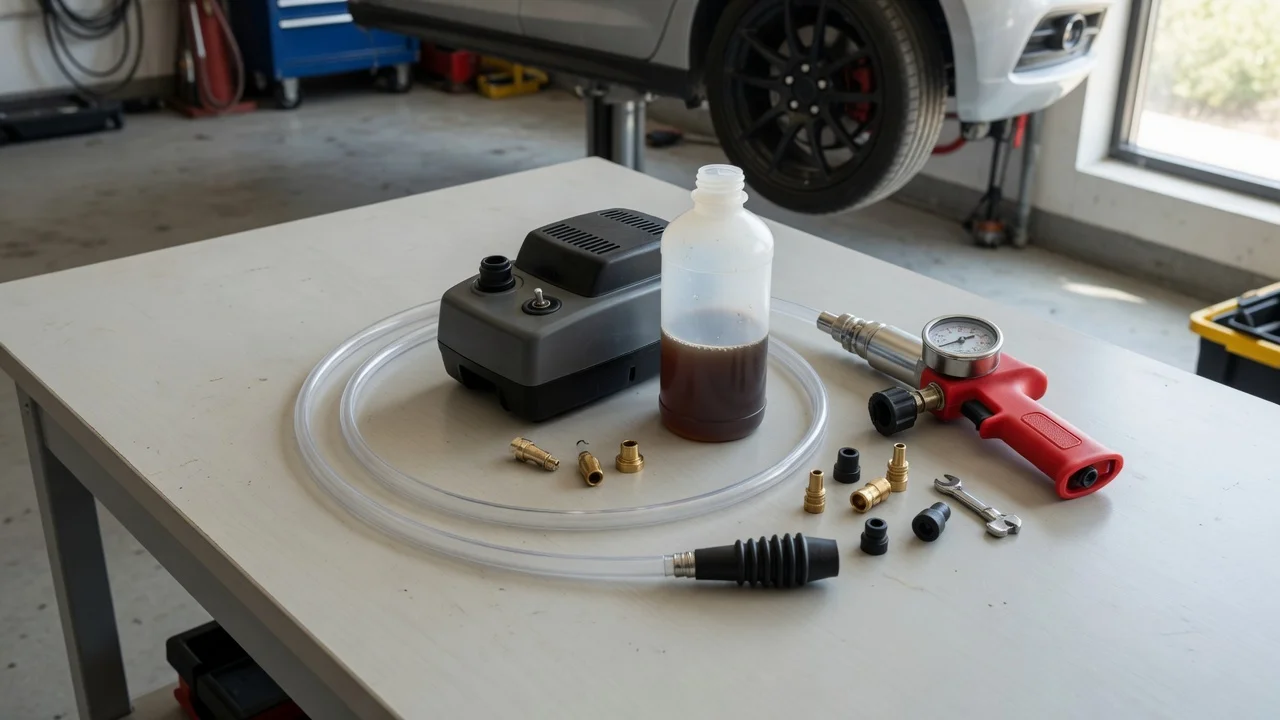
Method | How it moves fluid | Works solo | Main strengths | Main drawbacks; Two-person pedal method | Helper presses the brake pedal while you open and close the bleeder | No | Needs only a wrench, clear hose and catch bottle | Requires coordination; risk of drawing air if the bleeder is open when the pedal is released; One-person check-valve bottle or hose | Pedal pushes fluid out; a one-way valve resists air flowing back | Yes | Very cheap and simple | Valve quality varies; you must keep checking the reservoir level yourself; Check-valve bleeder screws | Replacement bleeder screws with a built-in one-way valve | Yes | Fast repeat bleeds once installed | Must match your thread size; adds parts to the car; Hand vacuum bleeder | Hand pump creates vacuum at the bleeder to pull fluid through | Yes | No helper or pedal pumping needed | Air drawn past bleeder threads can show false bubbles; repetitive pumping; Air-powered vacuum bleeder | Compressed air drives a venturi that creates vacuum | Yes | Faster than hand pumping | Needs an air compressor; same thread-leak issue as hand vacuum units; Pressure bleeder | Pressurizes the reservoir through an adapter cap and pushes fluid out of each bleeder | Yes | Steady flow, no pedal work, reservoir stays topped up | Needs the correct reservoir adapter; overpressurizing or a poor seal can spill fluid
No supplied evidence covers specific product prices, build quality or independent test results, so this comparison is based on how each method works rather than on measured performance. Prices, included adapters and kit contents vary by brand and retailer, so compare those directly before buying.
Which option fits your priorities
Lowest cost, occasional use, and a helper available: the two-person method with a length of clear hose and a catch bottle. Working alone on a budget: a one-person check-valve bottle, accepting that you will need to stop and top up the reservoir. Repeated bleeds on the same car, such as track or performance use: check-valve bleeder screws, if a version fits your calipers. Working alone without pumping the pedal, and willing to manage thread leaks: a vacuum bleeder, with grease or thread sealant applied to the bleeder threads as many users do to reduce false bubbles. Frequent flushes, multiple vehicles, or a clutch hydraulic system to bleed as well: a pressure bleeder with the correct adapter for each vehicle's reservoir. ABS vehicle where air may have reached the modulator: whichever bleeding method you prefer, plus a scan tool with an ABS bleed function if the service procedure calls for one.
What to check before you buy
Reservoir adapter fit: pressure bleeders depend on a cap or adapter that seals on your specific master cylinder reservoir. Confirm one exists for your vehicle. Hose and fitting sizes: the hose should fit snugly over your bleeder screws so it does not leak or slip off. Bleed sequence: follow the order given in the service manual. The common farthest-wheel-first rule does not apply to every vehicle, particularly those with diagonally split or ABS-controlled circuits. Fluid specification: use the DOT type listed for your vehicle, often on the reservoir cap. DOT 3, DOT 4 and DOT 5.1 are glycol-based; DOT 5 is silicone-based and should not be mixed with them. ABS requirements: check whether a scan-tool bleed procedure applies to your vehicle and situation.
Practical cautions
Glycol-based brake fluid damages paint, so cover nearby surfaces and wipe spills quickly. Never let the reservoir run dry during bleeding, or air will enter the master cylinder and the job gets longer. With pressure bleeders, keep the pressure within the tool maker's instructions and check the adapter seal before pressurizing. When using the pedal method on an older vehicle, a commonly given caution is to avoid pushing the pedal far past its normal travel, since master cylinder seals can be damaged by debris in the unused part of the bore. After bleeding, confirm a firm pedal before driving, and test the brakes at low speed first.
Limits of this guide
Readers searching community forums for kit recommendations will find individual opinions on specific brands, but no specific threads, product test data or prices were supplied for this guide, so no particular kit is recommended here. Vehicle-specific requirements, especially ABS bleed procedures, reservoir adapter compatibility and bleed order, should be confirmed in the service information for your exact model and model year.