One-Man Brake Bleeder Kits: Which Type Fits Your Car and How You Work
The short answer
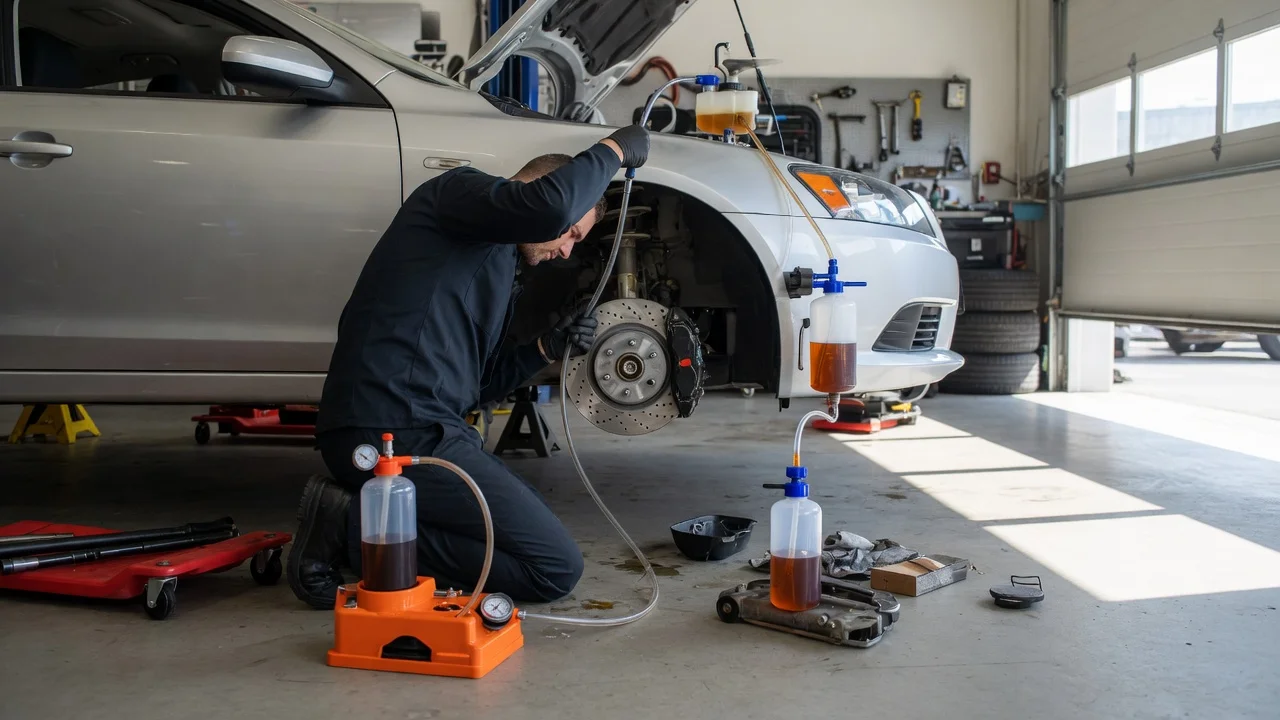
A one-man brake bleeder kit lets a single person flush brake fluid and purge air from the hydraulic system without a helper pumping the pedal. For most DIY owners doing routine fluid changes or bleeding after replacing a caliper or hose, a simple one-way valve kit or a pressure bleeder is the most practical choice. A vacuum (often air-powered) bleeder suits people who already own a compressor. A reverse bleeder is a more specialized tool.
Two conditions can change that answer. First, if air has reached the ABS modulator, for example because the master cylinder ran dry or was replaced, many vehicles need a scan tool to cycle the ABS valves during bleeding, and no bleeder kit replaces that step. Second, pressure bleeders depend on a reservoir cap adapter that matches your specific vehicle, so fitment must be confirmed before buying.
What one-man kits have in common
Conventional two-person bleeding works by having one person press the pedal while another opens and closes the bleeder screw on each caliper or wheel cylinder. A one-man kit replaces the helper by doing one of three things: preventing air from being drawn back in when the pedal is released, pulling fluid out at the bleeder screw, or pushing fluid in from the reservoir or the wheel end. The four common types below each use one of these approaches.
One-way brake bleeder valve kits
These are the simplest kits. They come in two forms: a hose and catch bottle with a check valve inline, or replacement bleeder screws with a built-in check valve. A check valve is a small valve that lets fluid flow out but not back in. You open the bleeder, pump the pedal yourself, and the valve stops air from being sucked back into the caliper on the pedal's return stroke.
Strengths: inexpensive relative to powered tools, no compressor or adapter cap needed, and works on most vehicles with standard bleeder screws. Limitations: you must keep walking back to check and top up the reservoir, inline check valves can let small amounts of air seep past if not seated well, and replacement bleeder screws must match the thread size and seat type of your calipers. Fitment caveat: bleeder screw thread and seat specifications vary by vehicle, axle and caliper supplier, so confirm against your model year, trim and brake package rather than assuming one size fits.
Vacuum and pneumatic brake bleeders
A vacuum bleeder attaches to the bleeder screw and draws fluid out into a collection container. Hand-pump versions exist, but pneumatic versions run off a shop air compressor and use a venturi, a constriction that creates suction as compressed air flows through it, to generate continuous vacuum.
Strengths: no pedal pumping, fluid comes out steadily, and air-powered units are quick once set up. Limitations: a pneumatic unit requires a compressor with adequate air supply for the specific tool; suction can pull air in around the bleeder screw threads, producing bubbles in the hose that make it hard to tell whether the system is truly air-free; and the reservoir can be drained quickly if you don't watch it. Common workaround: some users wrap bleeder threads with thread-seal tape or use thread sealant made for this purpose to reduce false bubbles. Check the tool maker's guidance before doing so.
Pressure brake bleeders
A pressure bleeder pushes fluid into the master cylinder reservoir under low, regulated pressure through an adapter cap. You then open each bleeder in turn and let fluid flow until it runs clear and bubble-free. Many hand-pump pressure bleeders hold fresh fluid in their tank, which keeps the reservoir from running dry during the job.
Strengths: genuinely one-person, keeps the reservoir topped up, and is generally regarded as a reliable way to do a full fluid flush. Limitations: the adapter cap must match your reservoir, and caps are often sold separately or in assortments; too much pressure can damage a reservoir or force a cap off. Pressure setting: use the pressure recommended by the tool manufacturer and, where given, the vehicle service information. No specific values were supplied for this article, so none are stated here.
Reverse brake bleeders
A reverse bleeder pushes fluid in at the caliper's bleeder screw so it travels upward through the lines and out of the master cylinder reservoir. The idea is that air naturally rises, so pushing from the bottom moves it in the direction it already wants to go.
Where it helps: stubborn systems, or after replacing components where air is trapped low in the system. Risks: old fluid and debris from the calipers are pushed back up through the ABS unit and master cylinder; the reservoir must be partly emptied first or it will overflow onto paintwork and components. Compatibility: some vehicle manufacturers do not approve reverse bleeding, particularly with certain ABS or stability-control units. Check the service information for your specific vehicle before using this method.
Quick comparison
Type | Extra equipment | Main fitment check | Best suited to; One-way valve (hose or bleeder screws) | None | Bleeder screw thread and seat, for screw type | Occasional DIY bleeding on a budget; Vacuum / pneumatic | Air compressor for pneumatic units | Hose fit on bleeder nipple | Owners with a compressor wanting speed; Pressure | Adapter cap for your reservoir | Reservoir cap style | Full fluid flushes, reliable one-person work; Reverse | Fluid supply to push from the caliper | Manufacturer approval for your ABS unit | Hard-to-bleed systems, with care
Vehicle details that change the right choice
ABS and stability control: if air may have entered the hydraulic control unit, the service procedure for many vehicles calls for a scan tool function to cycle the ABS pump and valves. This depends on the make, model year and ABS supplier. Bleed sequence: the order of wheels varies by vehicle and brake circuit layout. Follow the service information for your model rather than a generic farthest-to-nearest rule. Brake fluid specification: use the fluid type stated on the reservoir cap or in the owner's manual. Silicone-based DOT 5 fluid must not be mixed with glycol-based fluids such as DOT 3, DOT 4 or DOT 5.1. Reservoir and cap design: this matters most for pressure bleeders, since adapter caps are specific to reservoir style. Clutch hydraulics: on manual-transmission vehicles that share the brake reservoir, the clutch circuit may also need bleeding after a flush; check your vehicle's procedure.
Choosing a next step
If you bleed brakes occasionally and want the lowest-commitment option, start with a one-way valve kit. If you plan regular fluid flushes or work on one or two vehicles long term, a pressure bleeder with the correct adapter cap is usually the more dependable one-person setup. Choose a pneumatic vacuum bleeder if you already have a suitable compressor and value speed. Treat a reverse bleeder as a specialist tool and confirm your vehicle's manufacturer permits the method.
Before buying, confirm your vehicle's bleeder screw size, reservoir cap style, required brake fluid type and whether its ABS bleeding procedure needs a scan tool. These details vary by model year, market, trim and brake package.
Information not covered here
No product listings, prices, test results, pressure or vacuum ratings, or vehicle-specific fitment data were supplied for this article, so it does not recommend specific brands or quote figures. For those details, rely on the kit manufacturer's specifications and the service information for your exact vehicle.