How to Bleed the Brake Hydraulic System: Choosing and Using a Brake Bleeder Kit
Bleeding the brakes means pushing fluid through the hydraulic system and out of a valve at each wheel until no air remains. Air compresses and brake fluid does not, so trapped air shows up as a soft or sinking pedal. You can do the job with a second person and a clear hose, but a brake bleeder kit lets one person do it and usually makes the result more consistent. Kits differ mainly in how they move the fluid: one-way check-valve hoses, vacuum pumps that pull fluid from the wheel, and pressure (power) bleeders that push it from the reservoir. The main exception is a vehicle with ABS. If air has reached the ABS hydraulic unit, many vehicles need a scan tool to cycle the unit's valves, and a basic kit alone may not be enough.
What bleeding does and when it is needed
A hydraulic brake system is a closed circuit: master cylinder, brake lines and hoses, and the calipers or wheel cylinders. Air gets in whenever the circuit is opened, for example when you replace a caliper, hose, line or master cylinder, or when the reservoir runs low enough to draw air. Bleeding removes that air.
Bleeding also replaces old fluid. Most brake fluids are glycol-based and absorb moisture over time. Moisture lowers the fluid's boiling point and can corrode internal parts. A full flush runs enough new fluid through each wheel to push out the old. The service interval depends on the vehicle, so use the owner's manual or service information rather than a generic rule.
Common reasons to bleed or flush the brakes: A caliper, wheel cylinder, hose, line or master cylinder was replaced or disconnected. The pedal feels spongy, sinks, or travels farther than usual, and no leak is visible. The reservoir ran low or dry. The fluid is dark, contaminated, or due for replacement under the maintenance schedule. The brakes have been overheated hard, such as after track use or long mountain descents.
A soft pedal is not always caused by air. Leaks, a worn master cylinder, or flexing hoses produce similar symptoms. Check for leaks and confirm the fluid level before assuming bleeding will fix it.
Key parts: bleeder screw, valve, hose and wrench
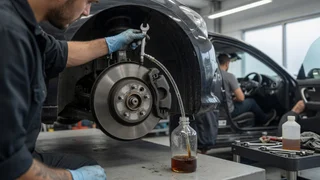
Each caliper or wheel cylinder has a brake bleeder screw, also called a brake bleeder valve. It is a small hollow fitting with a tapered tip that seals against its seat. Loosening it a fraction of a turn opens a path for fluid and air to escape, and tightening it closes the path. Some calipers have more than one bleeder, and some master cylinders and ABS units have their own.
Bleeder screws are small and often corroded, so they round off and snap easily. A dedicated brake bleeder wrench, usually a six-point box end or a flare-nut style, grips the hex better than an open-end wrench. Penetrating oil and patience help on stubborn screws. If a screw breaks off in the caliper, repair can get much more involved, so don't force one that won't move.
A brake bleeder hose is a clear tube that slips over the bleeder tip and runs into a catch bottle. Clear tubing lets you see bubbles. A snug fit stops air being drawn in around the tip. Keeping the hose end submerged in fluid in the bottle also stops air from being pulled back in.
Types of brake bleeder kits compared
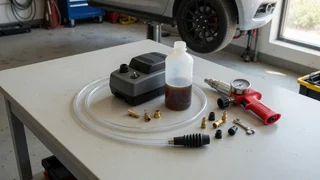
Method | How it moves fluid | Helpers needed | Main strengths | Main limitations; Two-person manual | Pedal pressure from the driver's seat | Two | No special tools beyond a hose, bottle and wrench | Needs coordination; can stress master cylinder seals if the pedal is pushed past its normal travel; One-way check-valve hose | Pedal pressure; the check valve blocks backflow | One | Inexpensive and simple | Still needs many pedal strokes; valve quality varies; Check-valve bleeder screws | Replacement screws with a built-in one-way valve | One | Convenient for repeated bleeding | Must match the caliper's thread and seat; seals can wear; Gravity | Fluid drains under its own weight | One | Gentle and simple | Slow; not effective on every system layout; Vacuum (hand or air-powered pump) | Suction at the bleeder pulls fluid through | One | Portable; popular for home use | Air can leak in around the bleeder threads and look like system air; Pressure / power bleeder | Pressurized reservoir pushes fluid toward the wheels | One | Fast, steady flow; common in shops; no pedal pumping | Needs the correct reservoir adapter; overpressure or a poor seal can cause spills; Master cylinder bench bleed kit | Short lines loop fluid back into the reservoir | One | Purges a new master cylinder before installation | Only for the master cylinder, not the whole system
One-person check-valve kits
A brake bleeder check valve is a one-way valve built into the hose or into a replacement bleeder screw. You open the bleeder, pump the pedal yourself, and the valve stops air from being drawn back in on the return stroke. This is the simplest upgrade over the two-person method. Check the reservoir level often, because one person can't watch it while pumping.
Vacuum bleeders and brake bleeder pumps
A vacuum brake bleeder pump creates suction in a catch container connected to the bleeder screw. Fluid is pulled from the reservoir, through the lines, and out at the wheel. Hand-pump versions are widely sold, including budget options at chains like Harbor Freight. Air-powered versions use shop compressed air to create the vacuum.
The common confusion with vacuum bleeding is a steady stream of small bubbles in the hose. These often come from air drawn in past the loosened bleeder threads, not from the brake system. Some users put thread sealant or grease around the bleeder threads to reduce this. A firm pedal afterward is the real test of success.
Pressure and power bleeders
A brake pressure bleeder, often called a power bleeder, attaches to the master cylinder reservoir with an adapter cap. It pressurizes a tank of fresh fluid and pushes it through the system, so you only need to open and close each bleeder screw. The reservoir stays full the whole time, which avoids the common mistake of letting it run dry. Many shops use pressure bleeding for a full flush.
Fitment is the main issue. Reservoir caps vary widely, so a kit must include or offer the right adapter for the vehicle. Use the pressure recommended for the tool and the vehicle. A loose adapter under pressure sprays fluid, which damages paint and is unpleasant to clean up.
Master cylinder bleeder kits
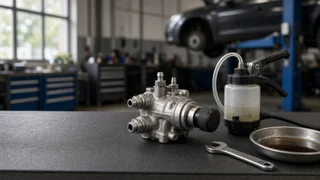
A brake master cylinder bleeder kit, usually called a bench bleed kit, contains short tubes and fittings. They route fluid from the master cylinder's outlet ports back into its reservoir. You stroke the piston on the bench until no bubbles appear, then install the unit. This removes most air from a new or rebuilt master cylinder, so the wheels need less bleeding afterward. Many replacement master cylinders include a simple version of this kit.
How to choose the best brake bleeder kit for your situation
There is no single best brake bleeder kit. The right choice depends on how often you'll use it, whether you work alone, and what vehicles you service. These questions help narrow it down.
Working alone occasionally: a check-valve hose or a hand-pump vacuum bleeder covers most basic jobs. Full fluid flushes or several vehicles: a pressure bleeder saves time and keeps the reservoir from running dry. Replacing a master cylinder: get a bench bleed kit that fits its ports, if one isn't included. Unusual or European reservoirs: confirm the correct adapter cap before buying a pressure bleeder. Compressed air available: an air-powered vacuum bleeder is faster than a hand pump. Vehicles with ABS: find out whether the vehicle needs a scan tool function for bleeding before choosing a kit.
Quality varies within each type. Look for clear, flexible tubing that seals well on the bleeder tip. Look for check valves that actually hold, and a catch bottle that won't tip over. For pressure units, look for a reliable gauge and adapter seals. Product details, prices and included adapters change over time, so check the listing or packaging for the specific kit.
Buying, borrowing, or using a brake bleed service
Some auto parts retailers, including AutoZone, run tool loaner programs. Brake bleeder kits are sometimes among the tools offered, but availability and terms vary by store, so ask your local location. Borrowing makes sense for a one-time repair. Owning a kit makes more sense if you maintain several vehicles or flush fluid on a schedule.
A professional brake bleed service is worth considering in these cases: The vehicle needs a scan tool to cycle the ABS hydraulic unit. The pedal stays soft after a careful bleed. The bleeder screws are seized. You'd rather not handle brake fluid at home. Shops can also check for leaks and worn parts while the system is open.
General procedure for bleeding the brakes
The steps below describe the general principles that apply to most kits. The exact bleeding sequence, any ABS procedure, and torque values depend on the vehicle. Follow the service information for your model year and system layout. Systems with a diagonal split or an integrated ABS unit may not follow the traditional order.
1) Identify the correct fluid. Check the reservoir cap or owner's manual for the required specification (for example DOT 3, DOT 4 or DOT 5.1), and use fresh fluid from a sealed container. 2) Prepare the vehicle. Park on level ground, secure it properly if any wheels must come off, and protect painted surfaces from fluid. 3) Check the reservoir. Note the level, remove some old fluid if you're flushing, and top up with new fluid. 4) Confirm the sequence. Many vehicles start at the wheel farthest from the master cylinder and finish at the nearest, but use the sequence your service information gives. 5) Connect the bleeder. Fit the six-point wrench on the bleeder screw first, then attach the clear hose to the tip and route it into a catch container. 6) Move fluid. Open the bleeder slightly and use the pedal, vacuum or pressure, depending on the kit. 7) Watch the hose. Keep going until the fluid runs clear and without bubbles from the system, then close the bleeder. 8) Keep the reservoir topped up. Never let it run low during bleeding, or air will enter and you'll have to start over. 9) Repeat at each wheel in sequence. 10) Tighten and check. Snug the bleeder screws to specification, set the fluid to the correct level, and confirm a firm, consistent pedal before driving.
After bleeding, test the brakes at low speed in a safe area before normal driving. If the pedal is soft, sinks, or the brake warning light is on, don't drive the vehicle until the cause is found.
Brake fluid specification and handling
Brake fluid is a specified fluid, and using the wrong one can harm the system. DOT 3, DOT 4 and DOT 5.1 are glycol-based and generally compatible with each other where the manufacturer allows, though they have different boiling points. DOT 5 is silicone-based and must not be mixed with glycol fluids. Some vehicles also call for fluids carrying a specific manufacturer approval. When in doubt, use exactly what the reservoir cap or manual lists.
The fill amount isn't fixed. It depends on the system and on whether you're bleeding one corner or flushing the whole system. Have more fresh fluid on hand than you expect to need. Do the final level check with the reservoir cap's markings, following any conditions in the manual. Once a container is opened, it starts absorbing moisture, so reseal it promptly. Don't reuse fluid from the catch bottle, and dispose of it through a recycling or hazardous-waste channel that accepts automotive fluids.
Common mistakes to avoid
Letting the master cylinder reservoir run dry partway through. Pushing the pedal far past its normal travel on an older master cylinder, which can damage worn seals. Using an open-end wrench on a corroded bleeder screw and rounding it off. Mistaking air drawn past the bleeder threads during vacuum bleeding for air in the system. Mixing silicone DOT 5 with glycol-based fluids. Ignoring an ABS-specific bleeding procedure when the vehicle requires one. Leaving brake fluid on painted surfaces.
Bottom line
A brake bleeder kit makes air removal and fluid replacement a one-person job. For occasional work, a check-valve hose or vacuum pump is enough. For frequent flushes, a pressure bleeder gives the most consistent results. Whatever tool you use, the results depend on using the correct fluid, the right sequence, a reservoir that never runs dry, and any ABS procedure your vehicle requires. If the pedal isn't firm after a careful bleed, have a professional inspect the brakes before the vehicle goes back on the road.