How to Use a 3M Auto Glass Repair Kit on a Windshield Chip
The short answer
A 3M auto glass repair kit is meant for small chips and short cracks in a laminated windshield. You clean the damaged spot, use the kit's applicator to force a clear resin into the break, then cure the resin and scrape off the excess. Done well, the repair can stop the damage from spreading and make it less visible. It will not make the glass look new.
Several conditions change that answer. If the damage is larger than the limits printed on your kit's packaging, sits in the driver's direct line of sight, reaches the edge of the windshield, or is close to a camera or sensor mounted behind the glass, a DIY kit is not the right next step. Have a glass professional assess it instead.
Check whether your damage suits a DIY kit
Do these checks before you open the resin. Once resin is in the break, a professional technician may not be able to repair it any further.
Glass type: Windshields are laminated glass, meaning two layers of glass bonded to a plastic interlayer. Resin kits are made for this. Side and rear windows are usually tempered glass, which shatters into small pieces instead of chipping and cannot be resin-repaired. Size and shape: Compare the chip or crack against the size limits on your kit's packaging or instructions. Your kit's own limits take priority over general rules of thumb. Location: Damage in the driver's primary viewing area may be refused for repair, or may not meet local roadworthiness rules once repaired, depending on where you live. Damage at or near the edge of the glass tends to spread and is generally a poor candidate for DIY repair. Driver-assistance hardware: If the damage is in or near the area viewed by a forward camera or sensor, any repair or replacement may affect how those systems work. Some vehicles need the camera recalibrated after windshield work. Leave this area to a professional. Depth: The damage should affect only the outer layer of glass. If you can feel the break from inside the cabin, or the glass is pushed in, the windshield needs replacing.
What you need
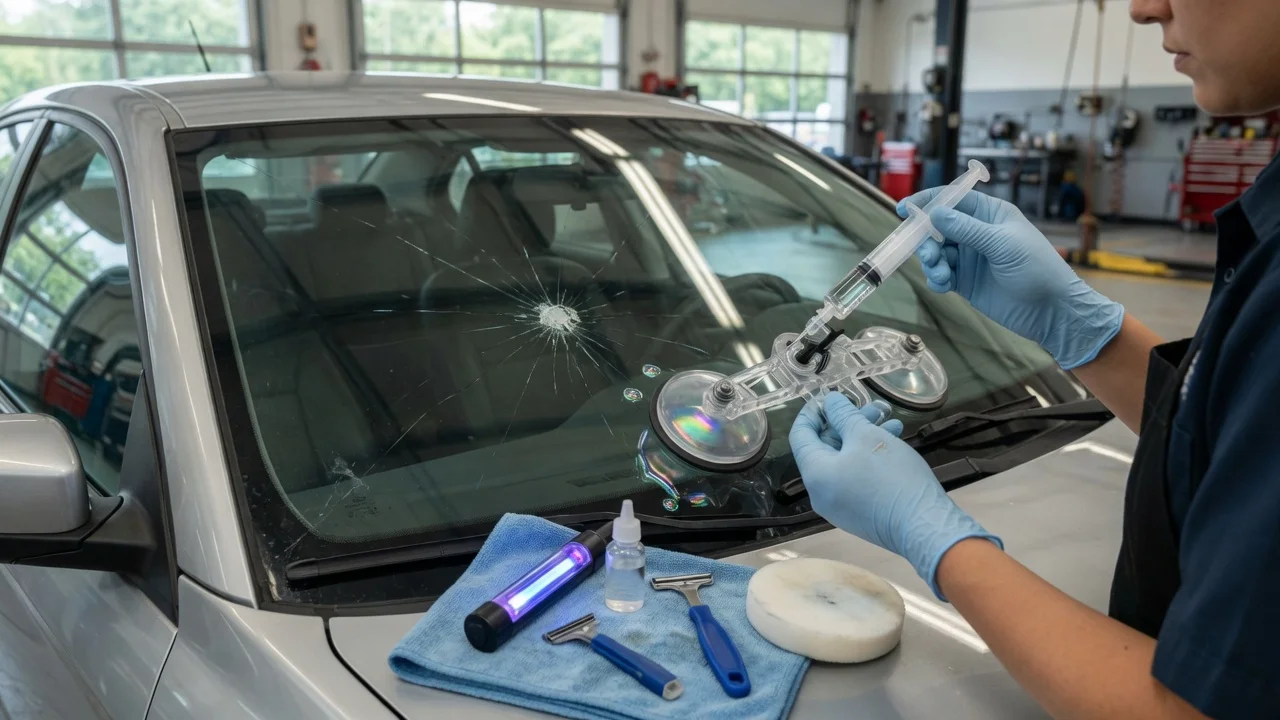
Kit contents vary between versions and markets, so check the package list and the instructions included with your kit. Repair kits of this type usually include a repair resin, an applicator or bridge that holds the resin over the damage, clear curing strips or film, and a razor blade for removing cured excess. Have clean, lint-free cloths, glass cleaner that leaves no residue, and a pin or similar fine point ready for clearing loose glass. If the damage is in direct sun when you start, you will also need shade.
Step-by-step: using the kit
The steps below follow the general sequence for resin-injection kits. The exact order and timing in your 3M kit's instructions take priority wherever they differ.
1) Park somewhere shaded and let the glass cool to the temperature range given in the kit instructions. Many resins start curing on exposure to sunlight, so they should not be applied in direct sun. 2) Clean the area around the damage and let it dry completely. Moisture or dirt trapped in the break can stop the resin from filling it and leave a cloudy spot. 3) Use a pin to gently lift out any loose glass fragments from the impact point. Do not widen the break. 4) Attach the applicator so it sits centered over the impact point, following the kit's mounting method. 5) Add resin to the applicator in the amount the instructions specify. 6) Work the applicator as directed to push resin into the break and draw out air. This often takes several cycles and some waiting time. Watch the break from different angles: it should become less visible as resin fills it. 7) Remove the applicator. Put a small amount of resin on the surface over the impact point and cover it with a curing strip, pressing out any air bubbles. 8) Cure the resin for the time and under the light conditions stated in your instructions. This usually means moving the vehicle into sunlight or using a UV light source. 9) Once the resin is fully cured, remove the strip. Hold the razor blade at a low angle and scrape away excess resin until the surface is flush. Then clean the glass.
What results to expect
A successful repair is mainly about stopping the break from spreading. Most repaired chips leave a faint mark. The results of DIY resin kits vary with the type of damage, how clean and dry the break was, the temperature, and how carefully the steps were followed. No test data or success rates for this specific kit were supplied here, so check independent reviews and the manufacturer's own claims before relying on any expected outcome.
When to stop and use a professional instead
The chip or crack grows while you are preparing or repairing it. Resin will not flow into the break, or air stays trapped after the cycles described in the instructions. The damage turns out to go deeper than the outer glass layer. The repair leaves distortion in the driver's view. Your vehicle has a camera or sensor behind the windshield and the damage is anywhere near it.
Insurance coverage is also worth checking before you start. Some policies cover professional chip repair, and a failed DIY attempt can affect whether a shop will take on the job. This varies by insurer and region, so confirm it with your provider.
Information you will need to confirm yourself
No product documentation was supplied for this article. It therefore does not state this kit's exact contents, the maximum chip or crack size it is designed for, its working temperature range, its curing times, or its price and availability. All of these can differ by kit version and market. Read the packaging and the enclosed instructions before you buy and again before you repair. Also check the local rules on windshield damage and repairs in the driver's field of view.