How to Put Snow Chains on Tires: Step-by-Step Installation Guide
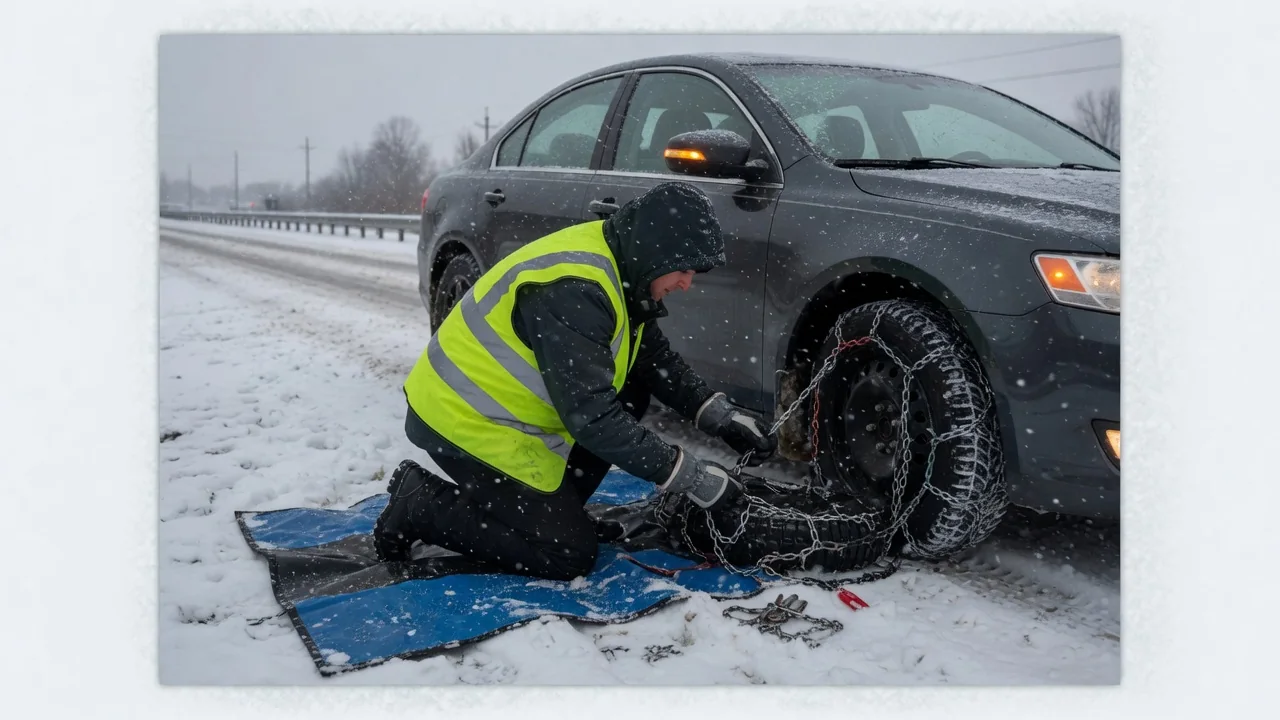
Drivers who ask how do you install snow chains usually ask at the worst moment: on a cold shoulder below a chain control checkpoint. Installing snow chains is manageable once you know the sequence of sizing, draping, fastening, tightening, and re-checking. This guide explains how to put on snow chains safely, which designs are easiest to fit, and how to care for them afterward.
Before You Install: Confirm Chain Size, Clearance, and Which Wheels Need Chains
Snow chains installation starts with the numbers molded into the tire sidewall, which give width, aspect ratio, and wheel diameter. Tire chains are built for specific size ranges, so the packaging or fitment chart must list your exact tire size, not one that looks close. A chain that is too large cannot be tensioned properly, and one that is too small will not close around the tread. If the vehicle wears non-original tires or wheels, read the sidewall itself instead of relying on the door-jamb placard.
Next, open the owner's manual. Some vehicles prohibit chains entirely, and others permit only low-profile designs because wheel well clearance around struts, brake lines, and body panels is tight. The manual also states which axle should carry chains. They normally go on the drive wheels, but AWD and 4WD systems vary, so follow the manufacturer's guidance instead of assuming a universal answer. Chain laws and road signs differ by state and route as well, so check the current requirements for the mountain passes you plan to cross.
Practice Installing Snow Chains at Home Before You Need Them
The best time to learn how to install snow chains is on a dry afternoon in the driveway or garage. A first attempt made in darkness, with numb fingers and traffic passing nearby, takes far longer and invites mistakes. At home, unpack the chains, untangle them completely, and lay each one flat. Identify the inside and outside edges, the hooks or connectors, and the tensioners, and note which side of the links should face away from the rubber according to the instructions.
Fit the chains fully during this dry run so sizing problems appear before a trip instead of during one. If a chain will not close, hangs slack after tightening, or sits near suspension or brake components, sort that out with the retailer now. Practice also shows what belongs in a small installation kit kept with the chains: waterproof gloves, a mat or kneeling pad, a headlamp or flashlight that leaves both hands free, and a reflective vest so other drivers can see you working beside the vehicle.
How to Put On Snow Chains: Step-by-Step on the Tires
When conditions call for traction devices, pull into a chain-up area or another level spot well away from traffic lanes. Set the parking brake, switch on the hazard lights, and turn off the engine before stepping out. To put on snow tire chains, drape each chain over the top of the tire so it hangs evenly down both sides, with the cross links lying straight across the tread. Reach behind the tire to connect the inner fastener first, then join the outer fastener, without crawling under the vehicle.
On many designs, part of the chain ends up trapped beneath the tire. The common approach is to roll the vehicle a short distance forward to free that section, secure the vehicle again, and complete the remaining connections. Center the chain so the cross links sit evenly on the tread and nothing rests against the sidewall or sits close to brake parts. Fastening systems differ considerably between designs, so the instructions supplied with your particular chains take priority over any general description of how to put on snow chains on tires.
Tightening and Re-Checking Snow Tire Chains After Installation
A chain that is merely connected is not yet ready to drive on. Use whatever tightening hardware came with the set, whether a built-in chain tensioner, a rubber adjuster stretched across the outer face of the wheel, or tightening links that take up slack, until the chain sits snug around the tire. Then drive a short distance at low speed and stop in a safe place to check again. Chains settle into the tread as the wheel turns, which is why most instructions call for retightening after that first stretch.
Keep listening once you are moving. Slapping or banging noises, a new vibration, or a chain creeping toward the sidewall all suggest looseness or poor fit. Any sound of contact with the wheel well means stopping safely and inspecting right away. Continuing to drive with a chain striking the vehicle risks damage to body panels, wiring, and brake components, and a chain that comes off entirely leaves you without traction exactly where icy roads demand it.
Easy-to-Install Snow Chain Designs and What Makes Them Simpler
Shoppers looking for the easiest snow chains to install will find several features worth comparing. Self-tensioning chains take up slack automatically as the wheel rolls, reducing the need to stop and retighten by hand. Color-coded parts show at a glance which connector goes where and which side faces out. Some easy install snow chains fasten largely from the front of the wheel, sparing you the awkward reach behind the tire that makes traditional designs slow to fit in deep slush.
Cable chains and textile snow socks are often lighter and quicker to fit than traditional link chains, which appeals to drivers who need them only occasionally. They may not satisfy every chain-law requirement, however, so confirm what is accepted on your route. Before buying any snow chains that are easy to install, verify the design is approved for your tire size and clearance. Ease also depends on practice, weather, and fit to the vehicle, so even a simple design goes on slowly when it is unfamiliar.
Snow Chain Installation Mistakes to Avoid
Fitting chains to the wrong axle is a frequent error. Chains on wheels that do not deliver power leave the driven tires spinning, and a large grip difference between front and rear can upset handling in corners and under braking. Twisted links are another problem, since a twisted chain cannot lie flat or tension evenly. Chains mounted inside-out may press hooks or sharp edges into the rubber, and loose ends left unsecured can whip against the wheel well or brake parts.
Chains belong on snow and ice only. Long stretches of bare pavement wear the links quickly, stress the tires, and damage the road surface, so remove them once the road clears and conditions allow a safe stop. Speed matters as well. Chains change how a vehicle steers, rides, and stops, and every chain maker sets a maximum speed for its product. Stay at or below that limit, accelerate and brake gently, and leave extra following distance throughout winter driving with chains fitted.
Removing, Drying, and Storing Snow Chains After Use
Removal reverses the installation. Pull over in a safe, level place away from traffic, set the parking brake, and turn on the hazard lights. Release the tensioner and the outer fastener first, then the inner fastener behind the tire. Lay the chain flat on the ground clear of the wheel and drive slowly off it. At home, rinse away road salt and grit, which speed corrosion, and let the chains dry fully before packing them, because damp steel sealed in a case will rust.
Cleaning is also the moment for inspection. Look for broken links, cross chains worn thin where they meet the pavement, and bent or damaged fasteners. Worn chains should be replaced instead of repaired, since a failure at speed can damage the vehicle. Store the set untangled in its case along with the gloves and the printed instructions. A chain that comes out of the bag straight and ready makes the next roadside installation far quicker than one that must be unknotted in the cold.