Hardwired EV Charger Installation: What It Involves and How It Differs From a Plug-In Setup
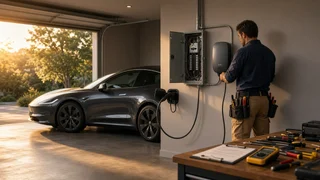
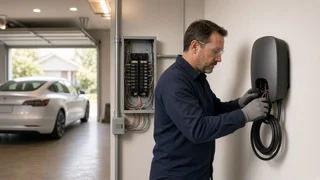
A hardwired EV charger installation connects a Level 2 charging unit directly to a dedicated 240-volt circuit from your home's electrical panel, with no plug or wall receptacle in between. It is one of two common ways to set up home charging. The other is a plug-in unit that connects to a 240-volt outlet. Hardwiring is usually the better route if you want the highest charging power your car and panel can support, an outdoor installation, or a more permanent setup. A licensed electrician normally does the work, and most US jurisdictions require a permit and inspection. The details depend on three things: your home's supply capacity, the charger's rated output, and what your vehicle can accept. This guide explains how those pieces fit together, so you can plan an EV charging unit installation and have an informed conversation with an electrician.
Hardwired vs. Plug-In: The Core Difference
Both setups use the same type of equipment. Technically, the wall unit is called electric vehicle supply equipment (EVSE). The difference is how it connects to your home's wiring.
Factor | Hardwired | Plug-in (240V receptacle); Connection | Wired directly into a dedicated circuit | Plugs into a 240V outlet, commonly a NEMA 14-50; Maximum charging current | Can exceed 40 amps if the charger, circuit and panel allow | Limited by the receptacle rating; a 50-amp outlet supports up to 40 amps of continuous charging; Portability | Fixed in place | Can be unplugged and moved or taken along when you relocate; Outdoor suitability | Generally well suited; no exposed plug connection | Possible, but the outlet and cover must be rated for wet locations; Points of wear | Fewer connections that can loosen or overheat | Receptacle quality and repeated plugging can matter over time; Flexibility | Swapping units requires an electrician | Easier to swap or upgrade the charging unit
Neither option is universally better. A plug-in unit on a properly installed, quality receptacle is a reasonable choice for many households, especially if 40 amps or less meets your needs. Hardwiring makes more sense when you want higher output, a cleaner permanent installation, or an outdoor mount without an exposed plug connection. Some chargers can only be hardwired, particularly the higher-amperage models.
How Circuit Sizing Works
The US National Electrical Code (NEC) treats EV charging as a continuous load, because a car can draw full power for hours at a time. For continuous loads, the circuit and breaker must be rated for at least 125 percent of the charger's maximum continuous current. Put the other way, a charger may draw no more than 80 percent of the circuit's rating.
Charger continuous output | Minimum breaker size (125% rule); 16 amps | 20 amps; 24 amps | 30 amps; 32 amps | 40 amps; 40 amps | 50 amps; 48 amps | 60 amps
Many hardwired chargers let the installer set the maximum current during setup, often with an internal switch or an app. This means one unit can be matched to whatever circuit your panel can support. Wire gauge, wire type, run length and installation conditions also affect the required conductor size. An electrician determines these according to the code edition your jurisdiction has adopted.
Charging Power and Vehicle Compatibility
A larger circuit only helps if your car can use it. Every EV has an onboard charger that converts AC from the wall unit into DC for the battery. Its rating sets a ceiling on Level 2 charging power. If your vehicle's onboard charger accepts less current than the wall unit can supply, the car simply draws what it can accept. The extra capacity goes unused until you own a vehicle that can take advantage of it.
Onboard charger ratings vary by manufacturer, model, model year and sometimes trim. Check the specifications for your specific vehicle before sizing the installation. If you expect to change vehicles or add a second EV, consider future needs as well. Running wire sized for a higher-amperage circuit during the initial installation can be simpler than redoing it later. Whether that is worthwhile depends on your panel capacity and budget.
Connector Standards and Charging Protocols
In North America, Level 2 charging uses one of two connector standards on the vehicle side:
SAE J1772: the long-standing standard connector used by most non-Tesla EVs sold in the US. NACS (North American Charging Standard), standardized as SAE J3400: the connector originally developed by Tesla. Many automakers have announced or begun adopting it for their vehicles.
Hardwired chargers are sold with one connector type or the other, and adapters exist in both directions. Because the industry is in transition, check which port your vehicle has and whether the charger maker offers a cable or adapter option that suits a mixed-vehicle household. The connector does not change the electrical installation itself. The circuit is the same either way.
Some smart chargers also support communication protocols, such as OCPP, which lets chargers talk to network management software. Many also offer Wi-Fi app control. These features support scheduling, energy consumption tracking and, in some cases, utility demand-response programs. They are optional for basic charging but can be useful if your utility offers time-of-use rates.
Checking Your Home's Supply Capacity
Before anything is installed, an electrician should confirm that your electrical service can handle the added load. This usually involves:
A load calculation: estimating your home's existing demand from heating, cooling, cooking, water heating and other large appliances, then adding the charger. A panel check: confirming that physical space exists for a new double-pole breaker and that the panel and its busbar are rated appropriately. A service evaluation: reviewing the size of the utility service to the home.
If the calculation shows limited headroom, a service or panel upgrade is not the only answer. Common alternatives include:
Setting the charger to a lower current. Overnight charging at moderate power covers typical daily driving for many owners. Using a load management device or a charger with built-in power sharing. These reduce or pause charging when other household loads are high. Installing a subpanel, if the main panel lacks breaker space but the service has adequate capacity.
What the Installation Process Typically Involves
The exact steps vary by home and jurisdiction, but a typical hardwired electric charging installation follows this general sequence:
Site assessment: the electrician reviews the panel, the planned charger location, the distance between them, and the route for the wiring. Permit application: the electrician or homeowner files for an electrical permit with the local authority, where required. Circuit installation: a dedicated breaker is added and conductors are run to the charger location, in conduit where the code or conditions call for it. Charger mounting and connection: the unit is mounted and wired according to the manufacturer's instructions, and its maximum current is configured to match the circuit. Testing and commissioning: the electrician verifies operation, and any app or network setup is completed. Inspection: a local inspector checks the work, if the permit requires it.
The longest wiring runs, such as from a basement panel to a detached garage or an exterior driveway post, tend to add the most complexity. Choosing a charger location close to the panel, while still allowing the cable to reach the vehicle's charge port, can simplify the job.
Choosing a Location for the Charging Unit
Cable reach: confirm the charger's cable length comfortably reaches your car's port wherever you normally park, without stretching across walkways. Weather exposure: for outdoor mounting, choose a charger rated for outdoor use and follow the manufacturer's mounting guidance. Wi-Fi coverage: smart features depend on a reliable connection at the mounting point. Future parking: consider whether a second vehicle, or a car with its charge port on the other side, might need to reach the same unit.
Can You Install a Hardwired Charger Yourself?
Rules on homeowner electrical work vary by state and municipality. Some jurisdictions allow homeowners to pull permits for work on their own residence, while others require a licensed electrician. Even where DIY work is legal, a hardwired EV charger installation involves high-current 240-volt wiring, correct conductor and breaker sizing, and code-specific requirements. Mistakes can create fire or shock hazards. Many charger manufacturers specify installation by a qualified electrician, and doing otherwise may affect the product warranty. Utility and government incentive programs may also require professional installation or a permit. For most readers, hiring a licensed electrician is the practical recommendation.
Incentives and Utility Programs
Some electric utilities, states and local governments offer rebates, credits or special rate plans for home EV charging. Availability, eligibility rules and amounts change often and differ by location. Check with your utility and current state and federal programs before buying equipment. Some programs require a specific approved charger model, a permit, or enrollment before installation.
Bottom Line
Hardwiring an EV charger means a dedicated 240-volt circuit sized at 125 percent of the charger's continuous output, connected permanently by an electrician, usually under a permit. It is the preferred option when you want more than 40 amps, an outdoor installation without an exposed plug, or a fixed, long-term setup. Your real charging speed is limited by the lowest of three ratings: the circuit, the charger setting, and your vehicle's onboard charger. Start with your vehicle's specifications and an electrician's assessment of your home's supply capacity, then choose a charger and current setting that fit both.