When to Replace Diesel Glow Plugs
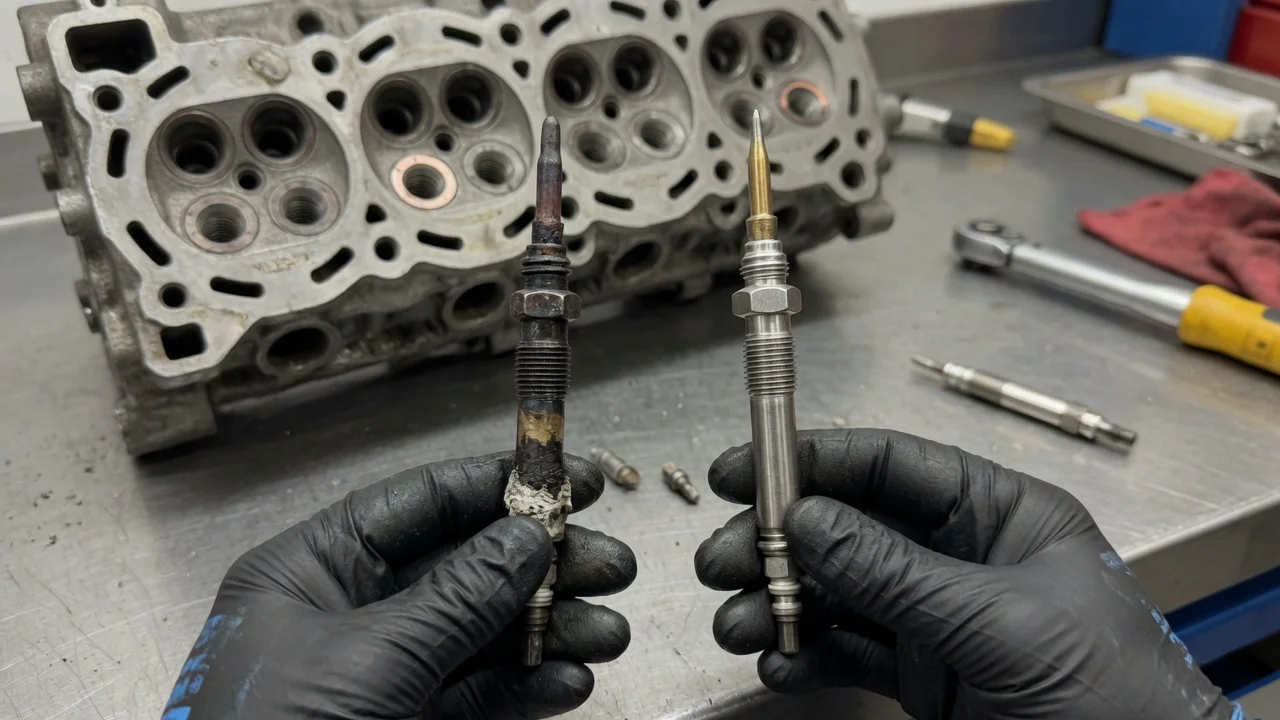
Diesel glow plugs have no universal replacement interval. Most are replaced when they fail or when testing shows they have weakened, not on a fixed calendar date or mileage. How long they last depends on the plug type, the engine design, how often the engine is cold started and the health of the glow plug control system. This guide explains how to decide whether replacement is actually needed and what the job involves once you have confirmed it.
How often diesel glow plugs need changing
Check your owner's manual or maintenance schedule first. Many manufacturers list no mileage interval for glow plugs at all and treat them as a wear item replaced on condition, while some service schedules call for inspection or replacement at a specific point. If your schedule names an interval, follow it. If it does not, replacement is driven by symptoms and test results. Plugs in vehicles that make many short trips in cold weather work harder than plugs in vehicles that mostly run warm on long highway drives.
Typical warning signs include long cranking before a cold start, rough running and white or gray smoke for the first moments after starting, a glow plug or engine warning light, and stored glow plug circuit codes. Because a single failed plug can go unnoticed in mild weather, problems often surface with the first cold spell. When one plug fails on a high-mileage engine, many technicians replace the full set, since the others share the same age and heat history. That is a judgment call rather than a rule, but it makes sense when reaching the plugs is labor-intensive.
Confirm the part and repair scope
Hard cold starts on a diesel are not always caused by the glow plugs. A weak battery or slow cranking speed, a failed glow plug relay or control module, damaged wiring, air in the fuel, a clogged or waxed fuel filter, low fuel pressure from a weak lift pump or high-pressure fuel pump, faulty injectors and low compression can all produce similar symptoms. Winter fuel problems, such as summer-grade diesel gelling in the cold, also mimic glow plug failure. Fuel additives may help prevent gelling, but they are not a repair for a failed plug or a fuel system fault.
Test before buying parts. A scan tool can show which circuit is reporting a fault, and many systems allow the glow plug module to be checked directly. A multimeter resistance test or a current-draw test on each plug, compared against the values in the service information, identifies open or weak plugs. When ordering, match the part to your exact engine rather than only the vehicle model, because engine configuration, plug length, thread size, voltage rating and plug type differ. Ceramic and metal-sheath plugs are not interchangeable unless the manufacturer approves it, and some control modules are designed for one specific plug type.
Prepare tools and safe access
Get the service procedure for your engine before starting. It lists the access steps, the correct tightening torque, whether the engine should be warm or cold for removal, and any coding or relearn needed afterward. Basic tools include a thin-wall glow plug socket or deep socket, extensions and swivels, a torque wrench that reads accurately at low values, a multimeter, a scan tool, compressed air and penetrating oil. Disconnect the negative battery cable before touching glow plug wiring, since the circuit carries high current.
Access varies widely. On some engines the plugs sit in plain view; on others the intake manifold, injector return lines, wiring harnesses or other components must come off first. If reaching the plugs means disturbing fuel lines on a common-rail system, remember that those lines can hold very high pressure. Work only with the engine off and the system at rest as the service procedure describes, never loosen a high-pressure fitting to bleed it, and keep skin away from any fuel spray. Owners without diesel fuel system experience, or anyone facing a seized plug in an aluminum cylinder head, should consider a shop equipped with an extraction kit.
Remove without avoidable damage
Clean around each plug with compressed air so debris cannot fall into the cylinder once the plug is out. Unplug each connector or remove the bus bar nut carefully, because brittle connectors break easily on older engines. Apply penetrating oil if the service information allows it and give it time to work. Some procedures call for loosening plugs with the engine slightly warm and others with it cold, so follow the one written for your engine.
Loosen each plug with steady, controlled force on a hand ratchet, never an impact tool. If a plug resists beyond normal breakaway, stop. Working it gently back and forth with more penetrating oil sometimes frees carbon on the tip, but forcing it can snap the plug off in the head. A broken tip or swollen plug may require specialized extraction tools or cylinder head removal, which costs far more than the plugs themselves. Keep removed plugs in cylinder order and note any with swollen, cracked or eroded tips, since that can point to an injector spraying incorrectly in that cylinder.
Install and restore the system
Clean the bore threads and the sealing seat before installing the new plugs. Use anti-seize only if the manufacturer specifies it, and only where specified, because compound on the tip or seat can affect heat transfer, grounding and torque accuracy. Start every plug by hand to avoid cross-threading, then tighten to the specified torque with a torque wrench. Glow plug torque values are low and the thin plug bodies are easy to damage, so do not guess or tighten by feel.
Reconnect the connectors or bus bar securely, reinstall any manifold, gaskets and lines that were removed, and replace one-time seals where the procedure requires them. If fuel lines were disconnected, prime and bleed the fuel system as directed so the engine does not draw air. Some vehicles require new glow plugs to be coded or adapted to the control module with a scan tool, and stored codes may need clearing. Reconnect the battery last.
Check the completed work
Using a scan tool, confirm that no glow plug circuit codes return and, where live data is available, that each plug draws current within the expected range. Check that the glow plug indicator behaves normally at key-on. The real test is a cold start after the vehicle has sat overnight: the engine should fire after a normal crank, with little smoke and a smooth idle that settles quickly.
Inspect around each plug for a hissing compression leak or soot tracks, which point to a poorly seated plug or damaged threads. If fuel lines were disturbed, perform a visual leak check at every fitting, running the engine only as the service procedure allows and never using your hands to search for a leak, since high-pressure diesel can penetrate skin. If hard starting, smoke or misfires continue with good plugs installed, move on to the control module, injector balance rates, fuel pressure, the fuel filter and compression rather than replacing plugs again.