What Is a Headlight Aim Screen Test? Wall Pattern, Adjustment and Service
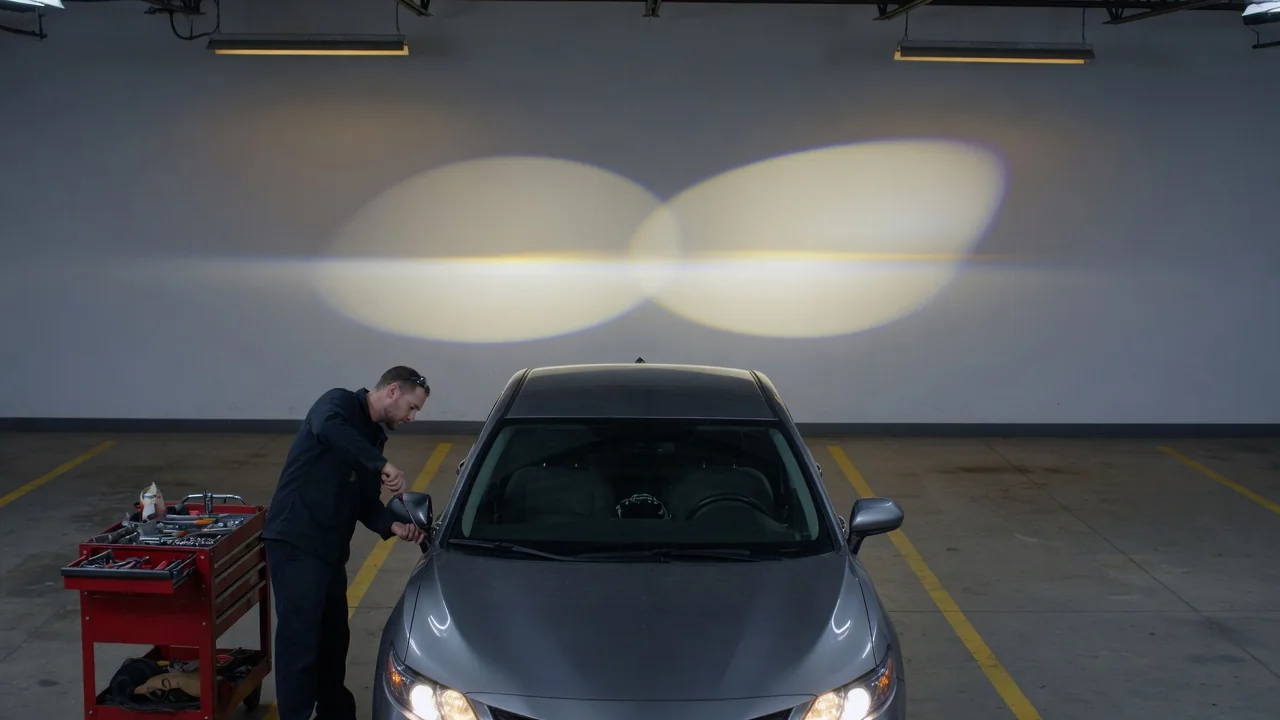
A headlight aim screen test checks where a vehicle's headlights point. The lights shine onto a flat, marked vertical surface at a set distance, and the light pattern is compared with reference lines. It is one of the most common ways to do a headlight beam aim check, in a repair shop or at home, because it shows the beam's height and direction without special optical equipment. The test reveals aim, not bulb brightness or lens condition.
Wall Pattern: What the Screen Reveals
The screen can be a dedicated aiming board, a garage door, or a light-colored wall. The vehicle is parked on level ground, facing the surface squarely, with the headlights a set distance away. Many procedures in the United States use 25 feet, but the correct distance comes from the vehicle's service information, and some procedures use other distances. Before marking the wall, the technician measures the height of each headlight's center from the ground and the distance between the two centers. These measurements go onto the wall as a horizontal line at lamp-center height and a vertical line for each lamp. A centerline for the vehicle is often added as well.
On low beam, most modern headlights project a pattern with a distinct cutoff, a sharp boundary between the bright area below and the darker zone above. On vehicles built for right-hand traffic, the cutoff is usually flat on the left side and steps or angles upward on the right. This lights the road shoulder and signs while keeping glare out of oncoming drivers' eyes. The screen test looks at two things: where the cutoff sits relative to the lamp-center line, typically somewhat below it, and where the step or elbow falls relative to each lamp's vertical line. Exact target values vary by vehicle and lamp design.
High beams generally lack a sharp cutoff and instead show a bright hot spot. On many vehicles the high beam shares a housing with the low beam and is not adjusted separately. Older sealed-beam and some reflector lamps produce softer edges that are harder to read, while many projector lamps produce a crisp line. Fog lamps, when fitted, have their own low, flat pattern and are checked on their own. Reading the pattern also means comparing left and right. If one beam sits noticeably higher, lower, or off to the side, there is an aim problem even before any measurement.
Adjustment: Moving the Beam Into Place
Most headlight assemblies have adjusting screws or knobs that pivot the reflector, the projector, or the entire housing. A vertical adjuster raises or lowers the beam, and on many vehicles a horizontal adjuster moves it left or right. Some assemblies offer vertical adjustment only. The adjusters may be reached from the top of the housing, from behind it under the hood, or through openings in the trim. Which way to turn for up or down is not standardized. The vehicle's owner's manual or service manual shows where the adjusters are and which tool they need. Some housings also have a built-in bubble level or scale, which helps as a reference but does not replace the correct procedure.
Accurate adjustment depends on preparing the vehicle the way the procedure expects, because anything that changes body pitch moves the beam on the wall. Typical preparation includes correct tire pressures, a level floor, and the load condition the manufacturer specifies. That condition may include a certain fuel level or weight in the driver's seat. The suspension is often settled by rocking the vehicle before measuring. While adjusting, it helps to cover one headlight so the two patterns do not overlap. Some procedures say to finish each adjustment in a particular direction to take up slack in the mechanism. After each change, the cutoff position is rechecked against the marks.
Vehicles with headlight leveling add another step. A manual leveling dial usually has to be set to its base position before aiming. Automatic leveling systems use ride-height sensors and actuators. On some vehicles, the control module needs a reset or calibration with a scan tool after the mechanical aim is set or after suspension work. Adaptive headlights that swivel with steering also need to be in their default straight-ahead position. These requirements are vehicle-specific, so the service procedure governs.
Service: When and How the Test Is Done
A headlight beam aim check is worth doing after any work that can disturb the lamps or the body's stance. Examples include: • replacing a headlight assembly; • repairing front-end collision damage; • changing suspension parts or ride height; • installing a lift or leveling kit; • replacing bulbs in housings where the bulb seat affects focus; It is also wise when oncoming drivers often flash their lights, when the road ahead seems poorly lit, or when the two beams visibly sit at different heights. Some jurisdictions include headlight aim in periodic vehicle inspections, though the rules and methods differ by location.
Repair shops may use a screen board, but many also use optical beam setters. These portable units sit in front of each headlight and show the pattern on an internal screen with calibrated markings. They work at short distance and can compensate for floor slope more easily than a wall test. At home, the wall method works when the floor is truly level and the measurements are transferred carefully. A home check is good for spotting obvious misaim and making basic corrections. A shop is the better choice for vehicles with leveling electronics or adaptive lighting, or when an inspection result must be documented.
Practical Implications and Limits
Correct aim matters on the road in two ways at once. A beam aimed too low shortens how far the driver can see, which cuts reaction time at night, especially at higher speeds. A beam aimed too high, or too far toward oncoming traffic, can glare other drivers. It can also reflect off signs and fog back toward the driver. Small angle errors grow with distance, so a shift that looks minor on the screen can move the cutoff far down the road. That is why the screen test focuses on precise placement rather than overall brightness.
A screen test shows where the light goes, not whether the headlight is in good condition. Yellowed or hazy lenses, moisture inside the housing, a damaged reflector, the wrong bulb type, or a poorly fitted aftermarket LED or HID conversion can all scatter light and blur the cutoff. No amount of adjustment fixes that. If the pattern lacks a defined cutoff or shows stray light above it, find the cause before aiming. Aim also changes with load. A heavily loaded vehicle sits nose-up and points its beams higher, which is why leveling systems exist. Finally, a wall test is only as accurate as its setup. An uneven floor, the wrong distance, or a measuring error carries straight into the result. When the procedure, targets, and adjuster locations come from the vehicle's own service information, the screen test is a simple and reliable way to keep headlights doing their job.