Subaru Transmission Valve Body Replacement
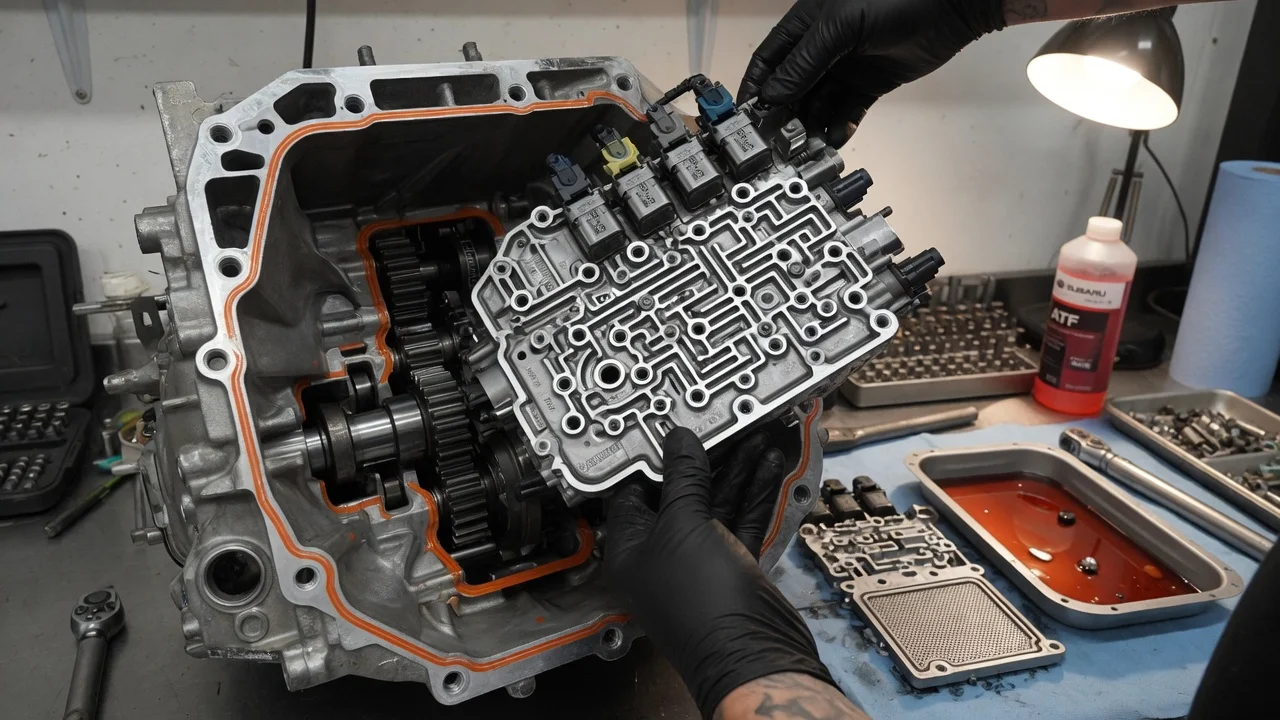
Replacing the valve body on a Subaru automatic transmission can cure certain shift and engagement faults, but only when the valve body is actually the cause. Subaru has used several automatic designs, including older four-speed and five-speed conventional automatics and the Lineartronic CVT, and each handles this job differently. This guide explains how to confirm the repair is justified, what preparation it needs, how removal and installation generally proceed, and how to check the result afterward.
Confirm the part and repair scope
Start by identifying the exact transmission type. Model name and year are not enough, because engine choice, market and production changes can put different units, valve bodies and fluid specifications in otherwise similar cars. Use the VIN and the transmission identification plate when ordering, and match the part number rather than relying on a general fitment listing. Some replacement valve bodies come with solenoids installed and others without, and some CVT applications expect the new unit to be paired with the transmission control module through dealer-level software. Confirm what your replacement includes and what programming it needs before buying.
A symptom is not proof of a failed valve body. Harsh or delayed engagement, flaring between shifts, judder, slipping and limp mode can also come from low or degraded fluid, damaged wiring or connectors, faulty sensors, outdated control software, worn clutches, a failing torque converter or, on a CVT, chain and pulley wear. Diagnostic codes point to a circuit or condition, not necessarily to a part. Check fluid level and condition, read codes and freeze-frame data from the transmission module, and review the service history for previous fluid work, software updates or warranty repairs. Heavy metal debris on the pan magnet usually indicates internal mechanical wear that a valve body will not fix. Weigh the repair options honestly: if diagnosis points beyond the valve body, a rebuilt or replacement transmission, or a dealer repair under any applicable coverage, may be the better path.
Prepare tools and safe access
Get the factory service information for your specific transmission before you start, because bolt locations, tightening sequences, torque values and fluid procedures differ between units. You also need a scan tool that can communicate with the Subaru transmission module, read fluid temperature, clear learned values and run any required learning or initialization routine. Without that capability the job usually cannot be finished correctly. Other essentials include a lift or sturdy jack stands on level ground, a large drain pan, a torque wrench that reads accurately at low values, the correct pan gasket or sealant, a new strainer or seal where specified, and enough fresh fluid that meets the exact fluid specification for your unit.
Work on a cool vehicle, since transmission fluid can be hot enough to burn, and support the car securely before going underneath. Disconnect the battery if the service procedure calls for it. Cleanliness matters as much as tools: valve bodies contain small passages and precise valves, and lint, grit or old gasket material can cause sticking and new shift problems. Use lint-free towels and a clean bench. If you have no access to a capable scan tool, a safe way to raise the car, or experience with internal transmission work, this is a job better left to a transmission shop or dealer.
Remove without avoidable damage
The general sequence is to drain the fluid while noting its quantity and condition, remove any underbody covers, then remove the oil pan. Inspect the pan and magnet for debris before cleaning them, since this is useful diagnostic evidence. Remove the strainer if it blocks access, then disconnect the solenoid and sensor connectors and release the harness from its clips. Only then remove the bolts that secure the valve body to the case. These bolts are often different lengths, so record each location, for example by pushing them through a cardboard template. Some bolts on the valve body hold its own sections together and must not be removed; the service information identifies which is which.
Lower the valve body carefully and keep it level. On conventional automatics, check balls, springs, small screens or accumulator parts can drop out of the case or the separator plate, and their positions must be noted. Never pry between the valve body and the case, and do not let the assembly hang by its wiring. Expect residual fluid to run out as the unit comes free. Do not guess torque figures or improvise with substitute fasteners.
Install and restore the system
Compare the old and new units side by side, confirming part numbers, connector positions and any components that must be transferred according to the instructions. Clean the case mating surface without scratching it. On transmissions with a manual valve, make sure it engages the selector linkage correctly as the valve body goes up; misalignment can leave the transmission in the wrong range or prevent proper engagement. Start every bolt by hand in its recorded location, then tighten in the specified sequence to the specified torque. Reconnect all harness connectors firmly, route wiring away from moving parts, fit the strainer with its new seal and install the pan with the correct gasket or sealant.
Refill with the fluid specified for your unit and set the level using the factory procedure. Many Subaru transmissions, particularly the CVT, require checking the level with the engine running and the fluid within a defined temperature range read through a scan tool; an incorrect level can cause slipping or damage. Then complete the commissioning steps: clear stored learned values, enter any data supplied with the new valve body if your application requires it, and perform the learning procedure or drive pattern described in the service information. Skipping these steps can leave harsh or erratic shift behavior even with a perfectly good part.
Check the completed work
Before the road test, inspect the pan and fluid lines for leaks, confirm the fluid level at the correct temperature, and scan for stored codes. With the car stationary and the brakes applied, engagement into drive and reverse should be prompt without a heavy clunk or long delay. On the road, test at light and moderate throttle and watch for smooth, timely upshifts and downshifts on a conventional automatic, or steady response without judder or rpm flare on a CVT. Warning lights should stay off. Scan again after the drive, and recheck the fluid level after a few days of normal use.
Further diagnosis is needed if codes return, slipping or judder persists, the fluid overheats, new noises appear, or debris continues to show up. Those signs point toward internal mechanical wear, torque converter trouble, electrical faults or an incomplete learning procedure rather than another valve body. Record the part number, fluid used and software procedures performed in the vehicle's service history; it helps future diagnosis and shows buyers that the repair was done properly.