68RFE Transmission Valve Body Replacement
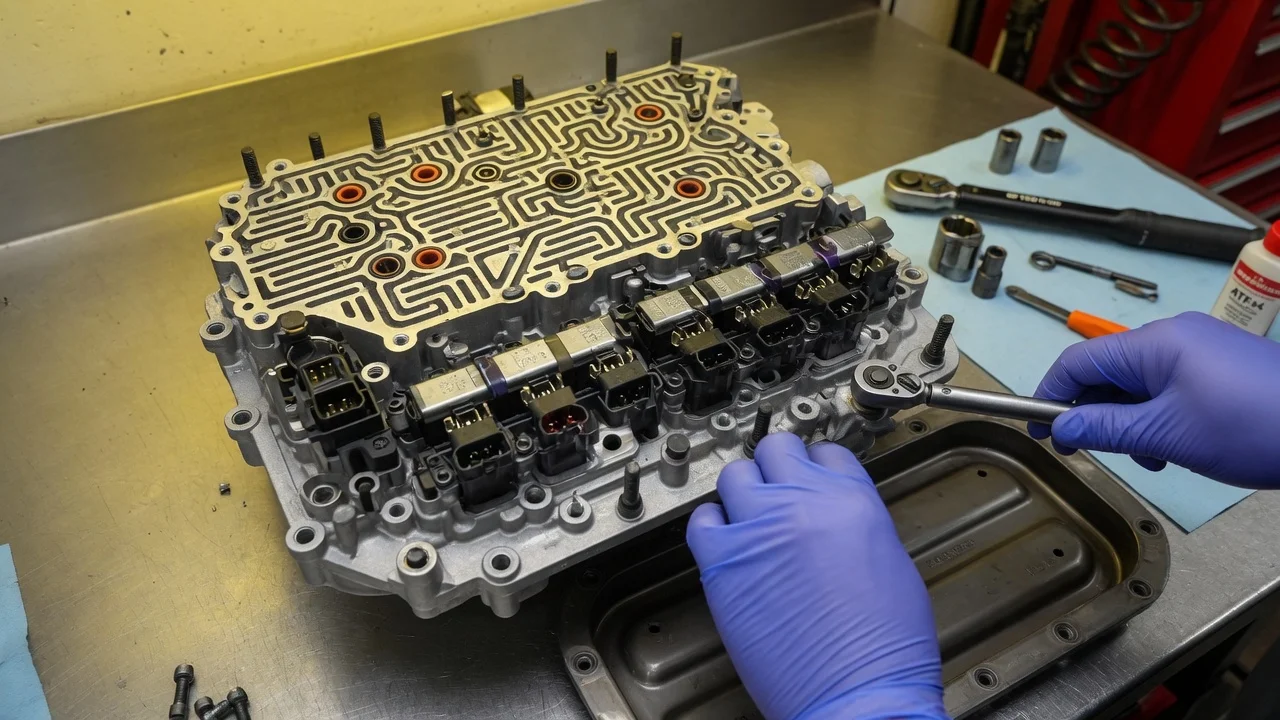
Replacing the valve body on a 68RFE is a common repair when a Ram heavy-duty truck, typically one with the Cummins diesel, develops shifting complaints that point to hydraulic control problems. The unit is reached through the transmission pan, but the job demands clean work, careful handling of small parts and a scan tool for the relearn afterward. This guide covers confirming the repair is justified, preparing, removing and installing the unit, and checking the result.
Confirm the part and repair scope
The 68RFE is a six-speed automatic from the same RFE family as the 45RFE and 545RFE, but its valve body is not interchangeable across every model year or application. Identify the transmission type from the build data, the identification tag on the case or a dealer VIN lookup, then match the replacement to that fitment. Remanufactured, new and upgraded performance valve bodies are sold for these trucks. Check whether the unit includes the solenoid and pressure switch assembly or only the hydraulic body, because that determines what you transfer from the old part.
Just as important is making sure the valve body is actually the cause. Harsh or delayed shifts, flare between gears, erratic shift behavior or stored diagnostic codes for solenoid circuits, line pressure or gear ratio errors can also come from low or degraded fluid, wiring and connector faults, a failing solenoid pack, controller software, worn clutches or leaking internal seals. A ratio error in particular may reflect clutch slippage that a new valve body will not cure. Read all stored and pending codes, check fluid level and condition, review the service history for prior repairs and software updates, and look for clutch material or heavy debris in the pan. If the evidence points to mechanical wear, compare repair options such as a rebuild before spending money on hydraulic parts.
Prepare tools and safe access
Get the factory service information for your model year, which lists bolt torques, the tightening sequence and the relearn procedure; do not rely on generic numbers. Plan for a drain pan large enough for the pan contents, a new pan gasket or the specified sealant, a new filter and seal, enough fresh fluid, a torque wrench that reads accurately in inch-pounds, lint-free rags and a clean bench. The 68RFE uses ATF+4 or a fluid licensed to that specification; confirm it in your owner's manual. A scan tool capable of running the transmission quick learn and reading adaptive values is required to finish the job properly.
Raise the truck on a lift or on rated jack stands on level ground, chock the wheels and disconnect the negative battery cables before unplugging any transmission connectors; diesel models commonly have two batteries. Let the transmission cool, since fluid at operating temperature can cause burns. This repair suits owners comfortable with precise, clean work. If you have never worked inside an automatic transmission, lack a capable scan tool or have warranty coverage that could be affected, a transmission shop is the better choice.
Remove without avoidable damage
Drain the fluid and remove the pan, keeping old gasket material out of the case. Inspect the pan and magnet before cleaning them: a fine gray paste is normal wear, while friction material, metal chunks or brass flakes suggest internal damage that needs further diagnosis. Remove the primary filter and make sure its seal comes out with it rather than staying in the bore.
Unplug the electrical connector at the solenoid and pressure switch assembly and note how the harness is routed and retained. The manual valve in the valve body engages the shift lever inside the case, so place the selector in the position the service procedure specifies before removal. Remove only the bolts identified as valve body mounting bolts; other bolts hold the body's sections together and should stay tight. Support the valve body as the last bolts come out and lower it level so the manual valve disengages without bending the lever.
Keep the unit upright and watch for check balls, springs or screens that may drop from the separator plate area or case passages. Lay parts out in order. If you are transferring the solenoid and pressure switch assembly, do it on a clean bench and use new seals where supplied.
Install and restore the system
Compare the new valve body with the old one before installation: casting shape, connector position, manual valve design and any screens or check balls the supplier expects you to transfer. Clean the case mating surface without scratching it and confirm that anything which belongs in the case is in place. Lubricate seals only with the specified transmission fluid.
Lift the valve body into position while guiding the manual valve onto the shift lever, then start all bolts by hand. Tighten them in the sequence and to the torque the service manual gives; uneven or excessive torque can distort the body and make valves stick. Install the new filter and seal, reconnect the electrical connector until it locks, and refit the pan with the correct gasket or sealant and bolt torque.
Reconnect the batteries, add the initial fluid amount from the service procedure, then start the engine and bring the level up gradually. Set the final level at the temperature and selector position stated for your model year, because an overfilled or underfilled transmission can foam or slip. Run the quick learn with the scan tool and complete any adaptive relearn or drive cycle the procedure calls for. Some replacement units may also require a controller software update, so follow the supplier instructions.
Check the completed work
Record any codes before clearing them, then scan again after the relearn for new or returning faults. Verify that the gear indicator matches the actual gear in every selector position, that the engine starts only in park and neutral and that reverse engages promptly. After the fluid is hot, inspect the pan and connector area for leaks.
On the road test, drive gently at first and note shift timing, firmness, torque converter lockup and downshifts under light and moderate load before towing or working the truck hard. Shift quality may keep improving as adaptive values settle. Seek further diagnosis if you notice slipping, flare, harsh engagements, recurring ratio or pressure codes, burnt-smelling fluid or fresh debris at the next service. Those signs can point to wiring, controller or internal mechanical problems that a new valve body does not address. Keep a written record of the parts, fluid and procedures used so future diagnosis starts from accurate history.