Repairing Auto Body Plastic Fenders: A Practical Guide
What is the essential answer to my question?
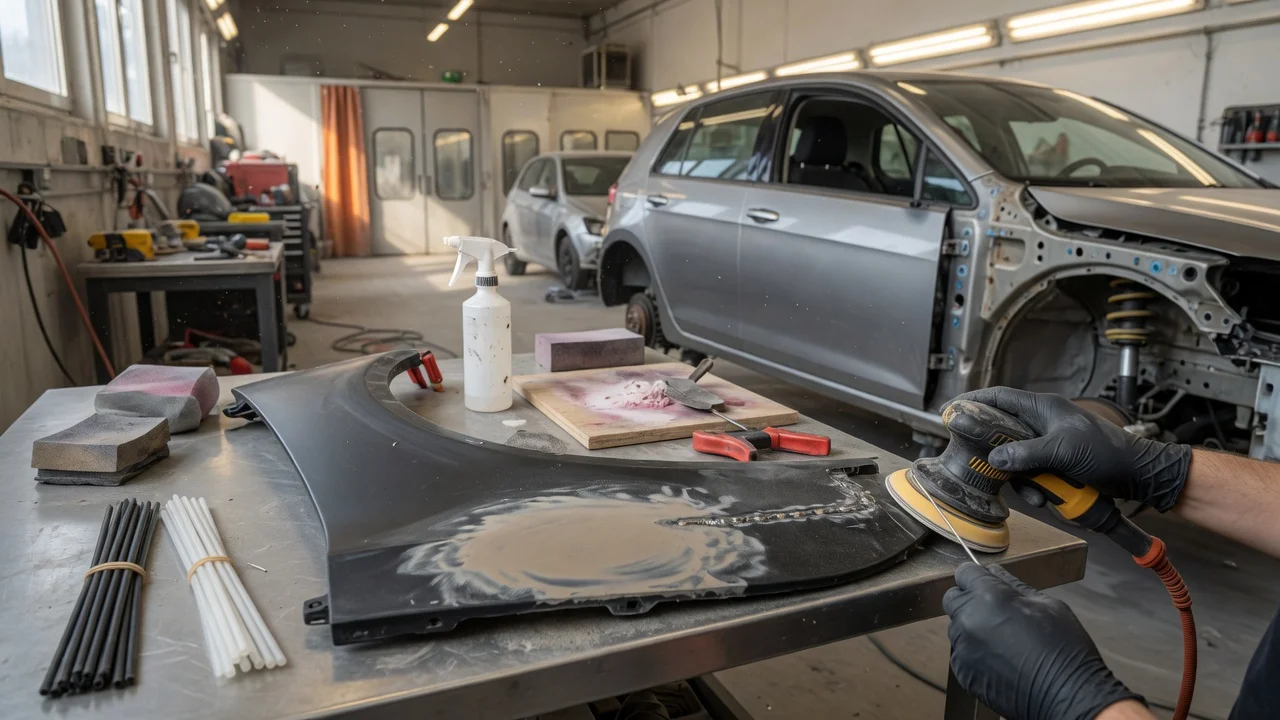
Repairing an auto body plastic fender usually involves identifying the specific plastic, cleaning the damaged area, then performing a mechanical or adhesive repair. Common repairs address cracks, splits, deep scrapes, and broken mounting tabs. Repair is generally feasible for thermoplastic fenders, especially when the damage is localized and no structural mounting points are compromised. For heavily deformed panels, large missing sections, or fenders where the damage extends into load-bearing attachment areas, replacement may be the more reliable option. The scope of a successful plastic fender repair depends on material type, damage size, and whether the fender must carry repeated stress from clips or fasteners.
How do I identify the fender plastic?
Look for an embossed identification code on the backside of the fender. Common codes include PP, TPO, ABS, PE, or PUR. A stamped acronym tells you which repair method and filler are compatible. If no code is present, consult the vehicle manufacturer's service information for the applicable model year and trim. Using a general-purpose body filler on the wrong plastic can cause poor adhesion or later cracking.
What could explain this symptom, and what should I check next?
The same visible symptom, such as a crack, can have different underlying causes. A stress crack often starts near a mounting hole or along a sharp body line. An impact crack appears as a radiating split from a point of contact. A split from a seized fastener or over-tightened clip may show deformation around the attachment hole. Observe whether the crack edges line up cleanly, whether the panel flexes excessively, and whether the surrounding plastic is discolored or brittle. Brittle, chalky plastic that flakes when probed may indicate age or heat degradation. If the fender is cracked through a main mounting point, or if the panel no longer supports its own weight without sagging, stop driving and have a professional assess the attachment integrity.
Preparing the repair area
Remove the fender or mask the surrounding bodywork. Clean the area with a plastic-safe cleaner to remove release agents, wax, and road film. For a crack, drill a small stop hole just beyond the visible end to reduce further propagation. Grind or sand a shallow V-shaped channel along the crack on both the face and backside using a low-speed tool and coarse abrasive. For two-part plastic repair adhesives, flame-treating may be required for low-surface-energy plastics such as PP and TPO; follow the specific adhesive system's instructions.
Plastic welding for thermoplastics
Thermoplastics such as PP, TPO, and ABS can be welded. A nitrogen or hot-air plastic welder is preferred, though a soldering iron with a flat tip can work on small repairs. Match the welding rod to the identified plastic. Tack weld the backside first to hold alignment, then weld the face. Melt the base material and the rod together rather than merely melting the rod onto the surface. This method restores strength close to the original material when done correctly, but it cannot correct significant panel distortion.
Adhesive repair and reinforcement
A two-part plastic repair adhesive designed for the identified plastic is practical for cracks and small splits. Apply the adhesive into the prepared V-channel and reinforce the backside with a fine-mesh repair patch compressed into the adhesive. For mounting tabs, reconstruct the tab using a compatible repair material, then re-drill the hole after full cure. Be aware that adhesive-only repairs on long unsupported cracks may flex and re-open; bonding a backing reinforcement across the repair reduces this risk.
Finishing and painting
After the repair cures fully, sand the surface flat with progressively finer abrasives. Use a flexible plastic filler for final shaping if the system allows it. Apply a plastic adhesion promoter before priming or painting. Because fenders flex, a flexible bumper and trim paint is more likely to resist cracking than a rigid body paint. Reinstall the fender with the correct clips and fasteners, and avoid over-tightening, which can re-initiate cracks at attachment points.
When replacement is the better choice
Replace the fender if the panel is torn through a primary mounting surface, if a large section is missing, if the plastic has widespread UV or heat embrittlement, or if the cost of materials and labor approaches the price of a new or quality used fender. A repair that restores appearance but weakens an attachment point can fail under normal road vibration.