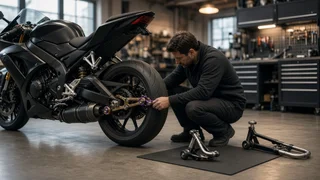
Lowering a Motorcycle for Rider Fit: Methods, Trade-Offs and How to Choose
Lowering a motorcycle means reducing seat height or overall ride height so a rider can reach the ground more confidently at stops, during slow maneuvers and while moving the bike around. It can be done in several ways: a lower or reshaped seat, a lowering link or shorter rear shock, adjusting the front forks, or choosing a model or trim that is offered with lower suspension from the factory. The direct answer is that lowering is a legitimate and common fix for rider fit, but it is never a free change. Most methods reduce suspension travel, ground clearance or lean angle to some degree, and they can alter steering behavior if the front and rear are not kept in balance. The right approach depends on how much height you actually need to lose, what kind of riding you do and how the specific motorcycle is built.
Why Riders Lower Their Motorcycles
Seat height on a specification sheet is only part of the fit picture. What matters at a stop is whether you can plant one or both feet firmly enough to hold the bike upright, especially on a crowned road, loose gravel or a slope. A tall seat combined with a wide seat or a wide engine and frame section can push the legs outward and make the reach to the ground feel longer than the number suggests. Conversely, a narrow seat can make a taller bike feel manageable.
Lowering is usually about confidence and control at low speed rather than about how the bike behaves once it is moving. Riders who are shorter, who are carrying a heavy touring load, or who frequently ride with a passenger often find that a modest drop in height makes stops, parking and U-turns far less stressful.
Check Fit Before Changing Hardware
Before lowering anything, it is worth confirming that ride height is really the problem. Several adjustments can improve reach without touching the suspension geometry at all.
Rider sag and preload: if the rear preload is set stiffer than your weight requires, the bike sits higher than necessary. Setting sag to the manufacturer's service specification for your weight may lower the static height slightly while keeping the suspension within its intended range. Seat width and shape: a narrower front section of the seat lets the legs drop straighter, which can matter as much as a lower seat surface. Footwear: riding boots with a thicker sole add reach without any change to the motorcycle. Technique: shifting your weight to one side and planting a single foot at stops is a common way to handle a taller bike. Riding controls: handlebar reach and footpeg position affect how comfortably you can balance the bike at low speed, even though they do not change seat height.
Common Methods for Lowering a Motorcycle
Lower or Reshaped Seat
A lower seat, either an accessory seat or a reworked stock seat with foam removed or reshaped, reduces seat height without changing suspension or chassis geometry. Ground clearance, lean angle and handling stay as they were. The trade-off is comfort: removing foam can make long rides less pleasant, and the change in hip position can shift how your knees and legs relate to the footpegs. For riders who need only a small reduction, this is often the least invasive option.
Lowering Links
Many motorcycles with a linkage-type rear suspension can be lowered by replacing one of the links (often called dog bones) with a longer or differently shaped part. This changes the leverage ratio between the swingarm and the shock, letting the rear of the bike sit lower. Lowering links are popular because they are relatively simple to fit, but they do more than drop the seat. Changing the leverage ratio can make the rear suspension feel softer and closer to bottoming out, and it reduces the clearance between the rear tire and the bodywork or fender under full compression. They also only apply to bikes that use a rear linkage; many cruisers and twin-shock designs do not.
Shorter Rear Shocks
Replacing the rear shock or shocks with shorter units designed for the model lowers the rear directly. This is common on cruisers and other bikes with twin rear shocks or no rear linkage. A shock built specifically for a lowered setup can be valved and sprung to suit the reduced travel, which can give better control than simply changing the leverage. The downside is reduced suspension travel, and with it a firmer or harsher response over large bumps, along with less ground clearance.
Front Fork Adjustment
On conventional telescopic forks, the front can often be lowered by sliding the fork tubes up through the triple clamps so more of the tube protrudes above the top clamp. Internal lowering kits that shorten fork travel are another option on some models. Front lowering is usually paired with rear lowering to keep the chassis balanced. Clearance must be checked carefully: with the forks raised in the clamps, the front tire or fender may contact the radiator, lower frame, exhaust headers or the underside of the bodywork when the suspension is fully compressed. The handlebars and controls also need to clear the fork caps at full steering lock.
Factory Low Suspension and Low-Seat Trims
Some manufacturers offer certain models, trims or model years with a lower seat, lowered suspension or a factory accessory kit intended for shorter riders. Where available, these options are typically engineered with matching suspension components and adjusted parts such as the side stand. Availability varies widely by model, generation and market, so it is worth confirming exactly which version a given bike is before assuming a low option exists. Accurate model identification, including year and trim, also matters when buying any aftermarket lowering parts.
Comparing the Approaches
Method | What changes | Main advantages | Main trade-offs; Lower or reshaped seat | Seat surface only | No change to suspension, clearance or handling | Possible loss of comfort; changes leg angle to pegs; Preload and sag setup | Static ride position within existing travel | Restores intended setup; no parts required on many bikes | Limited amount of height change; Lowering links | Rear leverage ratio | Simple fitment on linkage-equipped bikes | Softer feel, more risk of bottoming, reduced tire-to-fender clearance; Shorter rear shocks | Rear shock length and travel | Can be tuned for the lowered height | Reduced travel and ground clearance; Fork tubes raised in clamps or fork lowering kit | Front ride height | Keeps chassis balanced when paired with rear lowering | Clearance checks required; possible steering changes; Factory low trim or kit | Matched suspension and parts | Engineered as a package | Only available for some models and markets
Trade-Offs to Understand Before Lowering
Ground Clearance and Lean Angle
Lowering brings the footpegs, exhaust, frame and engine cases closer to the road. On a cruiser that already scrapes its floorboards in corners, even a small drop can make that happen sooner. Engine configuration and exhaust routing matter here: bikes with low-slung exhausts, wide engine cases or under-engine collectors have less margin to give up than bikes with high-mounted pipes. Reduced clearance can also mean more contact with speed bumps, driveway transitions and rough surfaces.
Suspension Travel and Ride Quality
Most lowering methods other than a seat change reduce usable suspension travel or change how the suspension uses it. Less travel means the suspension has less room to absorb large bumps, which can make the ride harsher and increase the chance of bottoming out, especially with a passenger or luggage. Riders who regularly carry a passenger should factor in that the added weight compresses the suspension further on an already lowered bike.
Steering Geometry and Handling
Lowering only one end of a motorcycle changes its chassis attitude. Dropping the rear alone tends to increase rake and trail, which can make steering slower and heavier. Dropping the front alone tends to have the opposite effect, which can make steering quicker and, in some cases, less stable. Lowering both ends by a similar amount helps preserve the original balance, though the exact effect depends on the frame design and the parts used.
Side Stand and Center Stand
After lowering, the factory side stand may hold the bike too upright, making it easy to tip over to the opposite side when parked, particularly on a slope or soft ground. A shortened or adjustable side stand is commonly needed. A center stand, if fitted, may become difficult or impossible to deploy because there is less space under the bike. These parts should be checked before the bike is ridden or parked unattended.
Drive System Considerations
The drive system can be affected by changes at the rear. On chain-driven bikes, altering the swingarm angle changes how chain slack varies through the suspension travel, so chain adjustment should be rechecked against the service specification after lowering. Belt-driven bikes have similar alignment and tension considerations. On shaft-drive motorcycles, the operating angles of the driveline may change, which is another reason to use parts designed for the specific model.
Equipment Compatibility and Electronics
Lowering can affect fitment of other parts and accessories. Aftermarket exhausts, luggage racks, hard cases, crash bars and fender extenders may sit closer to the ground or to the tire than intended. Headlight aim usually needs to be reset after a change in chassis attitude. On motorcycles with electronic suspension, ride-height sensing or other rider aids that rely on chassis data, mechanical lowering may interact with those systems in ways that vary by model, so compatibility should be confirmed for the specific bike.
Warranty, Insurance and Resale
Suspension modifications can affect warranty coverage on related components, depending on the manufacturer and dealer. Some insurers ask to be informed of modifications. Factory-approved low kits are less likely to raise these issues than aftermarket parts. Keeping the original components can make it easier to return the bike to stock height if you sell it.
Installation and Setup After Lowering
Suspension work involves supporting the motorcycle securely while the wheels are unloaded and tightening fasteners to the correct torque values. Riders comfortable with mechanical work often fit lowering links or seats themselves, while fork and shock changes are commonly handled by a shop or suspension specialist. Whichever route you take, a few checks are worth completing afterward.
Compress the suspension fully, where safe and practical, to confirm the tires do not contact fenders, bodywork, the radiator or the exhaust. Turn the handlebars lock to lock to confirm cables, hoses and controls clear the fork tubes and tank. Reset rider sag and preload for your weight and typical load. Check that the side stand holds the bike at a stable lean angle. Re-aim the headlight. Recheck chain or belt slack and alignment. Test ride at low speed in a safe area before riding normally, paying attention to steering feel, cornering clearance and bump absorption.
How to Choose the Right Approach
Start with the least invasive options: set sag correctly, try a narrower or lower seat, and consider footwear. If you still cannot reach the ground comfortably, look at whether the model offers a factory low option or a manufacturer-approved kit for your year and trim. If aftermarket suspension parts are the answer, favor components designed for your specific motorcycle, plan to lower front and rear in a balanced way, and budget for related parts such as a shorter side stand.
Also consider how you ride. A rider who mostly commutes and rides two-up on a cruiser has different priorities than someone who rides a sport bike aggressively through corners or takes an adventure bike onto unpaved roads, where suspension travel and ground clearance are especially valuable. In some cases, choosing a different motorcycle with a naturally lower seat height may serve better than heavily lowering a tall one.
Bottom Line
Lowering a motorcycle can make a real difference to rider fit and low-speed confidence, and for many riders a modest change is all that is needed. The key is to match the method to the amount of height you need to lose and to the riding you do, keep front and rear balanced, and address the follow-on effects on clearance, suspension behavior, the side stand and the drive system. Done thoughtfully, lowering adapts the bike to the rider without compromising how it handles in everyday use.