Motorcycle Lowering Straps: What They Do and What to Check Before Buying
A motorcycle lowering strap holds the suspension partly compressed so the bike sits lower. Straps are mainly used in drag racing, where a lower front end and a lower center of gravity help control wheelies and improve stability at launch. They are also used for show stance and, in a different form, for securing a bike during transport. If your goal is to reach the ground more easily on a bike you ride on the street, straps are usually the wrong tool. They lower the bike by taking away suspension travel, which affects braking, bump absorption, ground clearance and cornering. For rider fit, lowering links, a lower seat or properly adjusted fork height are the normal choices.
How Motorcycle Lowering Straps Work
A lowering strap is an adjustable length of webbing, usually with a buckle or ratchet, fitted between a sprung and an unsprung part of the motorcycle. You compress the suspension, then tighten the strap so the suspension cannot fully extend again. The bike rests at the strapped height until the strap is released.
Front straps usually wrap around the lower triple clamp, also called the lower fork yoke, and the fork legs or axle area. They hold the forks compressed and lower the front of the bike. Rear straps usually run between the swingarm and the frame or subframe. They hold the rear shock compressed and lower the back of the bike. Both types work by limiting extension. They do not change spring rate or damping. They remove part of the available travel.
Who Lowering Straps Are Suitable For
Drag racers: a lower front end reduces the bike's tendency to wheelie under hard acceleration and can reduce frontal area. Rear straps lower the center of gravity further. Show and stance builds: straps give a lowered look without permanent changes to the suspension. Testing before committing: some owners strap a bike to estimate how a lower ride height might look or feel while stationary before they buy permanent parts. Transport: dedicated tie-down straps compress the suspension so the bike stays stable in a trailer or truck. These are sold as tie-downs and should not be confused with racing lowering straps.
Lowering straps are generally a poor fit for everyday street riding. A bike strapped down to a fraction of its normal travel can bottom out over bumps, lose traction on rough pavement, scrape parts when leaning and react differently under braking. If you are shopping because the bike feels too tall, skip ahead to the alternatives section.
Trade-Offs to Understand Before You Buy
Reduced suspension travel: less room to absorb bumps, which means harsher impacts and a higher chance of bottoming out. Ground clearance: exhaust, footpegs, frame rails and the sidestand sit closer to the road, so lean angle and clearance over obstacles both decrease. Steering geometry: lowering only the front steepens rake and shortens trail, which can make steering quicker and less stable. Lowering only the rear does the opposite. Lowering both ends evenly keeps geometry closer to stock. Component clearance: a compressed fork moves the tire closer to the front fender, radiator, exhaust headers and lower fairing. A compressed rear can bring the tire closer to the undertail or hugger. Chain slack: on chain-drive bikes, compressing the rear suspension changes the distance between sprockets. Slack that is correct at normal ride height may be too tight or too loose when strapped. Parking stance: with the bike lower, the sidestand may let it lean over farther, or it may become harder to park on uneven ground.
What to Check When Choosing Lowering Straps
Front, Rear or Both
Decide what you are trying to achieve. Wheelie control at launch mainly comes from lowering the front. Lowering the center of gravity or the overall stance usually means doing both ends. Kits are sold for the front only, the rear only, or as a combined set. Front straps are normally sold as a pair, one for each fork leg.
Fit for Your Specific Motorcycle
Accurate model identification matters because suspension hardware can change between model years, trims and markets even when the model name stays the same. Confirm the year and version of your bike before you rely on a seller's fitment claim, and treat universal straps as needing a physical check.
Fork type: conventional (right-side-up) and inverted (upside-down) forks have different shapes around the lower clamp and axle, which affects where a strap can sit. Triple clamp shape: the strap must loop securely without sliding toward steering stops, wiring or brake hoses. Swingarm and subframe design: rear straps need a solid anchor point on the frame and a section of swingarm they can wrap without touching the chain, brake line or wheel speed sensor wiring. Drive system: rear straps are most common on chain-drive bikes. Belt and shaft-drive bikes have different swingarm and final-drive layouts, so check whether a suitable routing exists before buying. Adjustment range: the strap must be long enough to wrap your parts and short enough to reach the ride height you want.
Build Quality and Hardware
Webbing: look for heavy, abrasion-resistant webbing with clean, even stitching at the loops and buckle ends. Straps carry suspension load constantly while installed. Adjuster type: cam buckles are quick to set and release; ratchets allow finer tensioning but are bulkier. Either way, the adjuster should hold without creeping. Protective sleeves: padding or sleeves where the strap contacts fork tubes, clamps or the swingarm help prevent finish damage. Webbing should never ride on the chromed or coated sliding surface of a fork tube. End fittings: any hooks or loops should not be able to pop off the anchor point under load. Equipment compatibility: check that the strap clears fork braces, fender mounts, brake calipers, ABS sensor wiring and aftermarket parts already on the bike.
Racing Rules
If you plan to run straps at a drag strip, check the rules for your track and class before buying. Requirements for suspension modifications vary between sanctioning bodies and events, and some classes limit or specify how a bike may be lowered.
Installing and Checking Straps Safely
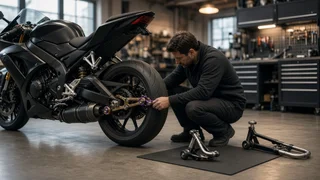
Support the bike on a suitable stand so it cannot fall while the suspension is compressed. Compress the suspension gradually, ideally with a helper, and tighten the strap a little at a time. Lower the front and rear in small steps rather than all at once. Turn the handlebars from lock to lock and confirm that brake hoses, cables and wiring are not pinched, stretched or rubbing. Check clearance between the front tire and the fender, radiator, exhaust and fairing at full strapped compression. On chain-drive bikes, recheck chain slack at the strapped height against the service specification in your owner's or service manual and adjust as needed. Confirm that the sidestand still holds the bike at a safe angle. Recheck strap tension and the condition of the webbing before each use. Remove the straps and restore normal chain adjustment before riding on the street.
Better Options for Lowering Seat Height
If the real problem is reaching the ground, these options lower the bike while keeping more of its usable suspension, or improve reach without changing the suspension at all.
Option | How it lowers the bike | Main trade-off; Lowering links | Change rear linkage geometry so the rear sits lower | Reduced rear ground clearance; may require front adjustment to keep handling balanced; Raising fork tubes in the clamps | Slides forks up through the triple clamps to lower the front | Limited adjustment range; check clearance to bars and fender; Lower or reshaped seat | Reduces foam height or narrows the front of the seat | Comfort on long rides may change; Preload adjustment | Less preload lets the bike sag more under the rider | Only small changes; can affect handling and bottoming; Lowering straps | Hold suspension compressed by removing travel | Not suited to normal street riding
For rider fit, the riding controls matter too. Handlebar position, footpeg placement and lever reach all affect how confident a shorter rider feels. Sometimes a narrower seat or adjusted controls solve the problem better than reducing ride height.
Quick Buying Checklist
Confirm the purpose: drag racing, stance, testing or transport, not everyday street seat height. Identify your exact model year and trim, plus fork type and drive system. Choose front, rear or a combined kit based on your goal. Check adjustment range, webbing and stitching quality, buckle type and protective sleeves. Verify clearance to wiring, brake lines, fenders, exhaust and accessories after installation. Recheck chain slack at the strapped height. Check track or class rules if you plan to race.