How to Remove a Stuck Rear Axle Shaft
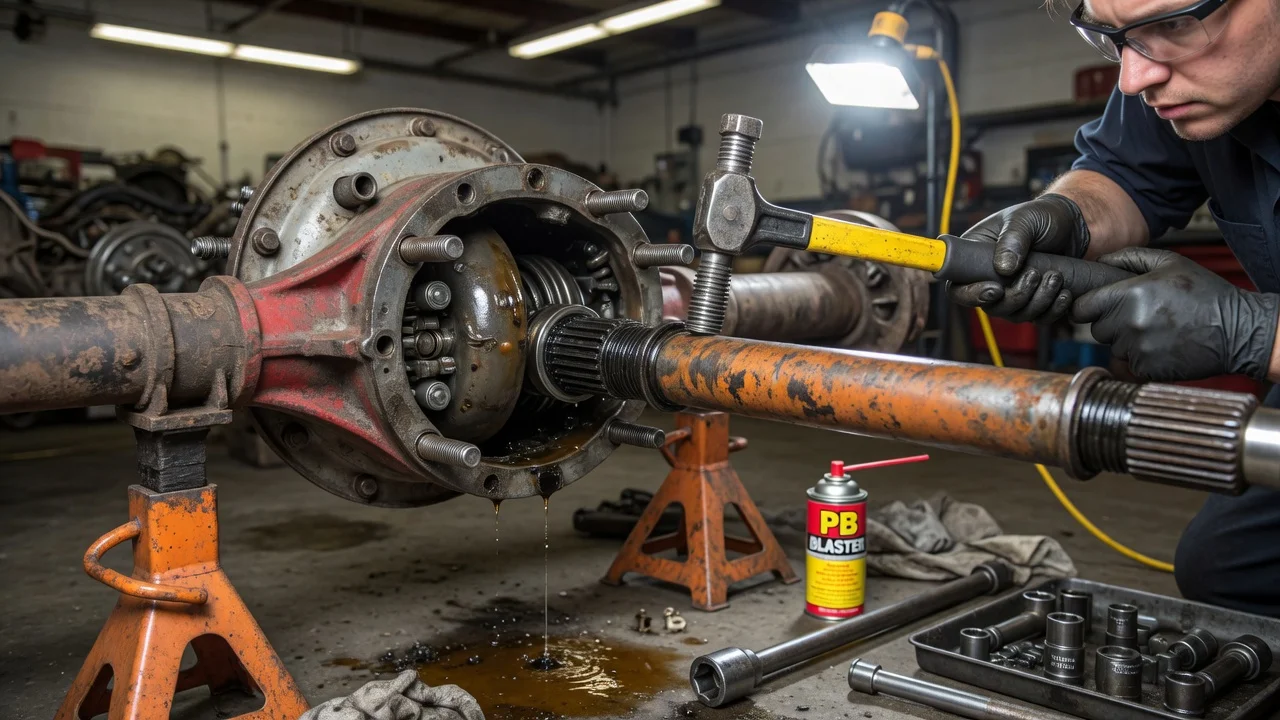
A rear axle shaft that will not slide out of the housing is usually held by a retainer that has not been released, or by rust, a seized bearing or a damaged shaft end. Forcing it can ruin the bearing bore, the seal surface or the wheel speed sensor. This guide explains how to identify the retention design on your vehicle, prepare safely, pull the shaft without avoidable damage, reinstall it correctly and confirm the repair.
Confirm the part and repair scope
Before removing anything, confirm why the shaft has to come out. Common reasons include a leaking axle seal, a noisy wheel bearing, damaged wheel studs, worn splines or a bent or broken shaft. If the actual fault is a differential noise or a brake problem, pulling the axle may not fix it. When parts are needed, match them to the exact vehicle configuration rather than the model name alone. The axle model, gear ratio, limited-slip or open differential, ABS tone ring design, side of the vehicle and production changes can all affect which shaft, bearing and seal fit. The axle tag, the VIN and the service history help narrow this down.
Next, identify how the shaft is retained, because most stuck-axle problems come from pulling against a retainer that is still in place. On a semi-floating C-clip axle, nothing bolts the shaft at the flange; it is held by a C-shaped clip on its inner end inside the differential. On a bearing-retained semi-floating axle, a retainer plate behind the flange is bolted to the housing, and the nuts are reached through an access hole in the flange. On a full-floating axle, used on many heavy-duty trucks, the shaft flange bolts to a hub that rides on its own bearings, and the shaft carries no vehicle weight. Confirm the design for your vehicle in the service information before starting.
Prepare tools and safe access
Park on a level, solid surface, chock the front wheels, and lift at the points the manufacturer specifies. Support the axle on rated jack stands and never work under a vehicle held only by a jack. Remove the wheel, then the brake drum, or the caliper and rotor on disc-brake axles. Hang the caliper from the suspension with wire or a hook instead of letting it hang from the brake hose. If a drum will not come off because the shoes have worn a lip into it, back off the adjuster rather than hammering on the drum. Disconnect or remove the wheel speed sensor if the service information calls for it, so it is not damaged when the shaft moves.
Typical tools include sockets, a torque wrench, a drain pan, a gasket scraper, penetrating oil and, for bearing-retained axles, a slide hammer with an adapter that bolts to the wheel studs. Have the new seal, cover gasket or sealant and the correct gear oil ready. Get the vehicle-specific torque values, fluid type, fill level and any friction modifier requirement for limited-slip differentials from the service information; do not guess them. Some jobs are poorly suited to inexperienced owners: pressed-on bearings and retaining rings need a hydraulic press and careful cutting, and full-floating hubs may require bearing preload adjustment. If you lack the equipment or experience, a shop can handle those steps.
Remove without avoidable damage
On a C-clip axle, drain the gear oil and remove the differential cover. Rotate the carrier to reach the pinion shaft lock bolt, remove it, and slide the pinion cross shaft out, keeping the spider gears from falling out of place. Push the axle inward from the flange, remove the C-clip from the groove on the shaft end, then pull the shaft out. If the shaft will not move inward, the cross shaft or lock bolt is usually still in place, or the shaft end is damaged. If it moves inward but sticks on the way out, rust, a burr or a wear ridge on the bearing journal is often catching the bearing rollers, which in many C-clip designs ride directly on the shaft. Clean the exposed shaft, rotate it while pulling, and do not pry against the bearing or housing end.
On a bearing-retained axle, remove the retainer nuts through the flange access hole, bolt the slide hammer adapter to the wheel studs, and use short, sharp pulls while keeping the shaft straight. Penetrating oil around the housing end can help where rust holds the bearing race. Avoid prying between the flange and the backing plate, which can bend the plate, and avoid striking the housing. Be cautious with heat: gear oil and seals can burn, and heat can damage bearings, seals and the tone ring. If the shaft still will not release, stop and reassess rather than adding force.
On a full-floating axle, remove the flange bolts or nuts. Some designs use tapered dowels or cone washers that wedge the flange in place; a firm strike to the center of the flange usually frees them. Then slide the shaft out straight, supporting its weight so the splines and any inner seal are not damaged. Keep a drain pan underneath, since gear oil can run out of the hub.
Install and restore the system
Clean the housing bore and inspect the splines, bearing journal, seal surface and tone ring. A pitted or grooved journal can quickly wear a new bearing or seal, so it may be a reason to replace the shaft. Install the new seal square to the bore with a suitable driver. On a C-clip axle, guide the shaft in carefully so the splines do not cut the seal, engage the side gear, push the shaft inward, fit the C-clip, then reinstall the cross shaft and lock bolt as the service information directs, including any thread locker or bolt replacement. Pull the shaft outward to seat the clip in its recess.
On bearing-retained axles, check gasket and backing plate orientation, including any drain holes, before tightening the retainer nuts to the specified torque. Full-floating axles get a new flange gasket and are torqued to the manufacturer specifications. Reinstall the brakes, adjust drum brakes and the parking brake as instructed, and reconnect the wheel speed sensor with its harness routed away from moving parts. Refit the differential cover, refill with the specified gear oil and any required additive to the correct level, and torque the wheel nuts to specification.
Check the completed work
Before lowering the vehicle, spin the wheel and listen for scraping or grinding. Pump the brake pedal until it is firm, since disturbed caliper pistons or shoes can leave the first application low. With the vehicle level, recheck the gear oil level and inspect the axle seal, retainer or flange gasket and the differential cover for fresh leaks.
Road test at low speed first, checking for noise, vibration, pulling and ABS or traction control warning lights. Afterward, inspect again for leaks and follow the manufacturer guidance on rechecking wheel nut torque. Signs that need further diagnosis include humming or grinding that changes with load or turning, a clunk when accelerating, play at the wheel, a persistent ABS light, or gear oil on the backing plate. Oil-contaminated brake linings should be replaced, not cleaned. Record the work in the vehicle's service history so future inspection has a reference point.