How to Remove a Rear Axle Bearing With a Puller
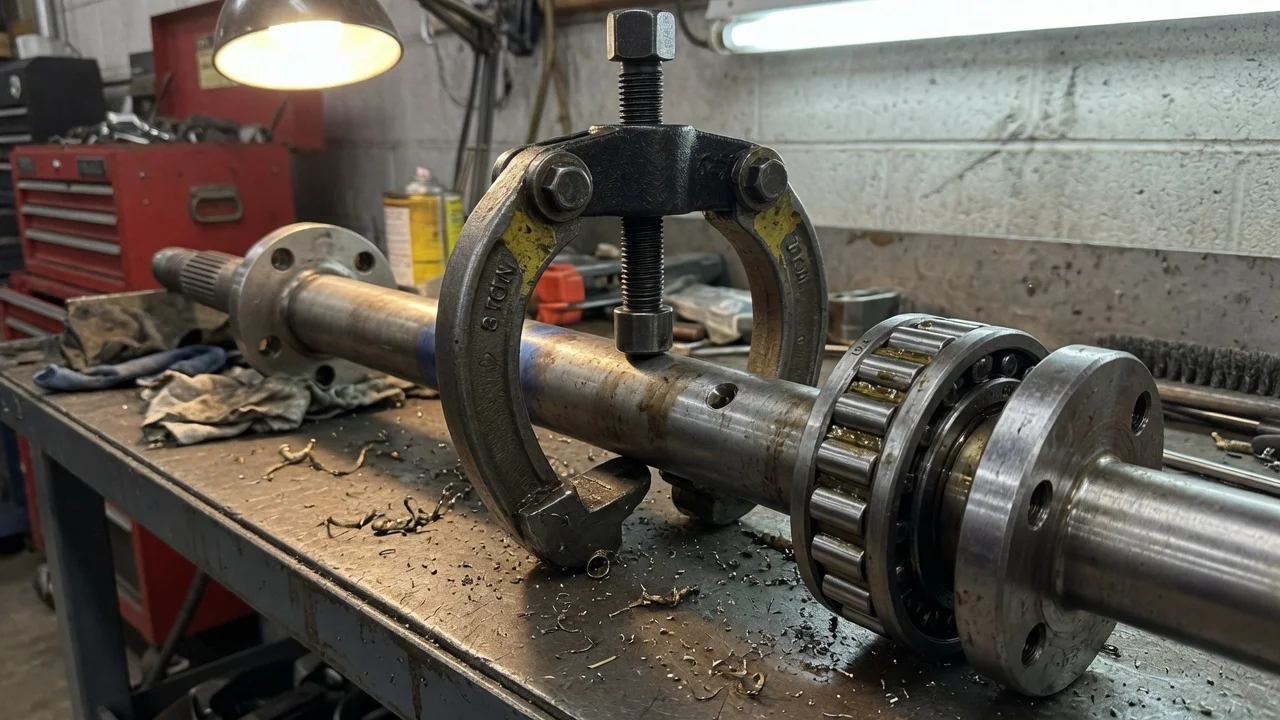
A worn rear axle bearing usually makes a growl or hum that changes with road speed, but the noise alone does not prove the bearing is at fault. On many rear-wheel-drive axles, removing the bearing with a puller is a job an owner can do, as long as they know how their axle retains the shaft and bearing. This guide covers the general sequence, the tools and the checks that matter. Exact specifications come from the service information for your vehicle.
Confirm the part and repair scope
Start by matching the job to your vehicle configuration. This procedure applies to solid rear axles, where a separate axle shaft rides on a bearing at the outer end of the housing. Many front-wheel-drive cars and some independent rear suspensions use a bolt-on hub assembly instead. That unit is replaced as a whole and does not need an axle bearing puller. When ordering parts, use the VIN, axle tag or gear code. Bearing size, seal and retention method can differ between axles fitted to the same model year.
Next, make sure the bearing is actually the problem. A failing bearing usually hums or rumbles more as speed rises, and the sound may change when weight shifts in a turn. Tire wear, differential noise and brake parts can sound similar. During your inspection, look for gear oil on the inside of the wheel, the brake shoes or the backing plate, which points to a leaking axle seal. Check the service history as well, since recent differential work may change the diagnosis. If you are unsure about the noise, a professional road test or chassis-ear check costs less than replacing parts that were fine.
Identify the retention design before you buy tools. On a C-clip axle, a clip on the inner end of the shaft, inside the differential, holds the shaft in place. Once the clip is removed and the shaft slides out, the bearing stays pressed into the axle tube and comes out with a slide-hammer bearing puller. On a pressed-bearing axle, a retainer plate bolts to the housing flange, and the bearing and a retaining ring are pressed onto the shaft itself. That design means pulling the whole shaft and then pressing the bearing off, which is a different job. The repair manual for your axle tells you which design you have.
Prepare tools and safe access
Get the factory manual or a reputable service manual for your exact axle before you start. It gives the torque values, gear oil type and capacity, and any steps specific to your differential. Typical tools include a floor jack, rated jack stands, wheel chocks, a socket set and a torque wrench. You will also need a drain pan, a scraper for the cover gasket surface, a seal or bearing driver, and a slide hammer with an internal puller attachment sized to the bearing. Buy the new bearing and seal together, plus the cover gasket or sealant the manual calls for.
Park on level, solid ground, chock the front wheels and support the axle housing on jack stands. Never work under a vehicle held only by a jack. Once the vehicle is secured, release the parking brake, since drum or rotor removal may require it. Limited-slip differentials, wheel-speed sensors and some brake designs add steps that are easy to get wrong. If you are not comfortable removing a differential cover, handling the pinion shaft lock bolt or adjusting the brakes afterward, leave this job to a shop.
Remove without avoidable damage
On a C-clip axle, the general sequence is as follows. Remove the wheel, then the brake drum, or the caliper and rotor. Drain the gear oil and remove the differential cover. Remove the pinion shaft lock bolt and slide the pinion shaft out far enough to clear the axle ends, without letting the differential gears shift. Push the axle shaft inward, remove the C-clip, and slide the shaft out of the tube. Support it as it comes out so it does not drag across the seal and bore. Do not rotate the differential while the pinion shaft is out, and keep left and right parts separate. Details vary between differentials, so follow the manual.
With the shaft out, you can use the rear axle bearing puller. Remove the old seal first, unless your puller removes the seal and bearing together. Insert the puller jaws behind the bearing's outer race and set them so they grip the race, not the tube. Attach the slide hammer and pull with steady, controlled strokes, keeping the tool in line with the tube. Pulling at an angle can score the bore where the new bearing must sit. Once the bearing is out, inspect the shaft where the rollers ride. Many C-clip axles use the shaft surface as the inner race. If it is pitted or grooved, the shaft needs replacing, or a repair bearing designed for that purpose may be an option.
Pressed-bearing axles work differently. After you remove the retainer plate nuts, a slide hammer with an axle flange adapter draws the shaft out with the bearing still on it. The retaining ring and bearing are then removed on a press, following the method in the manual. Never heat the ring with a torch or nick the shaft surface. Because this step needs a press and care, many owners take the shaft to a machine shop.
Install and restore the system
Clean the bore, check it for burrs or scoring, and confirm the new bearing and seal match the old ones. Drive the bearing in squarely, using a driver that contacts only the outer race, until it reaches the stop or depth given in the manual. Striking the rollers can damage a new bearing before it turns a mile. Note any orientation markings on the bearing and seal. Lubricate the seal lip with the specified gear oil, then drive the seal to its specified position without tilting it.
Slide the axle shaft in carefully, keeping it off the new seal lip and guiding the splines into the side gear. Refit the C-clip, pull the shaft outward so the clip seats, and reinstall the pinion shaft. Tighten the lock bolt to the manufacturer specifications; some manuals call for a new bolt or thread locker. Clean the cover and housing surfaces, apply the specified gasket or sealant, and torque the cover bolts. Refill with the correct gear oil to the specified level, including any friction modifier a limited-slip unit needs. Then reassemble the brakes, adjust drum brakes if fitted, and torque the lug nuts.
Check the completed work
Before driving, pump the brake pedal until it is firm, confirm the parking brake holds, and spin the wheel by hand to check for rubbing or binding. Recheck the gear oil level and look for drips at the cover. Then road test at low speed in a safe area, building speed gradually while listening for the original noise. A new ABS or traction warning light means you should check any wheel-speed sensor you disturbed.
After the drive, check the backing plate and the inside of the wheel for oil. Any wetness suggests a damaged or poorly seated seal. If the noise persists or changes, the source may be the opposite bearing, the differential or pinion bearings, or the tires, and it needs further diagnosis rather than another part. Record the repair in the service history. Inspect the seals and fluid at the next service on your maintenance schedule, especially if your operating conditions include towing or heavy loads.