How to Keep a Car Emergency Kit Organized
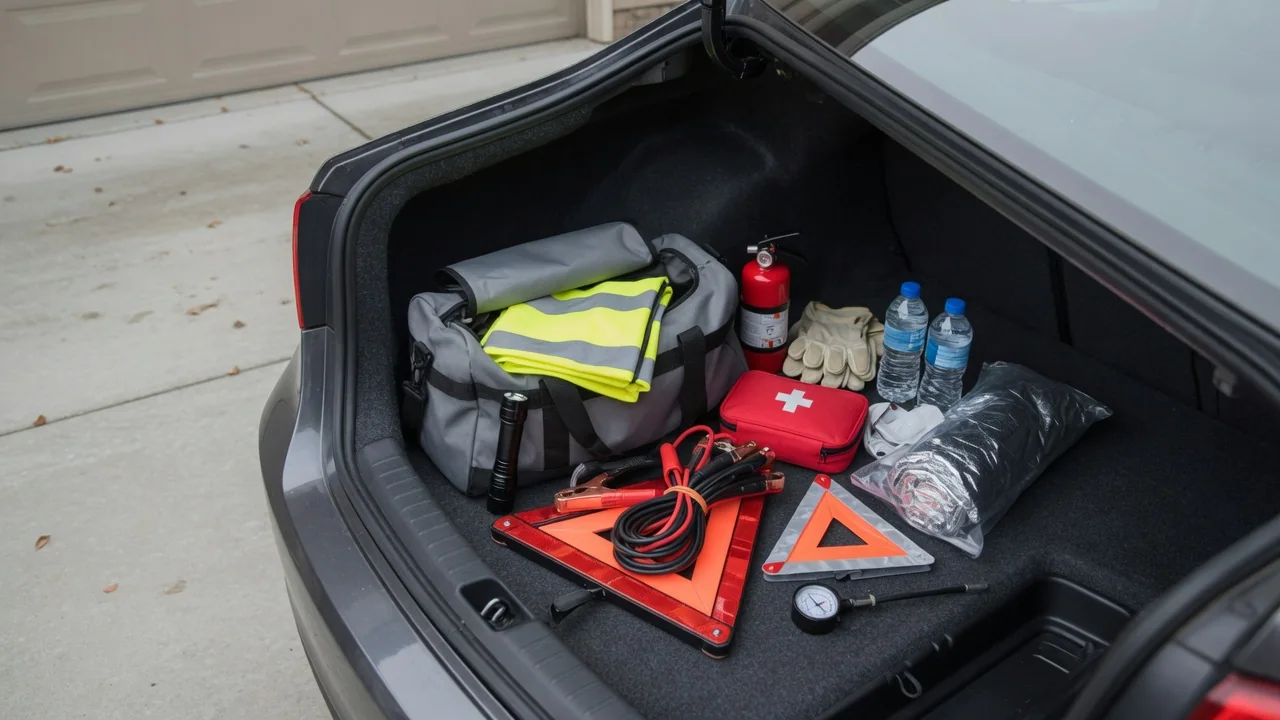
A roadside kit only helps if you can find the right item quickly, in the dark, on a narrow shoulder. Learning how to keep a car emergency kit organized comes down to three habits: storing items where you can reach them, shielding them from cabin and trunk temperatures, and checking them on a regular schedule so nothing is expired or missing.
Group by use
Sorting supplies by the situation they serve is faster than sorting by size or shape. Items for a dead battery, such as jumper cables or a portable jump pack, belong together. Tire supplies, including a pressure gauge, an inflator, and gloves, form a second group. Visibility gear like reflective triangles and a flashlight makes a third, while first aid supplies, water, and a blanket cover personal needs. Separate pouches or small bins, each clearly labeled, let you grab one bundle instead of digging through a loose pile.
Where each group lives depends on the vehicle. Many cars have a well beneath the cargo floor near the spare tire or sealant kit, which suits tire tools, while some SUVs and trucks offer side cubbies or under-seat bins. Check that nothing blocks the spare, the jack, or the tow hook, because those locations differ between models and are described in the owner's manual. Keep a flashlight and a window-breaking tool within reach of the driver's seat rather than buried under luggage in the cargo area.
Protect from heat
A parked car in direct sun can become far hotter inside than the air outside, and that heat shortens the life of many kit items. Batteries in flashlights and jump packs lose capacity faster, adhesive bandages and tape can lose their grip, bottled water can take on a stale taste, and medications may degrade. Tire sealant and aerosol products usually carry storage temperature guidance on the label, so read it before leaving them in the vehicle through a long summer.
Placement reduces exposure. Areas below the window line and out of direct sunlight, such as an under-floor compartment or the footwell behind a front seat, generally stay cooler than a rear parcel shelf or dashboard. An insulated bag adds a buffer for sensitive supplies, though it only slows temperature swings. Lithium jump packs deserve particular attention; follow the maker's stated storage range and consider bringing the unit indoors during extreme weather. Cold matters too, since freezing can split water bottles and weaken battery output.
Refresh contents
A kit drifts out of date quietly, so tie inspections to something you already do, such as seasonal tire changes or clock changes in spring and fall. Open every pouch rather than glancing at the bag. Look at expiration dates on first aid items, sealant, food, and medications. Switch on the flashlight, check the charge indicator on the jump pack, and confirm the inflator runs from the vehicle's power outlet. Replace anything borrowed for a household job and never returned.
Seasonal swaps keep the kit relevant without making it bulky. Before winter, an ice scraper, warm gloves, a compact shovel, and traction aid make sense in snowy regions; in summer, extra water and sun protection earn the space. Look for physical clues as well: corrosion on battery contacts, cracked cable insulation, brittle plastic, or swollen packaging all signal replacement. A simple inventory card kept inside the lid, with the date of the last check written on it, shows at a glance what is due.
Everyday Use and Observations
Daily driving tests an organization scheme better than any plan. Listen for rattles or sliding from the cargo area over bumps and during braking, since loose objects can become hazards in a sudden stop. Use the cargo tie-down points, a net, or hook-and-loop strips on the bin's base to hold it in place. Notice whether groceries, strollers, or sports gear routinely end up stacked on top of the kit; if so, a side pocket or seat-back organizer may serve better.
A quick practice run reveals weak spots. Try reaching the triangles and flashlight at night with the cargo area loaded, and time how long it takes. If the kit sits beneath the cargo floor, remember that a full trunk must be unloaded first, which is awkward beside traffic. Make sure regular passengers and other drivers of the vehicle know where things are. Hatchbacks, sedans, pickups, and vehicles with third-row seating all offer different storage, so arrangements that work in one may fail in another.
Limits and Next Steps
Even a well-kept kit handles only minor trouble. Sealant and an inflator may help with a small tread puncture but not sidewall damage, and a jump start will not fix a battery that no longer holds charge or an underlying charging fault. Warning lights, overheating, fluid leaks, or brake problems call for professional diagnosis rather than roadside improvisation. On a busy highway, personal safety comes first: moving well away from traffic and calling for assistance is often wiser than attempting any repair.
Tailor the final contents to your own vehicle and routes. Confirm in the owner's manual whether the car carries a spare, a sealant kit, or run-flat tires, and where the jacking points and tow hook are located, because these details vary widely. Electric and hybrid vehicles may have specific guidance on jump-starting and towing that differs from conventional models. Keep roadside assistance and insurance contact details with the kit, set a recurring calendar reminder for the next inspection, and adjust the layout whenever your driving habits change.