How to Flush an RV Black Water Tank
The short answer
To flush an RV black water tank, empty it completely at a dump station or full-hookup site, then run clean water into the tank and drain it again until the water leaving the sewer hose runs clear. The black tank is the holding tank that collects toilet waste. A gray tank holds sink and shower water. You can get rinse water into the black tank in three ways: a built-in flush inlet on the side of the RV, a rinse wand inserted through the toilet, or a backflush attachment fitted at the sewer outlet.
Your equipment changes the procedure. If your RV has a built-in flush system, connect a dedicated hose to its inlet and keep the black valve open while it runs. If it has no flush system, you rinse through the toilet or the outlet instead. In every case, check your owner's manual for anything it specifies, such as a pressure limit or a required order of operations.
Methods compared
Method | How water enters | Best for | Watch out for; Built-in flush inlet | Hose connects to a labeled exterior port; spray heads inside the tank rinse the walls | RVs equipped from the factory or with an installed tank rinser | Never run it with the black valve closed and unattended; Rinse wand through the toilet | A wand on a hose is pushed down the toilet into the tank and sprays directly | RVs without a flush inlet, and stubborn buildup under the toilet | Messy if pulled out while spraying; dedicated hose only; Backflush attachment at the outlet | A clear fitting at the sewer outlet sends water back up into the tank | Breaking up material near the valve and outlet | Close the attachment's valve and drain repeatedly so the tank doesn't fill
Before you start
Only dump and flush at an approved dump station or a site with a sewer hookup. Rules on where wastewater can be emptied vary by state, county and campground. Some dump stations also limit how long you can occupy the station or prohibit flushing there, so check posted rules first.
Gather the following:
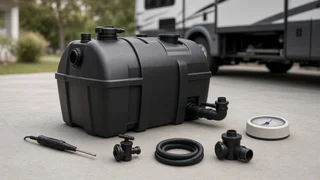
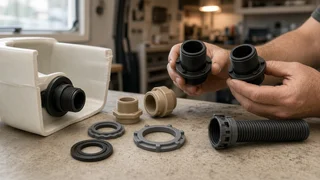
Disposable gloves, plus eye protection if you're using a wand or backflush fitting; A sewer hose in good condition, with secure fittings and a seal or adapter for the dump inlet; A clear elbow or clear fitting at the outlet, so you can see what is draining; A separate flush hose, clearly marked and never used for drinking water; A backflow preventer or vacuum breaker on the water supply connection, if the site doesn't already provide one; A rinse wand or backflush attachment, if your RV lacks a built-in flush inlet; A water pressure regulator, if your manual calls for one or site pressure is unknown; Hand sanitizer or soap and water for afterwards
The flush hose matters for sanitation. A hose that has been near the sewer connection can carry contamination back into your fresh water system, so store it apart from your drinking water hose and label it. Any water filter belongs on the drinking water hose only. The flush hose doesn't need one, and running it through your potable filter would contaminate the filter.
Step-by-step: flushing the black tank
1) Connect the sewer hose
Put on gloves. Confirm both the black and gray valves are closed, then remove the cap from the RV's sewer outlet. Attach the sewer hose to the outlet first, then secure the other end in the dump inlet so it can't pop out under flow. If the outlet cap holds liquid when you loosen it, a valve may be leaking. Have it inspected later.
2) Drain the black tank
Open the black tank valve fully and let the tank empty. Always drain black before gray, because gray water helps rinse the sewer hose afterwards. A fuller tank empties more forcefully and carries solids out better than a nearly empty one. That's one reason many owners wait until the tank is well filled before dumping, rather than draining a small amount at a time. When flow through the clear elbow drops to a trickle, the initial dump is done.
3) Connect the flush water supply
Attach the dedicated flush hose to the water supply, fitting the backflow preventer and any pressure regulator at the spigot end. Then connect the hose to the RV's black tank flush inlet, or to your wand or backflush attachment. Make sure you're using the black tank flush inlet and not the fresh water fill. They can sit close together, and mixing them up contaminates your potable system.
4) Run the rinse with the valve open
Leave the black valve open and turn on the water. With a built-in system, the spray heads rinse the tank walls while the water drains straight out. With a wand, work it down through the toilet and aim it around the tank floor and walls. A strong flow rate helps dislodge buildup, but stay within any pressure limit your manual gives. Excessive pressure can damage fittings.
Stop condition: stay with the RV the entire time water is running. If the tank isn't draining as fast as it fills, water can rise into the toilet and back up into the coach. If you see water rising in the toilet bowl, or the drain slows sharply, shut off the water supply at once.
5) Do fill-and-drain cycles for a deeper clean
A continuous rinse cleans the walls but may not lift solids settled on the tank floor. For a deeper clean, close the black valve, let the tank partly fill with flush water, then shut off the water and open the valve. The surge of draining water carries more debris than a steady trickle. Repeat as needed. Watch the toilet bowl and your tank monitor throughout, and never let the tank fill completely. Your tank capacity and the supply flow rate determine how quickly it fills, so do the first cycle cautiously until you know how your system behaves.
6) Check the result
The flush is complete when the water passing through the clear elbow runs clear with no visible solids or tissue. Don't rely on the tank level monitor to confirm this. Black tank sensors are easily fooled by residue stuck to the probes, so a gauge that still reads partly full after a thorough flush doesn't necessarily mean waste remains.
7) Shut down and drain the gray tank
Turn off the flush water and let the black tank drain fully, then close the black valve. Disconnect the flush hose and store it separately. Next, open the gray valve and drain the gray tank. This flushes residual black water out of the sewer hose. Close the gray valve when it's empty.
8) Disconnect and clean up
Disconnect the sewer hose at the RV end first, lifting it so remaining liquid runs toward the dump inlet. Rinse the hose using the dump station's non-potable rinse water if provided, then cap it and store it. Replace the RV's outlet cap. Remove your gloves and wash or sanitize your hands.
9) Prepare the tank for use
Add enough water through the toilet to cover the bottom of the black tank. This helps keep solids from drying onto the tank floor. If you use a holding tank treatment, add it now according to its label, and check that it's compatible with your system.
Weather and seasonal cautions
In freezing conditions, water left in the flush hose, valves or plumbing can freeze and crack components. Drain and disconnect hoses after use. Follow your manual's winterizing procedure, which usually includes flushing and fully draining the tanks before storage.
When to stop and get professional service
Repeated flushing won't fix every problem. Contact an RV service center or a mobile tank-cleaning service if you notice any of the following:
The tank won't drain even with the valve fully open, which suggests a severe clog or a buildup of solids under the toilet; A valve handle that is stuck, broken or won't seal; Leaks from the tank, valves, flush inlet or fittings; Water backing into the coach even when flushing with the valve open; Sensors that stay inaccurate after thorough cleaning, if you need reliable readings; Visible cracks or damage to the tank or its supports
Professional services use equipment such as high-pressure jetting to clear hardened buildup. Valve replacement and tank repairs involve working on sealed sanitary plumbing and are best left to a qualified technician unless you're experienced with RV plumbing.
How often to flush
There's no single schedule that suits every RV. Many owners do a quick rinse every time they dump and a more thorough fill-and-drain flush periodically, plus a full flush before storage. Increase the frequency if the drain slows, odors persist, or the clear elbow still shows debris after a normal dump.