How to Clean Around Car Badges Without Scratching Paint
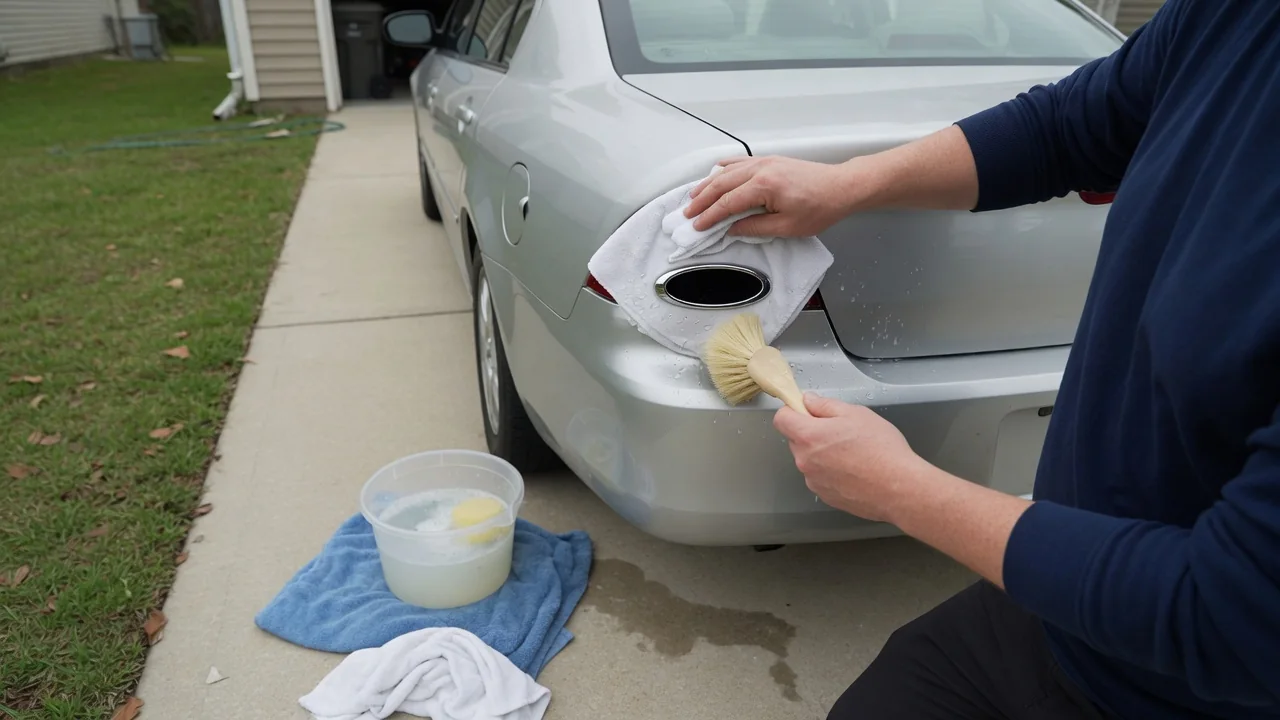
Emblems, lettering, and trim badges collect grime in tight gaps that a wash mitt slides right over. Learning how to clean around car badges without scratching paint comes down to three ideas: soften the dirt before touching it, agitate with soft tools only, and flush everything away thoroughly. The steps below explain each stage and what to watch for on your own vehicle.
Loosen deposits
The buildup around a badge is usually a mix of road film, dried wax or polish residue, pollen, and fine grit that settles into the recess where the emblem meets the panel. That grit is the real threat, because dragging it across clear coat is what leaves fine scratches. Start by rinsing the area with a steady stream of water to carry off loose particles, then apply a pH-balanced car shampoo solution or a diluted automotive all-purpose cleaner and let it sit briefly so it can soften what remains.
Work in the shade on a cool panel so the cleaner does not dry before it has done its job, since dried product can leave its own marks. You will often see the solution turn gray or brown as it runs out from behind the letters, which tells you the deposits are releasing. Old wax residue usually appears as a chalky white line along the badge edges and may need a second application. Chrome-plated plastic, painted emblems, and matte black lettering can react differently, so test any stronger cleaner on a small area first.
Gentle agitation
Once the dirt is softened, a soft detailing brush does the work that fingers and cloths cannot. Choose one with long, flexible bristles, either natural boar hair or a fine synthetic, and a plastic or rubber-wrapped ferrule so no metal can touch the paint. Dip the brush in your wash solution and use light, short strokes or small circles, letting the bristle tips reach into the gaps between letters. The lubrication from the suds matters as much as the brush, so keep the area wet throughout.
Pressure should stay light enough that the bristles flex only slightly; if they splay out flat, you are pushing too hard. Rinse the brush in clean water often so loosened grit does not ride along on the bristles. For narrow channels inside closed letters, a foam swab or a damp microfiber wrapped over a fingertip works well. Avoid toothpicks, stiff toothbrushes, and anything with a hard edge. Raised individual letters trap more dirt than a single solid emblem, so expect scripted model names to take a little longer.
Rinse
Rinsing is where the loosened dirt actually leaves the car, so it deserves as much care as the brushing. Use a gentle, free-flowing stream from a hose and direct it from above the badge so water runs down and through the gaps, carrying suds and grit away rather than driving them deeper. Keep flushing until the runoff below the emblem is completely clear. Any cleaner left behind can dry into streaks or a fresh white line that looks like the residue you just removed.
A pressure washer can be used, but hold it well back and avoid aiming a concentrated jet directly at badge edges. Most emblems are held by adhesive foam tape, sometimes with locating pins, and a harsh spray at close range can lift a corner or force water behind an aging bond. After rinsing, blot the area with a clean, plush microfiber towel instead of wiping. Water tends to hide behind lettering and drip out later, so a puff of air from a blower or a second blot a few minutes on prevents spotting.
Everyday Use and Observations
Making badge cleaning part of a regular wash keeps the job quick, because deposits never get the chance to harden. A few passes with a wet detailing brush at each wash is usually enough once the initial buildup is gone. Pay attention to where your vehicle collects the most grime: rear emblems on hatchbacks, SUVs, and wagons sit in turbulent air that pulls road spray onto the tailgate, while front grille badges gather bug residue. Fender and pillar badges generally stay cleaner but still collect wax.
When applying wax, sealant, or polish, keep the product a finger-width away from badge edges or use a small applicator so it does not pack into the gaps. Inspect the area in good light after it dries. Clean edges should look sharp, with no gray shadow or chalky outline. Fine circular marks or a hazy patch around the emblem suggest a gritty brush or too much pressure on an earlier wash. Dark paint colors show these marks most readily, so they reward extra patience and frequent brush rinsing.
Limits and Next Steps
Soft tools and shampoo have limits. Rust-colored specks, tar spots, tree sap, and hard water mineral rings may not respond to washing alone and often call for a dedicated product such as a tar remover, iron remover, or water spot treatment. Follow the product label and test first, since some chemicals can dull certain badge finishes or trim. If a stain remains after a careful attempt, resist scrubbing harder. More force with the same brush rarely removes a bonded contaminant, but it can easily mark the surrounding clear coat.
Look closely at the badge itself before going further. Peeling chrome plating, cracked plastic, a lifting corner, or visible corrosion around mounting points are conditions that cleaning will not fix, and an emblem with failing adhesive is best handled gently until it can be resecured or replaced. Haze or light scratches already present around the lettering can usually be improved with machine or hand polishing, though the tight space makes that delicate work. A professional detailer is a sensible choice when the marks are deep or the paint is thin or previously refinished.