How to Preserve Original Badges During Restoration
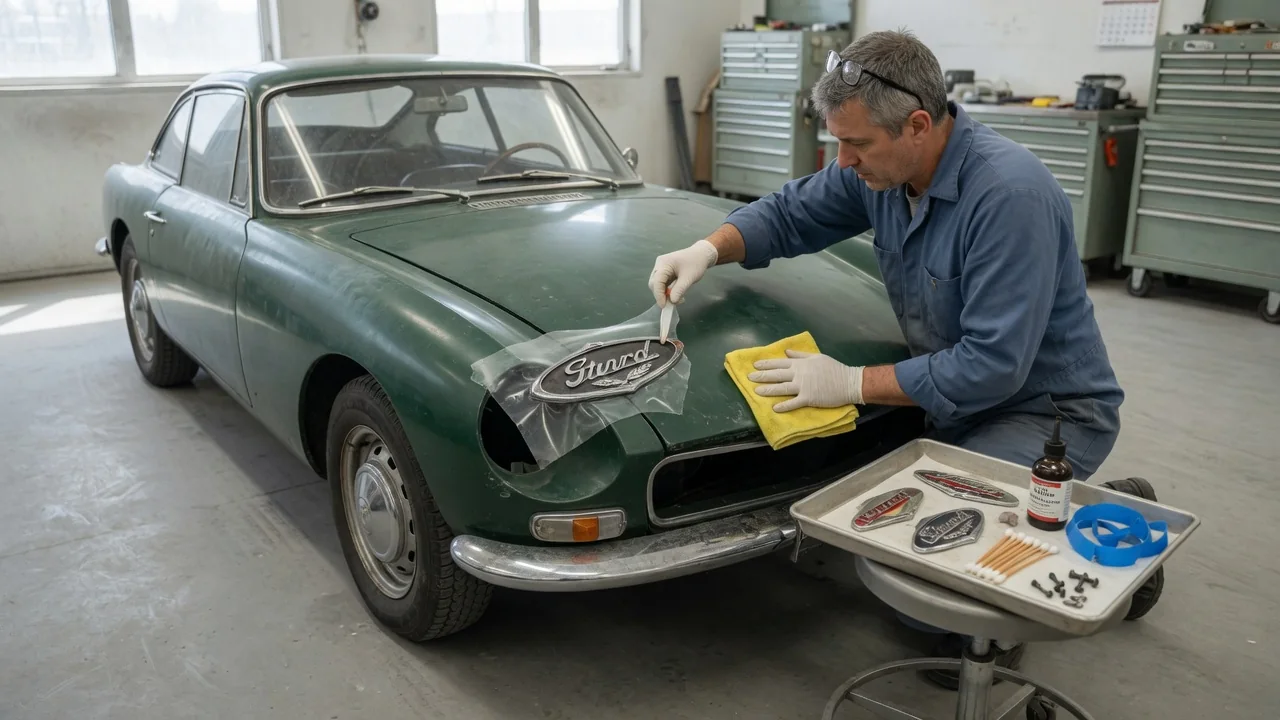
Original badges and emblems carry much of a classic car's identity. Once one is bent, pitted, or broken, an exact replacement can be hard to find. Preserving original badges during restoration comes down to three careful stages. First, remove each badge without stressing it. Second, clean it in a way that suits its material. Third, reattach it so it stays secure and protects the fresh paint around it. These general methods apply broadly, but details vary from vehicle to vehicle.
Removal: Getting Badges Off Without Damage
Before touching a badge, document it. Photograph it from several angles with a tape measure or ruler in the frame. Record its distance from fixed reference points such as panel edges, body lines, or other trim. Some restorers also make a paper or tape template that marks the mounting holes. This record matters more than it seems. Once the body is stripped and painted, the original locations disappear, and a badge set slightly crooked or off-center is one of the more noticeable errors on a finished car.
Next, find out how the badge is held on. Classic badges are commonly secured in one or more of these ways: threaded studs with nuts or speed clips on the back of the panel, push-in clips, rivets, or adhesive. Check behind the panel first, such as inside the trunk lid, under the hood, or behind door and quarter trim. Fasteners there are often the only clue. Do not pry a stud-mounted emblem from the front, because that is a common way to snap studs or bend a thin badge. Penetrating oil on rusted nuts reduces the force needed if you give it time to work. Many older badges are die-cast zinc alloy, often called pot metal, and corrosion can weaken their studs until they break with little warning.
For adhesive-mounted badges, gentle, even warmth from a hair dryer or a carefully controlled heat gun softens the adhesive. You can then saw fishing line or dental floss behind the badge to cut it free. Plastic trim tools are safer than metal blades near paint. Too much heat can warp plastic badges or lift chrome-look finishes, so warm gradually and keep checking. Once each badge is off, bag it with its fasteners and gaskets, label it, and store it padded so it cannot scratch against other parts.
Cleaning: Matching the Method to the Material
The right cleaning approach depends on what the badge is made of, and that is not always obvious. Common materials include chrome-plated pot metal or brass, stainless steel, aluminum that is sometimes anodized, plated or painted plastic, and badges with painted or enamel color fill. Identify the material before choosing a product. Test any cleaner or polish on an inconspicuous area, such as the back or an edge, before treating the visible face.
Start with the mildest method: lukewarm water, a gentle soap, and a soft brush or cloth to lift road film and old wax. Remove old adhesive residue with a remover that is compatible with the badge material, since some solvents can soften plastics or damage painted fill. Wooden or plastic picks help clear debris from lettering and recesses without scratching. Rinse thoroughly and dry completely, particularly around studs and crevices, where trapped moisture can encourage further corrosion.
Polishing calls for restraint. Plating is thin, and aggressive compounds or power buffing can cut through it quickly, especially on raised edges and lettering. Plated plastic is particularly vulnerable. A non-abrasive or very mildly abrasive polish applied by hand is usually the safest choice. Understand what cleaning cannot do. Pitting caused by corrosion beneath the plating will not polish out, and cleaning alone will not restore chipped color fill. Once the badge is clean, a protective wax or sealant suited to the material can help slow future tarnish.
Reattachment: Refitting Badges Securely
Timing comes first. Fitting badges onto paint that has not fully cured can leave impressions or trap solvents, so follow the cure guidance for the specific paint system before installing trim. When ready, use your photos, measurements, and templates to confirm each position. Mark each position with low-tack masking tape rather than relying on memory. Check the mounting holes after bodywork and paint. Filler or paint buildup can narrow them, and they may need careful cleanup so studs pass through without force.
Replace fasteners that are rusted, cracked, or no longer grip, even if the badge itself is original. Speed nuts, push clips, and gaskets are wear items, and fresh ones help the badge sit flat and stay put. Gaskets or pads behind the badge also cushion it against the paint and help keep moisture out of the mounting holes. Tighten nuts on pot metal studs gently and evenly, because overtightening is an easy way to snap a stud you worked hard to save. For badges that rely on adhesive, clean both surfaces with a suitable prep solvent and use automotive-grade double-sided mounting tape. Apply firm, even pressure, and follow the tape's recommended temperature and curing conditions.
Practical Implications and Limits
Classic car emblem preservation involves trade-offs that each owner has to weigh. A badge with light wear may contribute more to a car's originality than a flawless reproduction, and many restorers prefer to keep honest patina rather than risk removing original finish. On the other hand, a badge with deep pitting, missing fill, or broken studs may need professional work such as replating, refinishing, or stud repair. These processes can restore appearance, but they change the original surface. That may matter if the car will be judged or documented as original.
General methods also have limits on any specific car. Mounting systems, materials, and badge placement vary by manufacturer, model, year, and even trim level, and running changes during production were common. A factory service manual, an assembly manual, or a marque club's documentation is the best guide to how a particular badge was fitted. If the attachment method is uncertain, or a badge is rare enough that a mistake would be costly, research further or consult a specialist rather than forcing it. Keeping your removal notes and photos with the car's records also adds lasting value. They help future owners and restorers understand what is original and how it was preserved.