How to Check a Used Vehicle for Fire Damage
The Short Answer
To check a used vehicle for fire damage, start with the paperwork, then inspect with your senses and a flashlight. Look for a branded title or reported fire loss, a lingering smoke or chemical odor, soot in hidden places, melted or warped plastic, heat-damaged wiring, and replacement parts or upholstery that seem out of place for the car's age. Finish with a diagnostic scan and a professional pre-purchase inspection. Fire damage is often concealed by cleaning and cosmetic repairs, so a car that looks clean on the surface can still have damaged wiring, safety systems or structural parts.
Two conditions change the answer significantly. First, if the vehicle is a hybrid or fully electric model, any sign of fire or heat damage near the high-voltage battery or its orange cabling is a stop condition: do not handle those components, and leave assessment to a technician qualified in high-voltage systems. Second, if you find heat damage to seat belts, airbag components or the airbag warning light stays on, treat the vehicle as unsafe until a qualified shop has inspected and repaired those systems.
What Counts as Fire Damage
Fire damage covers more than visibly burned metal. It includes direct flame damage, heat damage that softens or deforms materials without burning them, smoke and soot contamination that penetrates fabrics, foam and air ducts, and secondary damage from firefighting, such as water or extinguishing agents getting into electronics and carpets. A small, contained fire, such as one confined to a section of wiring under the dashboard, can leave the rest of the car looking normal.
A few terms are worth knowing. A branded title is a title that carries a permanent notation about the vehicle's history, such as salvage or rebuilt. A salvage title generally means an insurer declared the vehicle a total loss. A rebuilt or reconstructed title generally means a salvage vehicle was repaired and passed a state inspection. Exactly which brands exist, what triggers them, and whether fire is specifically noted varies by state, so check the rules of the state where the vehicle is titled and the state where you will register it.
Before You Start: What You Need
The vehicle identification number (VIN), taken from the car itself, not only from the listing; The title document, or a clear copy of both sides; A bright flashlight and a small inspection mirror; Disposable gloves and a clean white cloth or paper towel for wipe tests; A phone or camera to photograph anything suspicious; An OBD-II scan tool, if you have one (most passenger vehicles sold in the US from the mid-1990s onward have an OBD-II port); Permission from the seller to inspect thoroughly, including lifting carpet edges and opening the hood; A cool engine: inspect before any test drive so you are not reaching near hot components
Step 1: Check the Title and Vehicle History
Confirm that the VIN on the dashboard, the driver's door jamb label and the title all match. Read the title for any brand. Then run the VIN through a vehicle history report and through the National Motor Vehicle Title Information System (NMVTIS), a federal database that collects title and total-loss information from states, insurers and salvage businesses. A history report may show a reported fire, an insurance total loss, an auction record, or a title transfer through another state shortly before resale, which can be a sign of an attempt to obscure a brand.
Know the limits of this step: a clean report does not prove a car has never burned. If a fire was never reported to an insurer or a state agency, it may not appear anywhere. Ask the seller directly, in writing if possible, whether the vehicle has ever had a fire, smoke, electrical or flood event. A dealer's answer, or a refusal to answer, is useful information either way.
Step 2: Use Your Nose First
Open the doors after the car has been closed up, ideally after it has been sitting in the sun, and smell the cabin before anything else. A lingering burnt, acrid or melted-plastic odor is a strong warning sign. Be equally wary of heavy air freshener, strong perfume or a sharp, unusual chemical smell; ozone treatments and odor-masking products are commonly used to remove smoke smell, and a car that smells aggressively deodorized may be hiding something.
Turn on the heating and air conditioning, cycle through all vent positions and fan speeds, and smell the air coming out. Smoke can settle deep in the ventilation ducts and cabin air filter, where surface cleaning does not reach it. If the seller allows it, look at the cabin air filter; heavy soot or a black, sooty filter is a red flag.
Keep in mind that tobacco smoke leaves an odor too. Cigarette smell alone does not mean the car caught fire, but it does not rule out fire damage either; continue with the visual checks.
Step 3: Inspect the Interior Closely
Fire damage inside a car tends to show up where cleaning is difficult. Work methodically from top to bottom with the flashlight, and use the white cloth to wipe hidden surfaces; black, greasy soot that smears is different from ordinary dust.
Headliner: look for yellowing, browning, sagging or a recently replaced headliner in an otherwise worn interior. Smoke rises, so the headliner often shows it first. Dashboard and trim panels: check for warping, bubbling, a melted texture, cracks near vents, or plastic that feels unusually brittle or sticky. Instrument cluster and screens: a cloudy, distorted or hazy lens can indicate heat exposure. Seats: look for scorch marks, melted seams, and foam that is discolored or hardened. Check under the seats and along the seat rails for soot. Carpet and floor: lift the edges of floor mats and, where possible, the carpet near the sill plates. Look for soot, charring, new carpet in an older car, or carpet that does not fit well. Door panels and pillars: check behind and around speaker grilles and switches for discoloration. Crevices: inspect seat belt slots, the gaps between console pieces, the glove box and the trunk, including under the spare tire cover.
Pull every seat belt out to its full length and inspect the webbing. It should be flexible, evenly colored and free of melting, glazing, stiffness or soot, and it should retract smoothly. Stop here if any belt shows heat damage: seat belts are safety-critical restraint parts, and a heat-damaged belt should be replaced by a qualified repair shop following the manufacturer's procedure, not judged as acceptable by eye.
Step 4: Check Electrical Systems and Wiring
Many vehicle fires start in or spread through wiring, and electrical damage can be both expensive and a renewed fire risk. With the engine off, look under the dashboard on both sides with the flashlight. Warning signs include melted or blistered wire insulation, blackened connectors, wiring that has been spliced with tape or crimp connectors in an otherwise factory-wired area, and new wiring harness sections that do not match the rest.
Open any fuse box you can reach without tools, using the owner's manual to locate them. Look for melted or discolored fuses, scorch marks around fuse sockets, or the wrong rating installed in a slot. Do not remove or swap fuses during a pre-purchase inspection; note what you see and photograph it.
Then test every electrical function: all windows, mirrors, door locks, seat adjusters, interior and exterior lights, wipers, horn, infotainment, climate controls, rear defroster and any driver-assistance features. Intermittent faults or several unrelated features failing at once can indicate heat-damaged wiring.
Watch the dashboard as you turn the ignition on. Warning lights normally illuminate briefly and then go out. If the airbag (often labeled SRS) light stays on, flashes, or never lights up at all, stop and have the airbag system diagnosed by a qualified technician before considering the car further. Do not attempt to inspect airbag modules or their connectors yourself.
Step 5: Inspect the Engine Bay
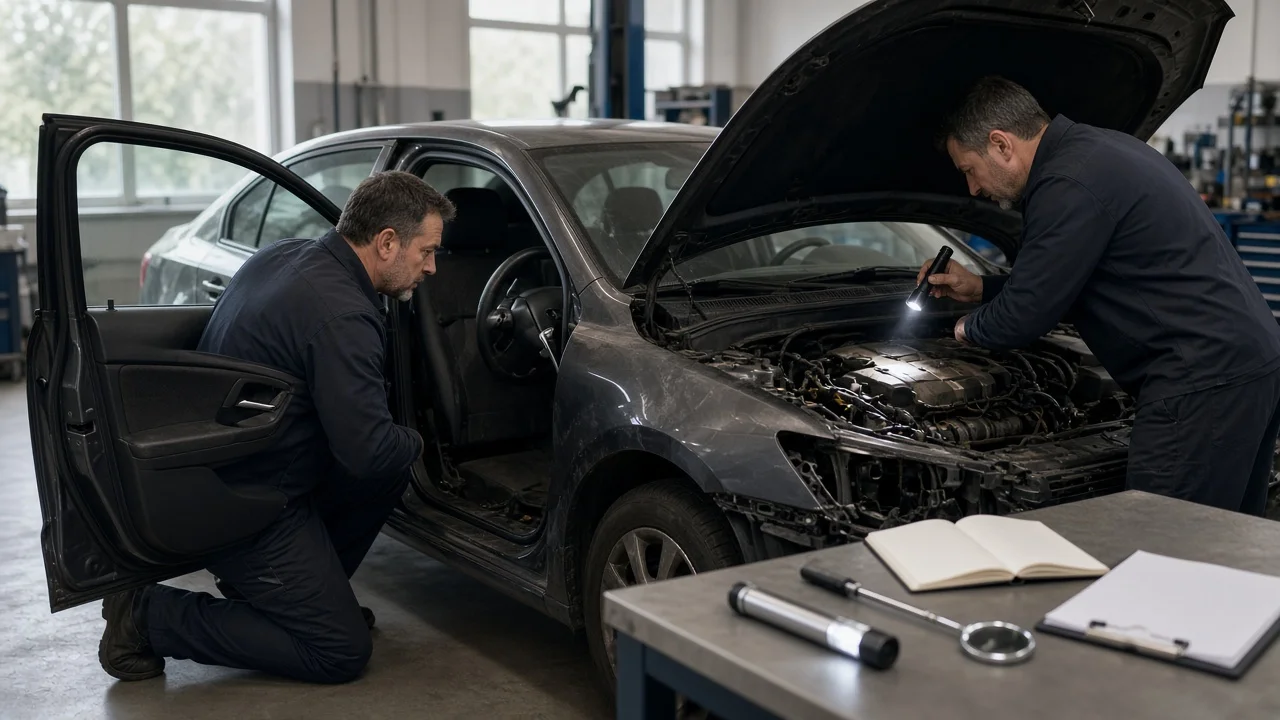
Engine compartment fires are among the most common kinds, and repairs there are often partial. Make sure the engine is cool before you start. Open the hood and check the underside of the hood itself: blistered or bubbled paint, a scorched or missing insulation pad, or fresh paint on the underside of an older hood all deserve questions.
Soot or black residue on the firewall, inner fenders and around the engine; Melted, warped or mismatched plastic engine covers, fluid reservoirs and air intake parts; Hoses that are hardened, cracked, swollen or noticeably newer than their neighbors; Wiring looms with melted insulation, blackened sheathing or improvised repairs; A mix of very new and very old parts in one area, which can point to a localized repair; Residue from fire extinguishing powder in corners and crevices; Rubber seals and weatherstripping around the hood that are deformed or brittle
Stop the inspection and do not start the engine if you smell raw fuel, see fuel leaking, or find damaged fuel lines. Fuel system damage is a fire hazard and should be assessed by a qualified mechanic.
Step 6: Look at the Exterior and Underbody
Walk around the car in good light and look along each panel at an angle. Heat often leaves paint that is blistered, bubbled, dull or discolored. Repainted panels, overspray on rubber trim or glass, and color differences between panels can indicate repair work; on their own they do not prove a fire, but combined with other signs they matter. Check headlight and taillight lenses for warping or haze, and look for deformed rubber seals around doors and windows.
If you can safely see underneath the car without crawling under an unsupported vehicle, use the flashlight to check for soot, melted heat shields, burned undercoating, and damaged fuel or brake lines. Never get under a car supported only by a jack; leave a full underbody inspection to a shop with a lift.
Extra Caution for Hybrid and Electric Vehicles
Hybrid and electric vehicles carry high-voltage battery packs and cabling, usually marked with orange insulation. Fire or heat damage to these systems can create electric shock hazards, and damaged lithium-ion batteries are known to be capable of reigniting after an initial fire has been put out. Do not touch, open or probe high-voltage components or orange cables. If the history, odor or visual inspection suggests any fire event, the battery and high-voltage system need assessment by a technician trained on that vehicle's high-voltage system before purchase. Procedures, battery locations and warning indicators differ between makes and models, so rely on the manufacturer's information for the specific vehicle.
Step 7: Scan for Codes and Test Drive
If you have an OBD-II scanner, plug it in and read stored and pending trouble codes. Note that generic scanners typically read engine and emissions codes; airbag, body and battery-management faults may require a more capable tool or a dealer-level scan. Recently cleared codes, or a monitor status showing that readiness tests have not completed, can mean someone cleared faults shortly before the sale.
Only take a test drive if none of the stop conditions above applied. During the drive, keep the windows up for part of it and pay attention to any burning smell, smoke, warning lights, flickering electronics or climate system odors once the engine and heater are fully warm. Heat can bring out smells that were not noticeable when the car was cold.
Step 8: Get a Professional Pre-Purchase Inspection
A do-it-yourself check can rule a car out, but it cannot fully clear one. Ask an independent mechanic, ideally one familiar with the make, to perform a pre-purchase inspection, and tell them specifically that you are concerned about fire or smoke damage. A shop can put the car on a lift, inspect wiring and underbody components properly, run a full-system diagnostic scan, and check safety systems. For a vehicle with a branded title, or with signs of a significant past fire, a collision repair or body shop can also assess whether structural parts were affected, since high heat can weaken metal.
Where to Look and What It Can Mean
Area | Warning sign | Why it matters; Paperwork | Salvage, rebuilt or similar title brand; reported fire or total loss | Confirms a serious past event and can affect insurance and resale; Cabin air | Smoke odor, especially from vents, or heavy odor masking | Smoke residue persists in foam, fabric and ducts; Headliner and trim | Yellowing, sagging, warping, new parts in a worn interior | Signs of heat or smoke exposure and cosmetic concealment; Seat belts | Melted, glazed, stiff or sooty webbing | Restraint may not perform as designed; Wiring and fuses | Melted insulation, scorched connectors, taped splices | Ongoing electrical faults and renewed fire risk; Engine bay | Soot, melted plastics, mismatched new parts | Indicates a localized fire and partial repair; Exterior | Blistered paint, warped lenses, overspray | Heat exposure or repair work; High-voltage system | Any heat damage near battery or orange cables | Shock and reignition hazard; requires qualified assessment
Completion Check: When Is the Inspection Done?
The VIN matches across the car and the title, and you have checked the title brand, a history report and NMVTIS; You have asked the seller about past fire, smoke, flood or electrical issues and noted the answer; The cabin and vents have been checked for odor with the climate system running; Interior hidden areas, seat belts, wiring under the dash and accessible fuse boxes have been inspected and photographed; All electrical functions have been tested and warning lights behave normally at startup; The engine bay, exterior and visible underbody have been checked; A diagnostic scan has been completed; An independent pre-purchase inspection has been done, or you have decided not to proceed; No stop condition remains unresolved
Deciding Whether to Buy
If you find no warning signs and a professional inspection agrees, the car may be a reasonable purchase on its merits. If you find isolated evidence of a minor, well-documented repair, such as a small electrical fault professionally fixed with receipts, weigh it with your mechanic's opinion and the price. If you find smoke contamination throughout the cabin, heat damage to wiring or safety systems, an undisclosed title brand, or any fire-related damage on a hybrid or electric vehicle, walking away is usually the safer choice. Even when a fire-damaged vehicle has been repaired, it may be harder to insure, finance and resell, and hidden damage can surface later.
Limits of This Guide
This guide covers general inspection principles for the US market. It does not include repair costs, failure rates or statistics, because no verified figures were available for this article. Title branding laws, disclosure requirements for dealers and private sellers, and inspection rules for rebuilt vehicles differ by state, so confirm current requirements with the state motor vehicle agency. Component locations, warning-light behavior and safety procedures vary by make, model year and powertrain; check the owner's manual and manufacturer service information for the specific vehicle.