How to Screen a Used Car for Flood Damage
Floods put large numbers of damaged vehicles into circulation. Some are repaired honestly and sold with a branded title, while others are dried out, cleaned up and sold far from where the water rose. A car that sat submerged in flood water can look fine on a lot and still develop electrical faults, corrosion and mold months later. This guide shows how to screen a used car for flood damage before you buy, what the evidence means, and when to walk away.
The Short Answer
To screen a used car for flood damage, work in three layers. First, check the paper trail: the title, a vehicle history report and the car's registration locations. Second, inspect the car yourself for physical traces of water ingress: odors, silt, water lines, corrosion in places that normally stay dry, and electrical faults. Third, have an independent mechanic do a pre-purchase inspection that includes a diagnostic scan and a look underneath on a lift. No single check proves a car is clean. A clean history report does not rule out flooding, because damage that was never reported to an insurer may never appear. Confidence comes from several checks pointing the same way.
In this guide, "flood damage" means damage from the car sitting in standing or moving water, such as storm flooding, a river overflow, or a car sunk in water at a boat ramp. It does not mean a minor leak from a worn door seal or a sunroof drain, although those can leave some of the same clues. How serious flood damage is depends mainly on how deep the water got, how long the car stayed in it, and whether it was fresh water or salt water.
Why Flood Damage Matters
Modern vehicles run on networks of electronic control modules, sensors, wiring harnesses and connectors. Many of these sit low in the cabin, under seats, beneath carpets or in the lower dash, where floodwater reaches first. When a car is flooded with water inside, the water carries mud, sewage, fuel, oil and, in coastal floods, salt. This contamination wicks into wiring insulation and connector pins and can keep causing corrosion long after the car looks dry. Problems often show up gradually as intermittent faults, warning lights, failed modules or erratic accessories, instead of all at once.
Beyond electronics, water can damage the engine if it was drawn into the intake. It can contaminate transmission fluid, differential oil and brake components, rust fasteners and seat mechanisms, and soak foam padding and carpet underlay. Soaked padding and underlay can harbor mold and bacteria. Airbag and seat belt systems include sensors and connectors in the floor area, so water ingress also raises safety concerns.
Before You See the Car: Check the History
Start with documents. They cost little and can end the search before you travel.
Get the VIN (vehicle identification number) from the seller and confirm it later matches the VIN on the dashboard plate, the door jamb label and the title. Run a vehicle history report from a commercial provider. Look for flood, salvage, junk, rebuilt or similar title brands, insurance total-loss records, and auction records. Use the free VINCheck tool from the National Insurance Crime Bureau (NICB). It searches participating insurers' records for vehicles reported as stolen or as salvage, including flood losses. Consider a report that draws on the National Motor Vehicle Title Information System (NMVTIS). This federal database collects title and brand information from participating states and certain salvage and insurance entities. Look at where the car has been registered. Registration in an area that recently had major flooding, followed by a quick re-titling in another state, deserves a closer look. Moving a car across state lines can sometimes drop a brand from the paperwork, a practice called title washing. Read the title itself. Brand terminology and rules differ by state, so if you see a term you don't recognize, check with that state's motor vehicle agency.
Remember the main limit of these checks. A history report only reflects what was reported. If an owner paid for repairs privately, had no comprehensive coverage, or the car was never claimed as a loss, the flood may leave no record at all. A clean report means the next steps still matter.
What to Bring to the Inspection
A bright flashlight, ideally with a narrow beam; A small inspection mirror, or your phone's camera to see into tight spaces; Disposable gloves and, if you plan to lift carpet or panels, a dust mask; A clean white cloth or paper towel for checking fluids and wiping surfaces; An OBD-II scanner if you have one, for reading stored and pending trouble codes; A notepad or your phone to photograph anything suspicious
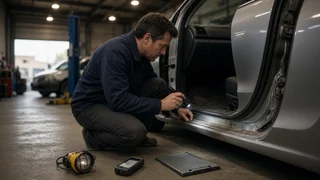
Inspect in daylight with the car dry and parked on level ground. Before you lift carpet edges, open panels or pull trim, ask the seller for permission. A seller who refuses any close look is giving you information too.
Step-by-Step Physical Inspection
Step 1: Use Your Nose First
Open the doors after the car has been closed up for a while, and smell before you look. A musty, mildewy or sour odor is one of the most common signs of past flooding. It is hard to remove fully because it comes from soaked padding and hidden cavities. Be equally wary of a very strong air freshener, a fresh shampoo smell, or a heavily perfumed cabin in a car that otherwise shows normal wear, since these can be used to mask odors. Run the HVAC system on both fresh-air and recirculation, because water and debris in the ductwork or blower housing can produce a damp smell when the fan starts.
Step 2: Examine the Carpet, Floor and Seats
Press on the carpet in several spots, including under the seats. Dampness, a crunchy feel or stiffness can indicate water that dried with sediment in it. Look for carpet that seems newer than the rest of the interior, doesn't fit well, or doesn't match in color or texture. New carpet in an older car isn't proof of flooding, but you should ask why it was replaced. With permission, lift a carpet edge at the door sill or in the footwell and look for silt, sand, water stains or rust on the metal floor pan. Shine a light on the seat rails, seat mounting bolts and adjustment mechanisms. Rust on these normally protected parts, especially in a car from a dry climate, is a strong warning sign. Check upholstery for tide marks, discoloration or uneven fading on the lower seat cushions and door panels.
Stop condition: do not unplug connectors or remove the seats yourself. Many vehicles have airbag, seat belt pretensioner and occupant-detection wiring under the front seats. Disturbing it can set fault codes or create a safety risk. Leave any work that involves removing seats or airbag-related trim to a qualified technician.
Step 3: Pull the Seat Belts All the Way Out
Extend each seat belt to its full length. The end of the webbing normally stays wound inside the retractor, so if water reached it, you may see staining, mud, grit or a water line near the end. Check that each belt retracts smoothly. A slow or gritty retraction can point to contamination inside the mechanism.
Step 4: Open the Trunk and Spare-Wheel Well
Remove the trunk floor cover and look in the spare-wheel well or under-floor storage area. Water collects here and is often missed during a cleanup. Look for standing water, mud, rust, a water line on the walls, and corrosion on the jack, tools or spare wheel. Also check behind trunk side panels if they can be opened without tools.
Step 5: Look High as Well as Low
If the water reached the windows, there may be traces higher up. Check the headliner for stains or sagging. Look inside dome lights, map lights and visor vanity lights for moisture or dirt. Examine the instrument cluster and any glass-covered displays for fogging, droplets or a dirt film behind the lens. Do the same with the headlamp and taillamp housings. A distinct line of moisture or debris inside a light lens can suggest the car sat in water up to that height.
Step 6: Inspect Under the Dashboard and Inside the Doors
Using your flashlight and mirror, look under the dashboard on both sides. Check for dried mud on wiring bundles, rust on bracket screws and steering column fasteners, and green or white corrosion on any visible connectors. Under the dash is one of the hardest places to clean, and these parts should not be rusty in a well-kept car. Open each door and check the bottom edge and drain holes for silt or debris, and look at the door panel bottoms for water staining.
Step 7: Check the Engine Bay
Look for silt, sand, leaves, grass or a debris line in crevices, on top of the transmission, around the radiator and in hard-to-reach corners. Pressure washing often misses these spots. Check the air filter box if it opens easily. A water-stained, dirty or damp air filter, or debris in the intake, is a serious warning because it suggests water may have reached the engine's intake. Pull the engine oil dipstick and wipe it on a white cloth. Oil that looks milky, foamy or light brown can indicate water contamination. The same appearance can also have other causes, such as a head gasket problem, so treat it as a reason to stop and get a professional opinion. If the transmission has a dipstick, check that fluid as well. Cloudy or milky fluid is a red flag. Look at the fuse box and relay box. Corrosion on terminals or water marks inside the cover are warning signs. Compare the age of under-hood parts. A mix of very new and very corroded components can indicate selective repairs after water damage.
Step 8: Look Underneath
Without getting under the car unsafely, use a flashlight to view what you can of the underbody, suspension and exhaust from the sides. Look for mud packed in frame rails, unusual rust on fasteners and brake lines, and debris caught in heat shields. Light surface rust underneath is normal in regions that use road salt, so judge it against the car's age and history. A thorough underbody check requires a lift and is part of a professional inspection. Never crawl under a car supported only by a jack.
Step 9: Test Every Electrical Function
Turn the ignition on and watch the dash warning lights. They should illuminate briefly during the bulb check and then go out once the engine runs. A warning light that never comes on can mean a bulb was removed to hide a fault. Then test everything you can operate: all windows and locks from every switch, mirrors, power seats, seat heaters, interior and exterior lights, turn signals, wipers and washers, horn, infotainment, every speaker, phone pairing, cameras, parking sensors, climate controls, keyless entry and push-button start. Intermittent behavior, flickering, slow motors, crackling speakers or a function that works only some of the time can all point to corroded wiring or connectors.
If you have an OBD-II scanner, plug it in and read stored and pending codes. A basic scanner usually reads only the powertrain modules. A professional scan tool can query the body, airbag, ABS and network modules, where flood-related communication faults often appear. Be cautious if all codes appear to have been cleared just before the sale, which some scanners can indicate through incomplete readiness monitors.
Step 10: Take a Test Drive
Drive the car through a range of speeds, including a few stops and turns. Watch for warning lights that appear once the car warms up, rough running, hesitation, harsh or delayed shifts, grinding or pulsing brakes, and unusual noises from wheel bearings. Afterward, sit inside with the engine running and the climate system on, and check again for odors and window fogging.
Reading the Flood Level
If you find evidence of water, try to estimate how high it rose. The flood level is one of the best indicators of how much of the car was affected. The bands below are general guidance. Where critical components sit varies between models, so the exact consequences depend on the vehicle.
Approximate water depth | Typical clues | What may be affected; Below the floor | Mud on the underbody, suspension and lower engine bay; a dry interior | Brakes, wheel bearings, exhaust, lower body fasteners, possibly fluids if seals were submerged; At or just above the floor | Damp or stained carpet, rust on seat rails, silt under carpet and in the trunk well | Carpet and padding, under-seat wiring and modules, airbag and seat sensors, floor pan corrosion; Up to the seats or lower dash | Stained seat cushions, debris under the dash, water at the end of seat belts | Seat mechanisms, dash wiring, more control modules, possibly the engine intake; Dash level or higher | Moisture in the instrument cluster or lights, stained headliner, debris high in the engine bay | Most of the electrical system, the engine and transmission if water entered, much of the interior
Several factors make damage worse. Salt water is far more corrosive than fresh water. A car that stayed submerged for a long time is generally in worse condition than one that was briefly splashed. Starting or cranking the engine while water was in the intake can cause severe internal engine damage, sometimes called hydrolock. A car submerged in water up to the dash, or a car sunk in water completely, is usually treated by insurers as a total loss, although that decision depends on the insurer, the vehicle's value and repair costs.
Signs of a Cover-Up
New carpet, seat covers or upholstery in an otherwise worn interior; Heavy air freshener or a strong cleaning-chemical smell; Rust on screws, bolts and brackets inside the cabin; Scratches or tool marks on interior trim clips, seat bolts or dash panels, suggesting recent removal; A history of quick ownership changes or re-titling across state lines after a regional flood; A price well below comparable cars without a clear explanation; A seller who resists a mechanic's inspection, rushes the sale, or offers only cash terms
Get an Independent Pre-Purchase Inspection
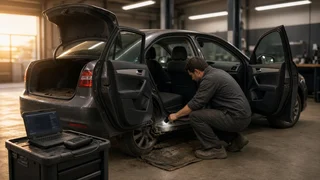
Even after a careful personal check, have the car inspected by an independent mechanic or inspection service that you choose, not one the seller recommends. Tell the inspector specifically that you are worried about flood damage. A qualified technician can put the car on a lift, scan all control modules, inspect connectors and harnesses where it's safe to do so, check fluids for water contamination, and look at areas behind trim that you shouldn't disturb yourself. If the car is a newer model with complex electronics, a dealer service department for that brand may have the most complete diagnostic tools.
Making the Decision
If you find clear, undisclosed evidence of flood damage, the safest choice for most buyers is to walk away. Undisclosed flooding also suggests the seller may be hiding other problems.
Some cars are sold openly with a flood or rebuilt title at a reduced price. Buying one can make sense only if you understand the trade-offs. Future electrical problems may be hard to predict. Some lenders may decline to finance the car, some insurers may limit coverage, and resale value is typically lower. Before committing, get a professional inspection, ask for repair records showing what was replaced, and check financing and insurance options in advance.
If you have already bought a car and later discover undisclosed flood damage, document everything with photos and inspection reports. Then contact the seller in writing. If that doesn't resolve the issue, contact your state's consumer protection office or attorney general's office and your state motor vehicle agency, and consider speaking with an attorney. Disclosure requirements and buyer remedies vary by state and by whether you bought from a dealer or a private seller.
Completion Checklist
Your screening is complete when you can confirm each of the following:
The VIN matches on the dash, door jamb and title; The history report and title show no flood, salvage or similar brands, or any brands are disclosed and understood; The car's registration history makes sense, with no unexplained re-titling after a known flood; The cabin has no musty odor or masking scents; The carpet, padding, trunk well and seat belt ends are dry, with no silt or water lines; There is no unusual rust on seat rails, under-dash fasteners or interior screws; The lights, instrument cluster and screens show no internal moisture or debris; The engine bay is free of silt lines, and the air filter and fluids look normal; Every electrical feature works consistently, and warning lights behave normally; The test drive revealed no faults or new warning lights; An independent mechanic has inspected the car, including a full module scan and an underbody check on a lift
If any item fails, treat it as a reason to dig deeper or walk away, not as something to explain away. A flood-damaged car can hide its past for a while, but careful screening greatly lowers the chance of buying one by mistake.