How to Check a Used Truck for Flood Damage
To check a used truck for flood damage, start with the paperwork, then inspect it physically. Run the VIN through a title and history search, and look for title brands such as "flood," "salvage," or "rebuilt." Then inspect the cab, bed, frame, drivetrain fluids and electrical system for the traces water leaves behind: silt, a musty smell, corrosion in unusual places, water lines and electrical faults. A clean title does not prove a truck is flood-free. Flooded vehicles are sometimes sold privately or retitled before any insurance claim is recorded. The physical inspection matters as much as the records, and a pre-purchase inspection by an independent mechanic is the most reliable final check.
Why Flood Damage Matters on a Truck
Water that reaches the cab, engine bay or drivetrain can cause problems that appear weeks or months later. Modern trucks rely on wiring harnesses, control modules, sensors and connectors spread throughout the cab and chassis. Once moisture and contaminants get into these components, corrosion can keep spreading after the truck looks dry. Water can also enter the engine, transmission, transfer case, differentials and wheel bearings and contaminate the lubricants that protect them. Saltwater flooding is generally more damaging than freshwater because salt speeds up corrosion. Airbag and seat belt pretensioner circuits can also be affected, so flood damage is a safety issue as well as a reliability and resale issue.
Trucks carry some specific risks. Higher ground clearance can make them look as if they escaped high water when they didn't. Under-bed spare tire hoists, trailer wiring, 4WD components and axle breather tubes all sit low or exposed. Because trucks are often driven through standing water, some sellers explain away mud and rust as normal use. That makes careful inspection more important.
What You Need Before You Start
The truck's 17-character VIN, taken from the dashboard plate visible through the windshield and confirmed against the driver's door jamb label and the title; A bright flashlight, ideally with a narrow beam for crevices; A small mirror or inspection camera for hard-to-see areas (optional); Clean paper towels or white rags for checking fluids; Gloves and clothing you don't mind getting dirty; An inexpensive OBD-II scan tool, if you have one, to read stored trouble codes; Daylight and a dry day, so moisture and stains are easier to spot; Permission from the seller to open doors, lift carpets at the edges, check fluids and take a test drive
Step-by-Step Flood Damage Inspection
Step 1: Check the Title and Vehicle History
Before you travel to see the truck, look up its records. In the US, the National Insurance Crime Bureau offers a free VINCheck lookup that can show whether an insurer reported the vehicle as a total loss or theft. A National Motor Vehicle Title Information System (NMVTIS) report shows title brands recorded by participating states. Commercial vehicle history reports can add registration history, accident reports and service records. Look for flood, salvage, rebuilt, reconstructed or junk brands. Also watch for registration in an area that recently flooded, followed by a quick move to another state and a new title. Moving a vehicle between states to obtain a title without the earlier brand is known as title washing. Branding terms and rules differ by state, so if a brand's meaning is unclear, check with the titling state's motor vehicle agency.
Stop condition: if the records show a flood brand the seller didn't disclose, or the VINs on the dash, door jamb and title don't match, treat the truck as high risk. Don't continue the purchase until the discrepancy is fully explained.
Step 2: Use Your Nose and Eyes When You First Open the Cab
Open the doors and smell the interior before the seller has a chance to air it out. A musty, mildew or damp-basement odor is one of the most common signs of water intrusion. A very strong air freshener, a heavy fragrance or a fresh shampoo smell can be an attempt to cover it. Look at the overall condition too. Brand-new carpet, upholstery or headliner in an older, well-used truck isn't proof of a flood, but you should ask about it.
Step 3: Inspect Carpets, Floors and Seats
Press firmly on the carpet in several spots, especially the footwells and under the seats. It should feel dry and firm, not damp or spongy. Lift a carpet edge or floor mat where you can do so without damage. Look for silt, sand, water stains, rust on the metal floor pan or corroded rubber drain plugs. If the truck has rear seats or under-seat storage, fold or lift them and check underneath. Mud and debris tend to collect in these areas. Shine a light on the seat mounting bolts and seat tracks. Rust on unpainted interior hardware is a strong warning sign, because these parts normally stay dry. Check whether the carpet is a different color, fit or texture from the rest of the interior. Mismatches can indicate replacement.
Step 4: Check Seat Belts, Door Panels and Hidden Crevices
Pull each seat belt all the way out and look at the webbing near the end. Stains, discoloration, grit or a damp feel on the part normally rolled up in the retractor suggest the belt sat in water. Belts that retract slowly or stick are another warning sign. Inspect the lower door panels, door seals, the area under the dashboard, the glove box and the center console for dried mud, a tide line or stains. Look at screws, brackets and pedal mounts under the dash for rust. These parts are rarely replaced during cleanup, so they often keep evidence that surfaces don't.
Step 5: Look for Condensation and Water Lines
Check the headlights, taillights, fog lights, gauge cluster and any interior screens for fogging, droplets or a dried residue line inside the lens. A single foggy headlight can have other causes, but moisture in several sealed units is more telling. Walk around the truck and look for a consistent horizontal line of dirt or discoloration on the body, inside the wheel wells, on the engine bay firewall or inside the door jambs. A visible water line can show how high the water rose.
Step 6: Inspect the Bed, Spare Tire and Rear of the Truck
Many pickups carry the spare tire on a cable hoist under the bed. Lower the spare if you can do so safely and inspect the hoist, cable and tire for unusual corrosion, silt or a seized mechanism. Look in the bed corners, behind and under any bed liner, and around the tailgate hinges for packed mud or debris. Check the trailer wiring connector and hitch receiver area. Heavy corrosion inside the connector pins can point to submersion, though it can also come from road salt or normal exposure, so weigh it alongside other signs.
Step 7: Inspect the Engine Bay
Look for silt, leaves, grass or debris in places that are hard to clean, such as behind the radiator, around the battery tray, in fuse box corners and in the air intake path. Open the air filter housing if it is easy to access. A water-stained, wrinkled or dirt-caked filter, or residue inside the housing, suggests water reached the intake. Check electrical connectors and the fuse and relay box for green or white crusty corrosion. Look for rust on bolt heads, brackets and hose clamps that seems out of place for the truck's age and climate. Note whether the engine bay looks freshly pressure-washed while the rest of the truck doesn't. Ask the seller why.
Step 8: Check the Fluids
With the engine off and cool, pull the engine oil dipstick and wipe it on a white towel. Milky, light brown or frothy oil can mean water contamination, though a failing head gasket can produce a similar look. Check transmission fluid where the truck has an accessible dipstick; some modern transmissions don't, and checking them needs a procedure from the service information. Water-contaminated fluid in the differentials and transfer case also tends to look milky. Those components are usually checked through a fill plug, so ask a mechanic to inspect them rather than removing plugs yourself. Axle and transfer case breather tubes let water in when a truck sits submerged, which makes these fluids worth checking on any 4WD truck.
Step 9: Look Underneath
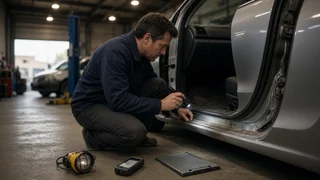
From a safe position beside the truck, use a flashlight to look at the frame rails, crossmembers, brake lines, fuel lines, exhaust and the backs of the wheels. Surface rust is normal on many trucks, especially in areas that use road salt. Be more suspicious of heavy scaling on parts that should be fairly clean, packed silt inside frame openings, or fresh undercoating sprayed over an otherwise older chassis. Fresh undercoating isn't proof of anything, but it can hide corrosion. Safety: never crawl under a truck held up only by a jack. If you need a closer look, have it done on a lift by a shop.
Step 10: Test Every Electrical Feature
Turn the key or push-button start to the on position before cranking. Confirm that all dashboard warning lights illuminate briefly and then go out. An airbag or SRS light that stays on, or that never comes on at all, needs professional diagnosis. Then start the truck and test every electrical feature: power windows and locks, mirrors, seats, lights, turn signals, wipers, horn, HVAC fan at every speed, infotainment, backup camera, USB ports, 4WD engagement switches, trailer brake controller and any power tailgate or running boards. Intermittent faults, flickering, or features that work only some of the time are typical of corroded wiring. If you have an OBD-II scanner, read stored codes. A long list of unrelated electrical codes is a warning sign, and a scan showing no codes at all right after a recent battery disconnect or code clear means little.
Step 11: Take a Test Drive
Drive the truck long enough for it to reach full operating temperature, on a mix of roads if possible. Watch for warning lights, rough idle, hesitation, harsh or erratic shifting and grinding or humming from the wheels or axles, which can point to water-damaged bearings. Engage 4WD where safe and appropriate. After the drive, check the cab again for any new musty smell as the heater warms the interior and recheck the windows for fogging.
Step 12: Get a Professional Pre-Purchase Inspection
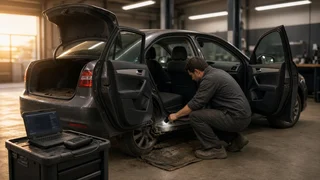
Even a careful buyer can miss well-hidden damage. Ask an independent mechanic you choose, not one recommended by the seller, to inspect the truck on a lift. Tell them specifically that you want it checked for flood damage. A shop can inspect connectors and harnesses behind panels, check differential and transfer case fluids, scan all control modules rather than only the engine computer, and look at areas you can't reach safely. A seller who refuses an independent inspection is giving you useful information.
Quick Reference: Common Flood Damage Signs
Sign | Where to look | What it may indicate; Musty or mildew odor | Cab, especially with HVAC running | Water absorbed into carpet, padding or ductwork; Silt, sand or debris | Under seats, under carpet, engine bay crevices, bed corners | Water entered and receded; Rust on seat bolts, tracks or under-dash screws | Interior hardware | Interior was wet for some time; Stained or gritty seat belt webbing | End of fully extended belts | Belts were submerged; Moisture inside lenses or gauges | Headlights, taillights, instrument cluster | Water intrusion into sealed units; Milky fluid | Engine oil, transmission, differentials, transfer case | Water contamination, or another mechanical fault; Corroded connectors | Fuse box, harness plugs, trailer connector | Possible submersion or long-term moisture; Intermittent electrical faults | Windows, lights, displays, warning lights | Corroded wiring or modules; New carpet or upholstery in an older truck | Cab interior | Possible cleanup after water damage; Title moved between states shortly after a flood event | History report | Possible attempt to remove a title brand
How to Interpret What You Find
No single clue proves a truck was flooded. Trucks used off-road, on job sites or in snowy, salted regions can show rust, dirt and some corrosion for ordinary reasons. Look for patterns. Several independent signs in areas that normally stay dry, such as under the seats, behind the dash, in the seat belt retractors and inside sealed lights, point strongly to flooding. One minor finding with a believable explanation may not. When signs add up, assume the damage is real, even if the title is clean.
When to Walk Away
The VIN on the dash, door jamb and title don't match; The history shows a flood or salvage brand the seller didn't disclose; An airbag or SRS warning light stays on or doesn't light up at startup; You find silt, water lines or rust in multiple areas that should stay dry; Multiple electrical systems behave erratically; Fluids look milky and the seller can't explain why; The seller refuses an independent pre-purchase inspection
Some buyers knowingly purchase a flood-branded truck at a steep discount for parts or a project. If you're considering that, understand that future reliability is hard to predict, insurance and financing options may be limited, and resale value will reflect the brand. Get a thorough professional inspection and price the truck with those limits in mind.
Completion Check
You've completed a thorough flood screening when you can confirm the following: the VINs match and the title and history reports show no flood, salvage or rebuilt brand or unexplained out-of-state retitling; the cab smells normal and the carpet, padding and under-seat areas are dry and free of silt; seat belts, interior hardware and lenses show no water evidence; the bed, spare tire hoist, engine bay and underside show no out-of-place corrosion or debris; the fluids look normal; every electrical feature works and warning lights behave correctly; the test drive was uneventful; and an independent mechanic has inspected the truck with flood damage specifically in mind. If any item can't be confirmed, resolve it before you buy.
If You Discover Flood Damage After Buying
If you find evidence of flooding after purchase that wasn't disclosed, document it with photos and keep your purchase paperwork, advertisements and any written statements from the seller. Have a mechanic record their findings in writing. Disclosure requirements and buyer remedies vary by state and depend on whether you bought from a dealer or a private seller. Contact your state's motor vehicle agency, attorney general's consumer protection office or a consumer attorney to learn your options. Avoid driving a truck with a lit airbag warning light or erratic electrical behavior until it has been diagnosed.