DIY car bodywork
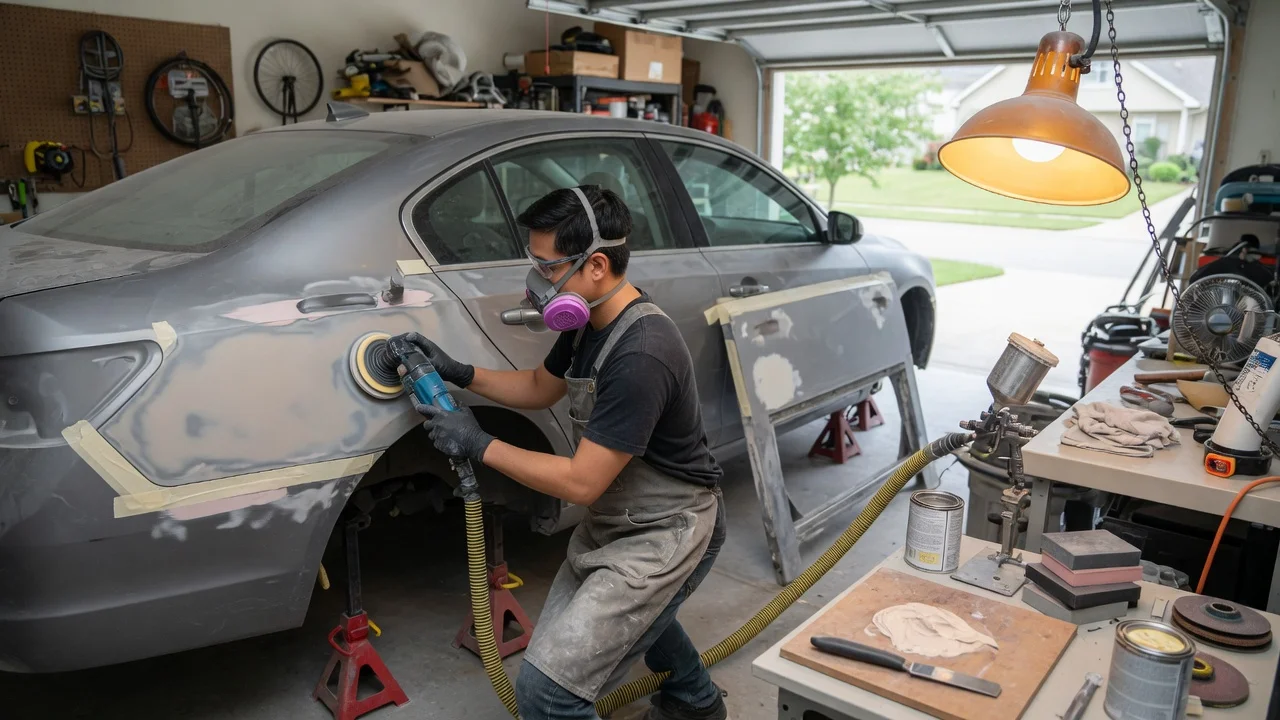
What you can fix at home
Many cosmetic body defects can be repaired in a home workshop: light scratches, small dents with intact paint, scuffed plastic bumpers, and isolated surface rust on steel panels. The repair is in scope when the panel still sits in its original shape, surrounding paint still adheres, and no safety structure is involved.
Stop and use a professional body shop if a door, wing or bumper no longer lines up, if the damage sits in a crumple zone, if an airbag has deployed, or if the panel is aluminium, carbon fibre or a factory-bonded assembly. Those jobs need alignment equipment and the vehicle maker’s body-repair procedure.
Paint, filler and rust products also depend on the substrate. Confirm whether the panel is steel, aluminium or plastic, and read the vehicle’s paint code (usually on a plate in the door jamb or under the bonnet) before buying materials. Tightening values, bake times and film-build figures from a generic guide are not a substitute for the paint system’s technical data sheet or the manufacturer’s body-repair information for that model year.
Judge the damage before you cut or fill
Work in good daylight on a clean, dry panel. The checks below sort a polish-out from a refinish, and they show when the metal or plastic is too far gone for a surface repair.
Wash the area with car shampoo and dry it so dirt does not masquerade as a scratch. Run a fingernail across the mark. If the nail does not catch, the defect is usually in the clear coat. If it catches but colour remains, the colour coat is cut. Grey or brown primer, or bright metal, means the repair needs filling and a full local refinish. For dents, inspect the panel edge and shut lines. A dent that has stretched the metal or pulled a crease through a character line is harder to pull back without heat and specialist tools. For rust, probe gently. Surface bloom that sands off is treatable. Soft, flaking metal or rust that has holed the panel needs cutting out and welding, or a replacement panel.
What you see What it usually means Typical next step; Haze or swirl; nail does not catch Clear-coat only Compound and polish; Nail catches; colour still present Colour coat cut Fine wet-sand, compound, or coded touch-up; Primer or bare metal showing Finish worn through Feather, fill if needed, prime, colour and clear; Shallow round dent; paint intact Metal displaced, film uncracked Glue-pull or paintless-style pull; Crease, cracked paint, stretched metal Severe dent Metalwork, thin filler, refinish, or a new panel; Surface rust; metal still sound Early corrosion on steel Grind to bright metal, treat, prime and paint; Holes or crumbling metal Perforation Cut and weld or replace; shop work; Bumper scuff or shallow gouge Plastic coating damaged Plastic prep, adhesion promoter, bumper paint; Changed panel gaps, deployed airbag, sensors in the area Structural or safety-related damage Professional diagnosis and repair
If you find cracked glass, a leaking seal, a misaligned headlamp, or a warning lamp after an impact, have the vehicle inspected before you paint over the area. A fault lamp is a reason to investigate, not proof of a single failed part.
Tools and materials
A small steel-panel or bumper repair typically uses the kit below. Match fillers, primers and paints to the substrate and to each other as one system.
Safety glasses, chemical-resistant gloves, and a respirator or mask rated for sanding dust and paint vapour; Car shampoo, and a wax-and-grease remover (panel wipe); Masking tape and paper; Sandpaper in several grades: coarser grits (commonly 180–320) for shaping filler, mid grits (400–600) for primer, finer grits (800–1500) before colour or clear, and 2000–3000 for denibbing cured clear; Body filler and hardener, with plastic spreaders; Etch or epoxy primer for bare metal, plus a high-build primer; Touch-up or spray colour matched to the paint code, and a compatible clearcoat; Rubbing compound, polish and microfibre cloths; For dents: a glue-pull kit or suction cup for shallow dents; a knockdown hammer and dolly where the back of the panel is accessible; For rust: a wire brush or grinding disc, and a rust converter or metal conditioner used exactly as that product specifies; For plastic bumpers: plastic adhesion promoter and a flexible bumper filler or two-part plastic repair rated for the bumper material
A dual-action sander speeds larger jobs and is not required for a coin-sized repair. A spray gun and compressor produce a more even film than aerosols on anything larger than a few centimetres; they also increase overspray and need more masking.
Safety at the steps that need it
Work outdoors or in strong ventilation, away from ignition sources. Two-component (2K) primers and clearcoats that contain isocyanates need a supplied-air respirator and are a poor choice in an unventilated home garage. Prefer products labelled for DIY use if you cannot meet those conditions.
Disconnect the battery before grinding near airbag modules, door wiring or fuel lines. Do not grind or weld a fuel tank, filler neck, or hybrid or electric high-voltage components. Keep sparks and solvents off hot exhaust parts.
Repair a light scratch
Clear-coat and shallow colour-coat marks are the most realistic DIY refinish. Deeper cuts that expose primer follow the filling and painting sequence later in this guide.
Wash and degrease the panel so compound does not grind grit into the clear. For marks that do not catch a nail, work a fine cutting compound on a foam pad over a small area, then polish until the haze blends into the surrounding gloss. For scratches that catch but have not reached primer, wet-sand lightly with 2000–3000 grit, keeping the paper and panel wet and staying inside the scratch. Compound and polish until the sanding haze disappears. If colour is missing in a narrow line, clean, then apply code-matched touch-up in thin layers, allowing the bottle’s stated flash time between coats. Once cured, level high spots with fine compound.
Stop sanding if you break through to primer or metal. That job has become a refinish repair, not a polish-out.
Pull a small dent with intact paint
Paintless dent repair (glue pulling) suits shallow dents on gently curved steel where the paint is not cracked. The aim is to walk the metal back in small steps rather than yank it proud.
Clean the panel so the glue tab can bond. Attach a tab, pull in small increments, and tap down high spots with a knockdown hammer. Repeat until the dent disappears in glancing light, or until further pulling starts to stretch the metal.
If the paint has cracked, or the metal is creased, pulling alone will not restore the finish. Traditional repair follows: get the metal as close as possible to the original contour, then fill remaining lows. Never hide a deep dent under a thick pad of filler. Filler is a levelling film after metalwork; a heavy build shrinks, cracks and can show through paint.
Treat surface rust on steel
Remove loose rust with a wire brush or 80–180 grit until you reach bright, sound metal, and feather the surrounding paint so the repair edge tapers. Treat remaining staining with a rust converter or metal conditioner exactly as that product specifies, including dwell time and whether it must be overcoated. Prime bare steel promptly with an etch or epoxy primer compatible with your topcoat. Bare steel flash-rusts if left open. Fill pits with body filler if needed, block-sand, then apply high-build primer, colour and clear.
If rust has perforated the panel, cutting out the rot and welding in new metal is a fabrication job. Filling a hole with body filler alone is not a durable repair. Aluminium panels need aluminium-specific abrasives, fillers and primers; products made for steel can promote corrosion. Confirm the substrate before you grind.
Repair a scuffed or cracked bumper
Wash, then scuff the repair area with a plastic-prep abrasive so new coatings can key. For scuffs in the colour coat, apply adhesion promoter, then flexible bumper paint matched to the code, then clear if that paint system requires it. For cracks, open a shallow V along the crack from the front, repair from the back with a plastic-repair rod or a two-part adhesive rated for the bumper’s plastic (often polypropylene or TPO), then fill, prime with a flexible primer, and paint.
A bumper torn from its mounts, or a reinforcement beam that is bent, is a replacement and alignment job. Sensors for parking aids or adaptive cruise control often sit in the bumper; removing or refinishing that cover can require calibration, which is model-year specific and belongs in a shop with the maker’s procedure.
Fill, prime and paint a localised steel repair
This sequence is the core of a traditional DIY refinish after metalwork or rust removal on a small steel area. Mix and overcoat times come from the products in your hand, not from a generic schedule.
Mask adjacent panels, trim and glass. Degrease with panel wipe and do not touch the bare area with bare hands afterwards. Mix body filler to the filler maker’s hardener ratio. Spread thin coats slightly proud of the surface. Do not return mixed filler to the tin. Shape with 180–320 grit on a block until the repair is flush and the edges feather into old paint. Recoat remaining lows; do not pile on one heavy layer. Apply high-build primer in light, overlapping coats. Stay inside the product’s flash and overcoat windows. A light guide coat (a dusting of contrasting colour) shows remaining highs and lows when you block-sand with 400–600 grit. Degrease again. Apply base colour in light coats until coverage is even, extending slightly onto surrounding paint so the new colour can blend. Metallic and pearl colours often need a whole-panel application or a careful fade; a tight spot repair commonly reads as a blotch. Apply clearcoat over the blend area as the paint system specifies. Single-component (1K) aerosols are simpler for tiny repairs. Two-component (2K) systems are more durable and bring stricter safety, pot-life and ventilation rules. After full cure—hours to days depending on product and temperature, as stated on the data sheet—denib dust nibs with about 2000 grit, then compound and polish to match adjacent gloss.
Temperature, humidity and film thickness change how paint flows and cures. Stay inside the temperature range on the product. Do not bake a home repair with a heat gun at close range; that can blister new paint and distort plastics.
Exact flash times, reducer ratios, spray-gun settings and recommended dry-film thickness are paint-system specific. Panel-gap specifications and bolt tightening values for mirrors, handles and bumper fasteners belong in the workshop manual for that model year and market. Confirm those figures before you strip a large area or refit hardware.
Check the finished repair
In glancing sunlight, the outline of the repair is not obvious as a lump, hollow or texture change. Colour is acceptably close on the same panel in daylight. Metallic mismatch on a blend is a common DIY limit; a whole-panel respray may still be required. Edges of new paint are polished in, with no dry spray, runs or tape lines. Adjacent trim, lamps and shut lines sit as they did before. Doors, bonnet and boot still close on the original striker without extra force. No rust remains visible at the repair edge, and the area was primed and sealed.
If the panel still shows a low spot after primer, return to filler. Colour and clear will not hide contour errors.
When a body shop should take over
Structural rails, A-, B- or C-pillars, the floor pan, or suspension mounting points are involved; Panel gaps changed after an impact; Cameras or radar in a bumper, grille or windscreen sit in the damaged area and may need calibration; The vehicle uses aluminium or mixed-metal construction that specifies weld-bonding or rivet-bonding; A three-stage pearl or a wide metallic blend cannot be matched on the car; Corrosion has holed a load-bearing panel
Insurance-funded collision repair is the usual path when another party caused the damage. A home finish can affect a later claim and should be disclosed at resale.
What a generic guide cannot specify
No single procedure covers every car. Steel versus aluminium, bumper plastic type, paint code (solid, metallic, pearl or matte), and whether the factory used a waterborne base all change the products and the blend method. Tightening values, any requirement to recalibrate cameras after a bumper or wing comes off, and approved joining methods for mixed-metal bodies are model-year and market specific. Confirm those details in the manufacturer’s body-repair information and the paint maker’s data sheet before you remove a sensor-carrying panel or cut into a large area.