Dana 44 Rear Axle Bearing Replacement
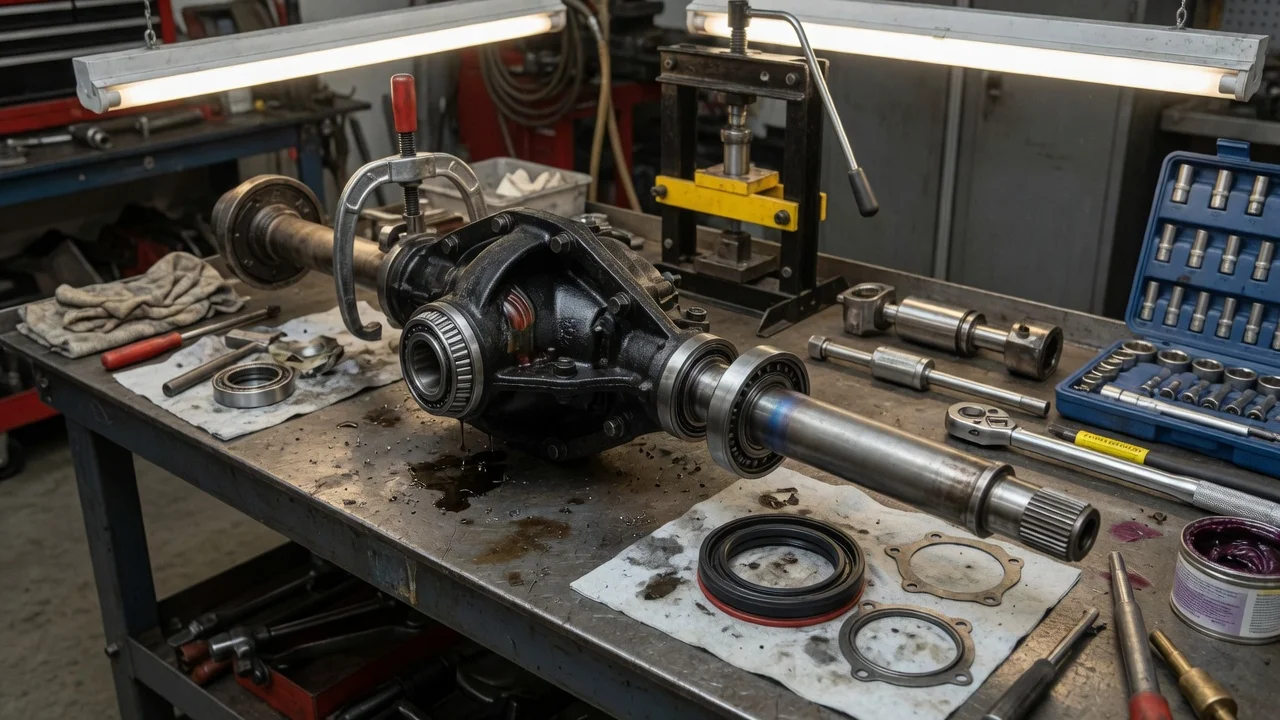
Replacing a rear axle bearing on a Dana 44 is a common repair, but the job depends on how your axle shafts are retained. Some Dana 44 rear axles use C-clips with a bearing pressed into the housing. Others use a bearing pressed onto the shaft and held by a retaining ring and a bolted retainer plate. This guide covers both layouts so you can plan the work, avoid damage and confirm the result.
Confirm the part and repair scope
Start by confirming that the bearing is really the problem. A worn axle bearing usually makes a growl or hum that rises with road speed and may change when you turn or shift load from one side to the other. Similar noises can come from tires with uneven wear, the pinion bearings or the carrier bearings. Gear oil on the inside of a wheel, on the brake backing plate or on the brake parts often means a failed axle seal, and a worn bearing frequently causes that seal failure. With the wheel off the ground, check for radial play at the axle flange and spin the shaft by hand to feel for roughness. If the noise stays the same when you coast or when you change load, look at the differential before you buy bearings.
Next, identify your exact axle. Dana 44 rear axles were fitted to many vehicles over decades, and bearings, seals and shafts differ between them. The axle tag, usually held by a cover bolt, along with your vehicle configuration and build information, helps you order the correct parts. Find out whether your shafts are C-clip retained or held by a retainer plate bolted to the housing end. Some older designs use tapered bearings with shims to set axle endplay. Order the bearing and seal together, and if your axle uses one, a new retaining ring. Replace both sides if your service history or inspection shows similar wear.
Prepare tools and safe access
Get the factory service information for your vehicle before you begin. It lists the torque values, sealant or gasket requirements, gear oil type and capacity, and any additive your differential needs. Do not substitute a generic figure. Raise the rear of the vehicle on a level, solid surface, support it on rated jack stands under the axle or frame, and chock the front wheels. The usual tools are sockets and wrenches, a drain pan, a slide-hammer bearing and seal puller, a bearing and seal driver set, a torque wrench, brake cleaner and clean shop rags. Have a new differential cover gasket or the sealant the manufacturer specifies on hand.
Be honest about your experience and equipment. Replacing a C-clip bearing is within reach of an owner who has done careful brake and differential work. Pressed-on bearings are different: they need a hydraulic press of suitable capacity, correct support for the shaft and a safe way to remove the old retaining ring. The bearing and ring are installed with heavy interference, and a poorly seated ring can let the shaft walk out of the housing while driving. If you lack a press or experience, have a machine shop or axle specialist press the bearing onto the shaft, then do the remaining work yourself.
Remove without avoidable damage
Remove the wheel, then the brake drum or the caliper and rotor, depending on the brake setup. Hang the caliper by a wire so the brake hose does not carry its weight. If an ABS wheel speed sensor sits near the axle end, unplug it or remove it so it is not damaged when the shaft comes out. On drum brakes you may also need to free the parking brake components. Clean dirt from around the axle end and the differential cover so debris does not fall into the housing.
On a C-clip axle, drain the gear oil and remove the differential cover. Remove the pinion cross-shaft lock bolt and slide out the cross shaft, keeping the differential gears in place. Push the axle shaft inward, remove the C-clip from the groove at its inner end, and pull the shaft out straight so it does not scratch the seal bore or bearing. Some lockers and limited-slip units use a different procedure, so check the service information. Inspect the bearing contact area on the shaft: on this design the rollers run directly on the shaft, so pitting or scoring means the shaft or the bearing setup needs attention. Use the puller to remove the seal and bearing from the housing.
On a retainer-plate axle, the cover usually stays on. Remove the nuts that hold the retainer plate to the housing flange, then pull the shaft with a slide hammer attached to the flange. Remove the old retaining ring with care. A common method is to cut a notch in the ring without reaching the shaft, then split it with a chisel. Never heat the ring or bearing with a torch, because it can weaken the shaft. Press the old bearing off, and inspect the shaft, splines and housing end for damage.
Install and restore the system
For a C-clip axle, clean the housing bore and drive the new bearing in squarely to its seat using a driver that contacts only the outer race. Install the new seal facing the direction the manufacturer specifies, set it to the correct depth, and lightly lubricate its lip. Slide the shaft in, engaging the splines without dragging it across the seal. Fit the C-clip, push the shaft outward to seat it, and reinstall the cross shaft and lock bolt. Use the threadlocker and torque from the service information.
For a pressed-on design, place the retainer plate and any seal parts on the shaft in the correct order and orientation before pressing. Then press the bearing on, followed by a new retaining ring, until each is fully seated against its shoulder. Never reuse the old ring. Reinstall the shaft and torque the retainer plate nuts to specification. On designs that use shims to set endplay, measure and adjust it as the manufacturer instructs. Reinstall the brakes, ABS sensor and wheel. If you removed the cover, clean the mating surfaces, seal it as specified, and fill the axle with the correct gear oil to the level in the service information. Add friction modifier if your limited-slip differential requires it.
Check the completed work
Before driving, spin each wheel by hand. It should turn smoothly, with only the normal drag from the brakes and drivetrain. Confirm that the brakes are fully reassembled and that the pedal is firm, and check that the parking brake works if you disturbed it. Torque the lug nuts to the manufacturer's specification. Road test at low speed first, then at the speeds where the noise was loudest before. After the drive, check the wheel ends, backing plates and cover for leaks, and recheck the gear oil level.
Recheck the lug nuts and look for leaks again after a short period of driving, especially if the vehicle works off road or tows. Investigate further if a growl or hum remains, if you feel play at the axle flange, or if gear oil reaches the brakes again. A continuing noise may come from the differential, from a damaged shaft bearing surface on a C-clip axle, or from a part that is not fully seated. A shaft that moves in or out noticeably needs immediate inspection before the vehicle is driven again. Record the repair in the vehicle's maintenance schedule so future inspections can be compared against it.