CV Axle Boot Repair: Assessing Whether a Damaged Boot Can Be Repaired
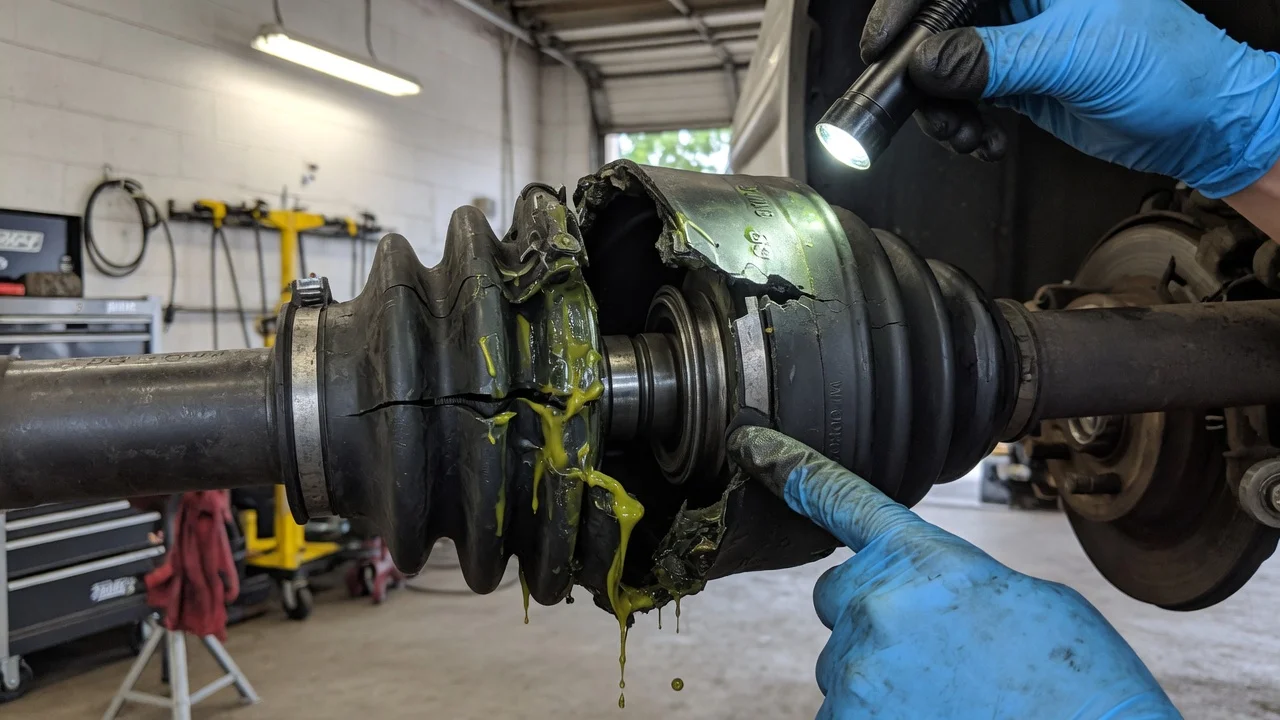
A split CV axle boot can look like a minor rubber problem, but the boot is the only barrier keeping grease in and road grit out of the constant velocity joint. Whether you can repair the boot alone or need more extensive work depends on how long it has been damaged, the condition of the joint underneath and your exact vehicle configuration. Below is how a mechanic approaches the job: confirm the fault, define the scope, choose an option and check the result.
Confirm the fault before repair
Start with a visual inspection of both the inner and outer boots on each drive axle. Turning the steering to full lock opens the folds of the outer boot and makes small splits easier to see. Look for cracks in the folds, a hardened or swollen boot, a clamp that has slipped or broken, and grease flung onto the inside of the wheel, the brake components or nearby suspension parts. CV joint grease is thick and sticky, so it behaves differently from thinner fluids. Wetness near the inner joint may instead come from a transmission or differential seal, and oil on suspension parts may come from a leaking shock absorber. Trace the source before blaming the boot.
Symptoms alone do not confirm a boot defect. A clicking noise during tight, slow turns usually points to a worn outer joint, which may follow boot damage but is a separate fault. Vibration under acceleration can involve an inner joint, yet it can also come from wheel balance, tires or worn engine and transmission mounts. The evidence that matters is visible boot damage, signs of grease loss and, if the repair is to stay limited to the boot, a joint with no excess play, roughness or contaminated grease. Grease that feels gritty, looks watery or shows rust indicates that debris or moisture has already entered the joint.
Define the repair scope
Identify exactly which component is affected: left or right side, front or rear axle on vehicles with driven rear wheels and independent suspension, and inner or outer joint. Joint designs differ between vehicles and even between versions of one model, for example tripod-style inner joints versus ball-type joints, and boot shapes and materials differ with them. On some designs the inner joint is integrated with a stub shaft or the transmission side, which changes how the boot is serviced. Use the manufacturer specifications and service information for your specific vehicle rather than assuming every version shares one remedy or one boot kit.
Next, judge the extent of damage. A fresh tear caught early, with plenty of clean grease still inside, is a very different case from a boot that has been open for an unknown period. Confirming contamination usually requires removing the boot and inspecting the grease and joint surfaces, so the final scope is sometimes only known partway through the job. Check the service history as well: if the axle was replaced before, the installed part may not be the original design, and boots or clamps intended for the factory axle may not fit. Operating conditions such as gravel roads, road salt, off-road use or heat from a nearby exhaust also affect how quickly an open joint deteriorates and why the boot failed.
Compare repair options
If the boot itself is intact and only the clamp has loosened, refitting or replacing the clamp may be enough. This applies only when little grease was lost and none of it is contaminated; a new clamp does nothing for a joint that has already taken in dirt or water. When the boot is split, the conventional repair is boot replacement: the axle or joint is removed, the old grease is cleaned out, the joint is inspected, then repacked with the grease specified for that joint and fitted with a new boot and clamps. This is appropriate when the joint shows no wear and the contamination is limited.
Split or universal stretch boots can be fitted without separating the joint, which reduces labor, but they still require proper cleaning and repacking, and their durability depends on the product, the fit to your joint and the quality of installation. Treat them as an option to weigh against the vehicle's service information, not as an automatic equivalent of a conventional boot. Axle replacement is the better choice when the joint is worn, the grease is contaminated or the labor to rebuild approaches the cost of a complete axle. Specialist service is advisable for complex all-wheel-drive layouts, axles with integrated sensor rings or unusual retention, or when the cause of the boot failure is unclear.
Each option leaves something unresolved if it is the wrong match. A new boot will not quiet a joint that already clicks. A new axle will not last if the original boot failed because of contact with another part, excessive heat, damaged suspension components or an incorrectly installed previous repair. Address the cause along with the part.
Requirements and limits
Doing this work properly takes more than a boot kit. Typical needs include a safe way to lift and support the vehicle on rated stands, wheel chocks, a socket for the axle or hub nut, a torque wrench, possibly a separator for suspension joints, retaining ring pliers, cleaning supplies, the correct grease and a clamp tool matched to the clamp type, since ear-type and band-type clamps are tightened differently. Equally important is service information for your vehicle: fastener torque values, whether the axle nut and certain bolts must be replaced rather than reused, the removal and installation procedure, and whether removing the inner joint will release transmission or differential fluid that must be refilled to the correct level.
Never work under a vehicle held only by a jack, and allow brakes and exhaust parts to cool before reaching near them. Some steps, such as freeing an inner joint retained inside the transmission, separating seized suspension joints or working around wheel speed sensors and electronic parking brakes, can damage expensive components if forced. Because procedures vary widely by vehicle, this guide does not provide a generic step-by-step method. If you lack the specific service information, the correct tools or confidence in inspecting the joint, a professional shop is the safer route.
Verify the outcome
After the repair, check that both clamps are fully seated and secure, that the boot is not twisted and its folds sit evenly, and that it does not contact other parts at full steering lock in both directions or through suspension travel. Confirm that fasteners were tightened to the values in the service information and that any drained fluid has been refilled. A road test should include slow, tight turns in both directions while listening for clicking, and gentle acceleration while feeling for vibration. Afterward, inspect the boot again for fresh grease on its exterior or the surrounding parts.
Record the date, mileage, side and joint repaired, parts and grease used, and whether the joint was inspected and judged serviceable. This adds useful detail to the service history and helps the next technician interpret what they find. Include a quick look at the CV boots in your regular maintenance schedule, for example during tire rotations or other routine visits, so any new damage is caught early.
If clicking continues after a boot-only repair, the joint was likely already worn and the axle or joint needs replacement. Persistent vibration calls for checking the inner joint, wheel balance, tires and drivetrain mounts. A new grease leak suggests an incorrectly seated clamp or a boot that does not fit the joint. Rather than repeatedly replacing boots, have the underlying cause diagnosed.