CV Axle Boot Repair Kits: How to Choose a Compatible Kit
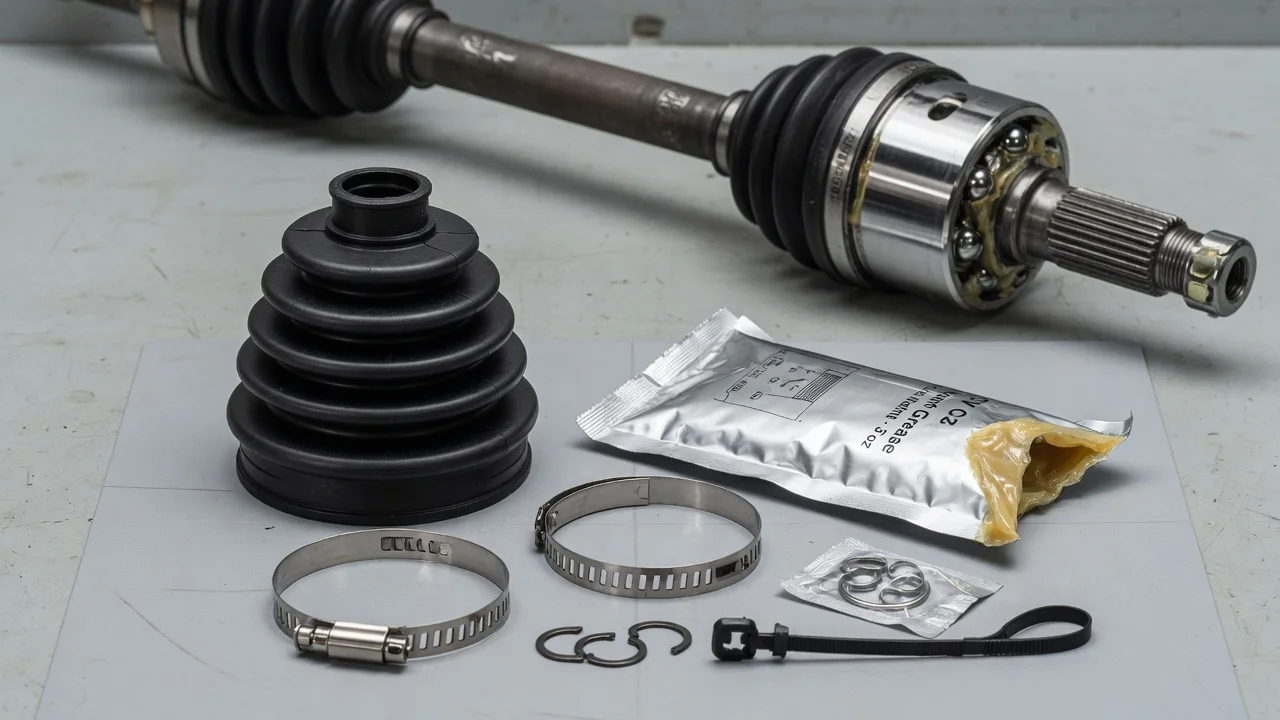
A torn CV boot lets grease escape and lets water and road grit into the joint, and the joint starts wearing from that point on. A CV axle boot repair kit can save a healthy joint if you catch the damage early and buy a kit that fits your axle. This guide covers how to match a kit to your vehicle configuration, which features actually matter, and when a boot kit is the wrong repair.
Define the job the product must do
Start with the joint, not the kit. A boot replacement only makes sense when the joint underneath is still sound. During inspection, look for grease thrown onto the inside of the wheel, the brake components or the suspension, along with cracks between the folds, a split near a clamp or a clamp that has slipped. If the joint is quiet, has no noticeable play and the remaining grease looks clean rather than gritty or watery, a new boot is a reasonable fix. If an outer joint clicks during tight turns, or an inner joint clunks or vibrates under acceleration, the joint is likely already worn. A boot will not reverse that wear.
Next, pin down exactly which boot has failed: front or rear axle if your vehicle has driven rear axles, left or right side, and inner or outer position. These boots usually differ in size and shape, so most kits are sold for one position. Then consider your practical constraints. Do you have the tools and space to remove the axle, or do you need a boot that installs with the axle in place? Do your operating conditions, such as gravel roads, winter salt or frequent full-lock maneuvering, put extra stress on the boots? Your answers decide which kit style is realistic for you.
Check compatibility
Search by the full vehicle configuration, not just year, make and model. Engine, drivetrain (front-wheel drive, all-wheel drive or a 4WD front axle), transmission type and sometimes trim can change which axle the vehicle uses. Left and right axles often differ in length, though they may share boots, so confirm the kit lists your side and position. When a listing groups many vehicles together, check its fitment notes for exclusions tied to transmission or drivetrain.
The interfaces that decide whether a boot seals are its small-end diameter, which clamps to the shaft, its large-end diameter, which clamps to the joint housing, and its overall length and profile. Joint type matters as well. Outer joints are usually ball-type designs. Inner joints may be tripod, double-offset or cross-groove designs. Some inner tripod housings have a lobed rather than round outer surface, and they need a boot molded to that shape or a matching insert. A round boot clamped over a lobed housing will leak no matter how tight the clamp is.
Your service history can override catalog fitment. If the axle was replaced with an aftermarket or remanufactured unit, its joints and boots may not match the original part numbers. In that case, measure the shaft and housing diameters on the car and compare them with the dimensions in the kit listing. When the original axle is still installed, the boot part number in the manufacturer specifications or parts catalog is the most dependable reference.
Features that affect the choice
Boot construction is the biggest trade-off. A one-piece boot gives the most reliable seal, but you must remove the axle and usually take the joint off the shaft to install it. Stretch-style universal boots slide over the joint on an installation cone, so the joint stays on the shaft, but they have to suit your diameters and joint size. Split boots wrap around the shaft and close along a seam with fasteners or adhesive. They can sometimes go on with the axle in the car, but the seam is a likely leak point, so many mechanics treat them as a convenience option rather than the first choice. If a kit is labeled universal, check that its stated size range covers both of your measurements.
Material affects installation and durability. Many modern vehicles use thermoplastic boots, which are stiffer and depend on the correct clamp and clamping force to seal. Rubber boots, often chloroprene, are more flexible and generally easier to fit. Ideally, choose a boot that matches the original material and design, because the clamp type and installation method are matched to that material.
Check exactly what each kit contains. A complete kit usually includes the boot, both clamps, a packet of CV joint grease and sometimes a retaining ring or axle nut. The grease should suit your joint type, since outer ball joints and inner tripod joints may call for different greases, and the quantity should suit the joint size. Labels such as heavy duty or OE quality are not evidence. Listed dimensions, position-specific fitment, the clamp style and the grease type are the information that helps you choose.
Limitations and ownership costs
Boot replacement is more work than the parts price suggests. On most vehicles you will remove the axle nut, separate a ball joint or other suspension component and pull the axle out of the transmission or differential, which may release fluid. You will also clean every trace of old grease and contamination from the joint, repack it and seat both clamps correctly. Plan for the right clamp pliers or crimpers, a torque wrench, retaining-ring tools if your joint uses them, and the torque values for your specific vehicle. Do not rely on generic figures.
Include consumables in the real cost. Many vehicles call for a new axle nut, cotter pin or retaining ring, and you may need fluid to top up the transmission or differential, or a new axle seal if the old one leaks once disturbed. Weigh the boot kit plus your time against the price of a complete replacement axle. On some vehicles a new or remanufactured axle costs less overall, especially when both boots on one shaft are damaged.
A boot kit cannot repair a worn or contaminated joint, a bent shaft, damaged splines or a failing intermediate bearing. There is no universal inspection interval for CV boots either. Checking them whenever the vehicle is on a lift, or at the tire rotations in your maintenance schedule, catches tears before the joint is harmed.
Build a practical shortlist
Before you compare prices, confirm that the joint is quiet and free of play and that the grease is not visibly contaminated. Write down the full vehicle configuration, the failed boot's side and position, and whether the axle is original or a replacement. If the axle is not original, measure the shaft and housing diameters and note whether the housing is round or lobed.
For each candidate kit, check five things. First, does it list your exact vehicle and position, or dimensions that match your measurements? Second, is it a one-piece, stretch or split design, and does that design suit your tools and willingness to remove the axle? Third, does its material match the original boot? Fourth, does it include the correct clamps and enough grease of the right type for your joint? Fifth, does it supply any single-use hardware your vehicle needs? Drop any kit that leaves these questions unanswered. Then compare the remaining options against the cost of a complete axle so the repair still makes financial sense.