CV Axle Boot Clamps: Choosing the Correct Type and Fit
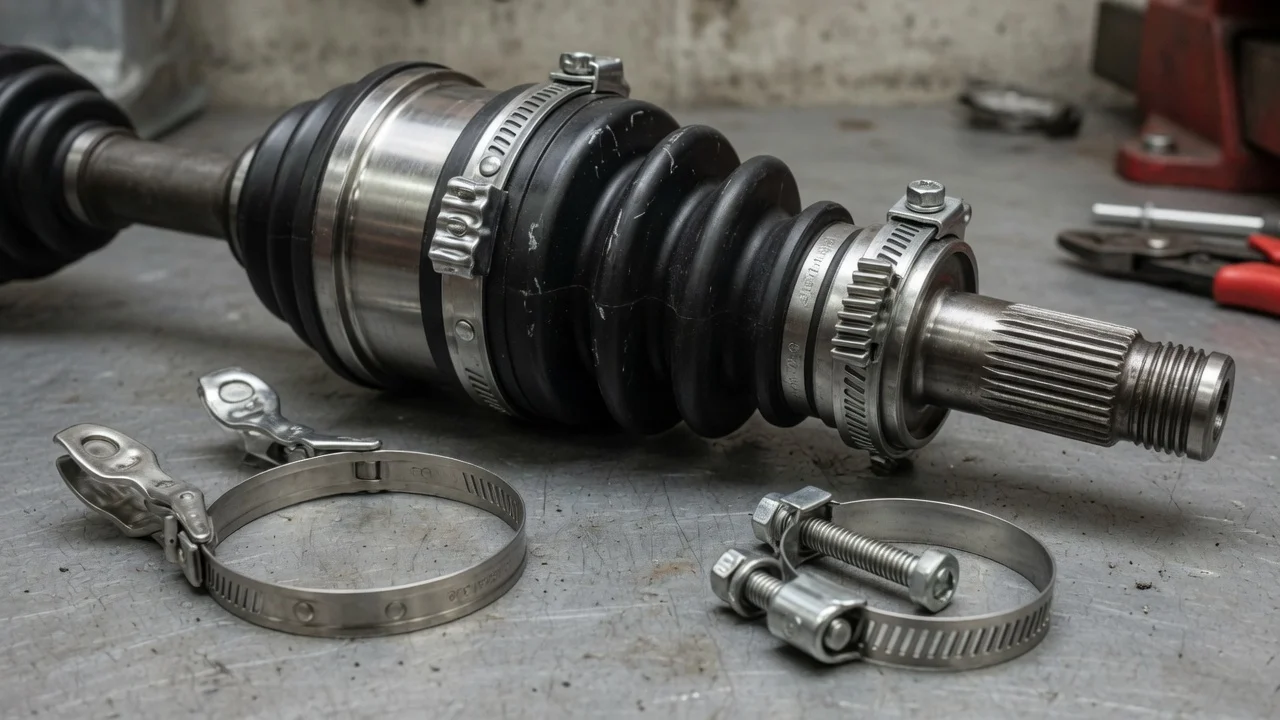
A CV axle boot clamp has one job: hold the boot tightly in its groove so grease stays in and water and grit stay out. If a clamp is the wrong type, size or material for the boot it secures, the joint can lose lubricant long before the boot itself wears out. This guide explains how to match clamps to your vehicle configuration, the boot you are installing and the tools you have, so you buy the right parts the first time.
Define the job the product must do
Start by deciding what you are actually fixing. Most owners shop for CV axle clamps in one of three situations. They may be replacing a torn boot with a new boot kit. They may be re-securing a boot that slipped or leaked at the clamp while the boot itself is intact. Or they may be reassembling a joint after a repair. Each case leads to a different purchase. A boot kit often includes clamps sized for that boot, so a separate clamp purchase may be unnecessary. A slipped clamp on an otherwise sound boot calls for clamps matched to the original groove and the boot material. If the boot is cracked or split, a new clamp will not seal it, and the boot needs replacing.
Also note which joint you are working on. Each boot uses two clamps: a larger one at the joint housing and a smaller one around the axle shaft. Inner and outer joints on the same axle usually take different sizes, and the front and rear axles on an all-wheel-drive vehicle may differ again. Practical constraints matter as well. Consider how much space there is around the joint with the axle installed, whether you can remove the axle, and which installation tools you own or are willing to buy.
Check compatibility before you buy
Clamp fit comes down to a few interfaces. The first is diameter range. Every clamp is made for a span of diameters, and it must close fully onto the boot within that span while the boot sits in its groove on the housing or shaft. A clamp that is too large may run out of take-up before it grips, and one that is too small will not close at all. You can measure the boot neck in its seated position, but the parts listing for your exact vehicle, joint and boot is a more reliable guide. The second interface is band width. The band should suit the clamp groove on the boot so it sits flat without riding on the groove edges.
The third interface is boot material. Many factory boots are thermoplastic, which is stiffer than rubber and generally needs the higher, evenly distributed clamping force that low-profile crimp clamps provide. Rubber or neoprene boots are more forgiving and are often supplied with ear-type or band clamps. If the manufacturer specifications or the boot kit instructions name a clamp type, follow them. Substituting a different style on a thermoplastic boot is a common cause of leaks. Finally, check clearance. The raised ear or buckle of a clamp must not contact suspension, steering or brake components through full steering lock and full suspension travel.
Features that affect the choice
Ear-type clamps, often called Oetiker-style, have one or two raised ears that are pinched closed with pincers. They are inexpensive, widely available and easy to install with basic tools. The ear leaves a raised bump, and the closed band leaves a small step at the gap. Stepless ear clamps add an internal tongue that bridges this gap so pressure stays more uniform around the boot. Low-profile crimp clamps are closed with a dedicated crimping or tensioning tool. They sit nearly flat and are the usual factory choice on thermoplastic boots. Band clamps with a buckle are tightened with a banding tool, then cut and folded over. They adjust to many diameters, which helps when the exact size is uncertain, but the result depends heavily on technique.
Universal worm-gear hose clamps sometimes appear in budget boot kits. They are easy to fit, but they are bulky, can upset balance on a spinning shaft, and are generally a poor long-term substitute for a purpose-made CV clamp. Material is the other feature that makes a real difference. Stainless steel resists corrosion better than plated carbon steel, which matters where roads are salted or the vehicle sees frequent water exposure. Treat labels such as heavy duty or OEM quality as marketing unless the listing names a specific clamp type, material and size range for your application.
Limitations and ownership costs
Most CV boot clamps are single-use. Once crimped or cut, they cannot be loosened and refitted, so plan on new clamps whenever a boot comes off, and keep a spare in case an installation goes wrong. The tool is often the larger expense. Ear pincers are cheap, while a proper low-profile crimping tool or banding tool costs more and is only worth buying if you will use it again. Overtightening can cut into the boot, and undertightening lets it rotate or weep grease, so follow the tool and clamp instructions rather than guessing.
A clamp also has clear limits. It cannot seal a cracked boot, repair a damaged groove on the housing, or restore a joint that has already lost grease and picked up grit. Clicking during turns or vibration under acceleration points to joint or axle wear that clamps will not fix. When a boot is replaced, the joint should be cleaned and repacked with the grease specified for that joint type, which is usually supplied in the boot kit. Check boots and clamps during routine inspection, especially if your operating conditions include rough roads, off-road use or heavy salt exposure. Your vehicle's maintenance schedule and service history are better guides to inspection timing than any universal interval.
Build a practical shortlist
Before comparing listings, write down the vehicle year, make, model and drivetrain, plus the axle side and whether the joint is inner or outer. Confirm the boot material and the clamp type the boot manufacturer specifies. Then ask the same questions of each candidate. Does the stated diameter range cover the seated boot neck for both the large and small clamp? Is the band width right for the boot groove? Is the material stainless steel or plated steel, and does that suit your climate? Which installation tool does it require, and do you have it?
Next, compare value rather than headline price. A boot kit with matched clamps, grease and instructions may cost less overall than buying a boot, clamps and grease separately. A clamp assortment covers more sizes but may not include the type your boot needs. Set aside any listing that does not state size range, material and clamp style. The right choice is the clamp that matches the boot and joint on your specific vehicle, installs correctly with tools you can use, and leaves enough clearance for full steering and suspension movement.