What a Car Coolant Reservoir Does and How to Check It
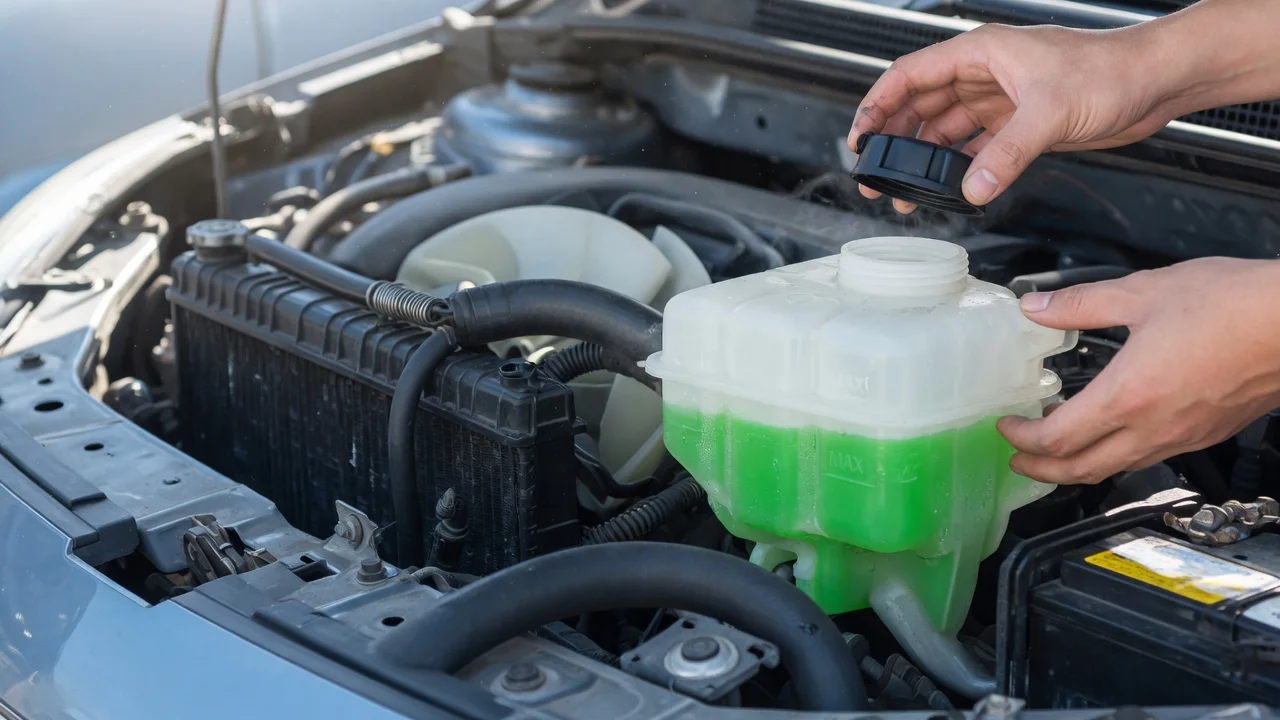
Before you start
The coolant reservoir is the translucent plastic tank under the hood that holds extra engine coolant. On many vehicles it is connected to the radiator by a small hose, while on some cars it is also part of a pressurized cooling system. The reservoir provides a safe place for coolant to expand into as the engine warms up and to return from as the engine cools. Checking it requires no special tools, but you must let the engine cool first.
Park the vehicle on level ground before checking the reservoir. A sloped surface can change the apparent coolant level and make a normal system look low. Work only when the engine and cooling system are cool. Opening a reservoir cap or radiator cap while the system is hot can release steam or hot coolant under pressure and cause serious burns. If the vehicle has been driven recently, wait until the engine bay feels cool and the upper radiator hose is no longer firm from pressure.
You do not need to disconnect anything for a basic check. The process runs locally in the sense that all inspection happens on the vehicle itself, with no service, app, or external account required unless you later choose to have a shop diagnose a suspected leak.
Step-by-step instructions
Using the coolant reservoir involves two routine tasks: identifying the correct fill area and interpreting the level marks. Some vehicles also require you to distinguish between the reservoir cap and the radiator cap, since adding coolant at the wrong opening can lead to an incorrect fill or injury.
1) Locate the reservoir
Look for a translucent plastic tank near the radiator, often white or semi-clear, with minimum and maximum marks or Full and Low lines printed on its side. The marks may be visible without opening the cap. If the reservoir is dirty or the plastic has become cloudy, clean the outside of the tank carefully and check again.
2) Compare the level with the marks
With the engine cold, read the coolant level against the side of the tank. It should normally be at or near the cold fill line. If the vehicle has only one pair of marks, use those marks as the reference and follow any instruction listed on the reservoir or in the owner's manual. A level between the minimum and maximum marks is generally acceptable.
3) Add coolant only if needed
If the cold level is below the minimum mark, coolant may need to be added. Use only a coolant type specified for your vehicle. The owner's manual is the most reliable source for the correct specification, because vehicles can use different formulations that should not be mixed carelessly. On some models the reservoir cap can be removed directly, while on others the fill point is the radiator cap. Follow the location described in the manual for that vehicle.
4) Refit the cap and recheck after a drive
After adding coolant, replace the cap securely. Start with small amounts and recheck the cold level, because the marked range is narrow and overfilling can leave no space for expansion. After the engine has gone through a warm-up and cool-down cycle, inspect the cold level again. This helps distinguish a one-time correction from a recurring loss.
Check the output
A correct result is a cold coolant level that remains between the minimum and maximum marks on a level surface. The exact position can vary by vehicle and temperature, but it should not require frequent topping up. If you added coolant, the job is successful when the level stays in range after the system has cooled instead of dropping again after every drive.
Do not expect the level to stay exactly at a single point. Coolant expands when hot and contracts when cold, so movement within the marked range is normal. The main limitation of a reservoir check is that it shows the level, not the condition or pressure integrity of the entire cooling system. A normal-looking reservoir does not by itself rule out a hidden leak, a failing cap, or a blocked hose.
If the level is above the maximum mark after driving, the system may have been overfilled, or the markings may be intended for cold readings only. Compare the reading with the condition specified on the tank or in the manual before deciding that something is wrong.
Common problems and next steps
A slowly dropping reservoir is a sign that coolant is escaping or being consumed, but it does not identify the cause. Check around the reservoir and its hose first, because cracks or a loose clamp can produce an obvious leak. Then inspect the ground under the engine bay after the car has been parked, preferably in the same spot, so a fresh drip is easier to recognize. Coolant leaks can leave green, pink, orange, blue, or yellow staining depending on the formulation, so do not assume that only one color counts as evidence.
If the reservoir keeps losing coolant but no external leak is visible, coolant may be leaking inside the engine or escaping only under pressure. Internal consumption can occur without an obvious puddle. In that case, the next practical step is to have a technician pressure-test the cooling system and check for contamination, rather than continuing to add coolant and drive indefinitely.
Fluid that rises noticeably or overflows while driving can suggest overheating, overpressure, or exhaust gas entering the cooling system. Do not open the cap when the engine is hot. Let the vehicle cool, note whether the level remains high when cold, and seek diagnosis before driving hard or long distances.
A related check is the appearance of the fluid. Coolant that looks muddy, oily, or filled with dark particles is not simply old; it may indicate mixing of incompatible coolants or contamination from another system. Replacing contaminated coolant may require flushing, which is a more involved job than a basic reservoir check. If you are unsure, have the current coolant type and vehicle requirements verified before mixing in a different product.