How to Check Your Coolant Level and Safely Add Coolant
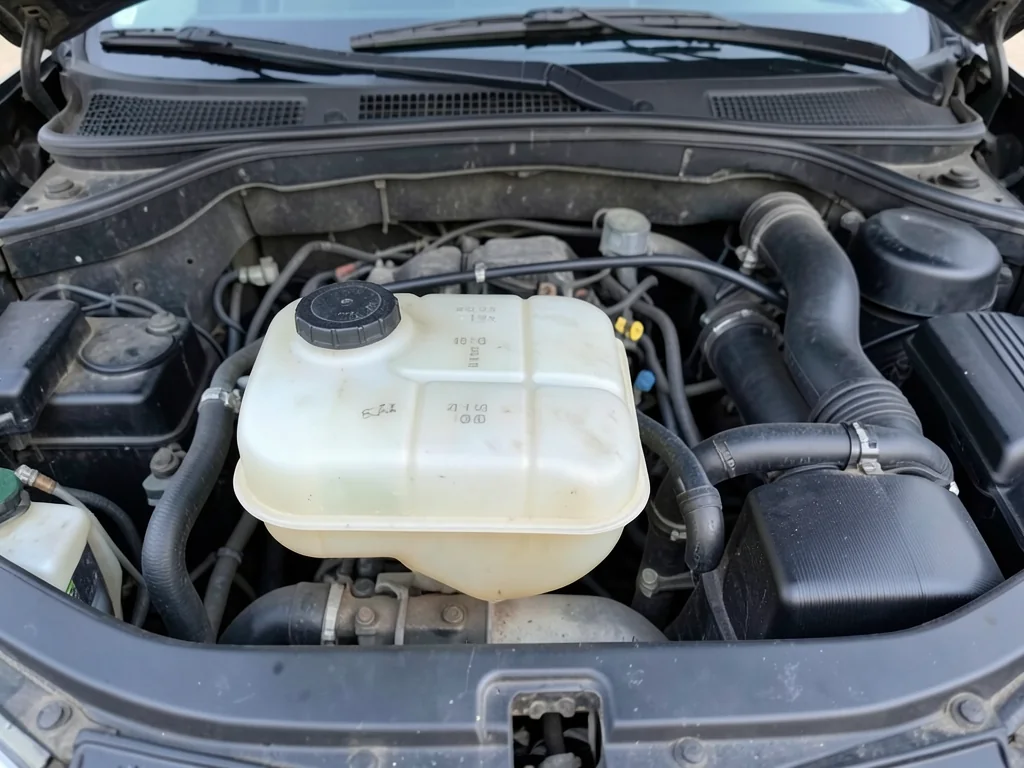
Coolant carries heat away from the engine, so a low level can lead to overheating and costly damage. Checking it is simple, but the cooling system runs hot and under pressure, and a careless check can cause scalding burns. Adding coolant safely depends on a few things: a fully cold engine, the correct fill point, an accurate reading of the level marks, and the right fluid.
Start With a Fully Cold Engine
Park on level ground so the vehicle isn't tilted when you read the reservoir, which would give a false level. Switch the engine off and give it time to cool completely. How long that takes depends on how hard the car was driven, the outside temperature, and the engine's design. A short errand on a cool morning heats the engine far less than a long climb in summer traffic. Instead of relying on a set number of minutes, treat the engine as hot until you're sure it isn't, and wait longer if you're unsure.
Never loosen a radiator cap or pressurized reservoir cap while the engine is hot or running. Pressure raises the coolant's boiling point, and releasing that pressure suddenly can turn hot coolant into steam and spray it out of the opening. If you see steam, get an overheating warning, or notice the temperature gauge climbing while you drive, pull over where it's safe and shut the engine off. Don't open the cooling system. Call for assistance, because pouring coolant into an overheating engine won't fix the underlying problem.
Find the Coolant Reservoir and Approved Fill Point
Start with the owner's manual and any labels under the hood. The coolant reservoir is usually a translucent plastic tank, and its cap often carries a coolant symbol or a pressure warning. Several fluid containers look alike, so confirm you've found the right one before opening anything. Washer fluid, brake fluid, and power steering reservoirs all have their own caps, and adding coolant to the wrong one can create a separate and expensive repair.
Reservoirs come in two main designs. A pressurized expansion tank is part of the sealed system, and its cap may be the main fill point. An overflow recovery bottle isn't pressurized: it collects coolant that expands out as the engine warms and returns it as the engine cools, so it may not be where coolant should go. Both are connected to the system by hoses, but that connection doesn't tell you where to fill. Hybrids, electric vehicles, and some turbocharged engines have more than one coolant circuit, so identify the correct reservoir in the manual first.
Read the Reservoir's Cold Level Marks
Look for MIN and MAX, LOW and FULL, or a line marked for cold level on the side of the reservoir. The owner's manual explains the conditions for a valid reading, which usually means a cold engine on level ground. Most tanks are translucent enough to read from outside, so you don't need to open the cap just to check. If the plastic is discolored or the engine bay is dark, a flashlight held beside or behind the tank will usually make the liquid line easy to see.
A cold reading below the minimum means coolant is needed, and it's also worth finding out why the level dropped. A reading anywhere inside the range is normal and needs no action, because MAX is a ceiling rather than a target. A cold reading above the maximum suggests overfilling, and the extra coolant may be pushed out once the engine warms up. Coolant expands as it heats, so a warm engine naturally shows a higher level. That's why only a fully cold reading tells you whether topping up is needed.
Choose Coolant That Meets the Vehicle's Specification
The owner's manual lists the coolant specification your engine needs, often as a named industry standard or a manufacturer approval. Check the product label for that exact specification before buying. Don't rely on color. Manufacturers use different dyes, and coolants with very different chemistries can look almost the same, while two different colors may both meet the same standard. Choosing by specification protects the corrosion inhibitors that keep metal parts, gaskets, and seals in good condition.
Coolant is sold premixed and ready to pour or as a concentrate that has to be diluted. Concentrate should be mixed at the ratio the manual gives, using water that meets any stated requirement, such as distilled or deionized water. Don't assume one ratio suits every vehicle or climate. If you don't know what coolant is already in the system, or you can't confirm the correct product, ask a dealer or qualified technician before adding anything. Mixing incompatible chemistries can reduce protection.
Top Up the Reservoir to the Specified Cold Level
Once the system is fully cold and you've confirmed the fill point, follow the manual's instructions for removing the cap. Some caps are meant to be turned slowly to a first stop so any leftover pressure can escape before the cap comes off. A clean funnel helps keep dirt, grit, and old debris out of the system, and it reduces spills onto belts, wiring, and hot-running parts that will warm up again once you start the engine.
Pour the prepared coolant slowly in small amounts, pausing to let it settle and checking the level each time. Stop when it reaches the specified cold mark rather than filling to the neck. Tighten the cap until it seats as the manual describes. Wipe up spills right away, because coolant tastes sweet and is poisonous to children and animals. Recycle leftover or waste coolant properly. A small top-up is a quick job. Refilling a system that has run empty is different, since trapped air may require a vehicle-specific bleeding procedure and professional service.
Check or Fill at the Radiator Only When the Manual Directs
Cooling systems differ in whether the radiator has a cap you're meant to check. Some vehicles allow a cold radiator-level check through an accessible cap. Many others have no routine radiator check, or no radiator cap at all, and rely on a designated reservoir instead. Only open a radiator cap when the system is fully cold and the owner's manual specifically tells you to. Opening it to check a hot engine is exactly the situation that causes burns from escaping coolant and steam.
When the manual does call for a radiator check, use its reference point and filling instructions, since some designs fill to the neck and others to a specific marker. Keep in mind that a normal level in the recovery bottle doesn't always prove the radiator is full, because the return path between the two may not be working as intended. If readings don't make sense, the cap is hard to reach, or the radiator looks empty, have a professional assess the system rather than guessing.
Recheck the Level and Recognize When a Top-Up Is Not Enough
After topping up, check the level again once the car has been driven normally and then allowed to cool completely, under the same conditions as before. Follow the manual's checking method each time so the readings can be compared fairly. Noting the level and date makes patterns easier to spot. A level that stays steady over several checks suggests the earlier drop was minor, while one that keeps falling means coolant is leaving the system somewhere.
Look for evidence without reaching into the engine bay. Signs include puddles under the front of the car, crusty residue around the reservoir or hose connections, a sweet smell, or coolant that looks murky, rusty, or oily. Keep your hands away from belts and fans, since some electric fans can start even with the engine off. These clues point toward a problem but can't identify which component has failed. Repeated loss, an empty reservoir, or ongoing temperature warnings call for professional testing, and if the engine overheats, stop driving.