Brake Pads and Rotors: When to Replace Them as a Set and What to Check Before Buying
The short answer
Replacing brake pads and rotors together, one axle at a time, is often the most practical choice, but it is not automatically required. New pads work best against a fresh, flat rotor surface. If your rotors are below their minimum thickness, warped, deeply grooved, cracked or heat-damaged, they need replacing, and buying a matched pad and rotor set is the simplest way to do it. If the rotors are still within specification and smooth, new pads alone can be a valid repair.
Two conditions apply either way. First, brakes are always serviced in pairs across an axle: both front wheels or both rear wheels, never one side only. Second, the parts must match your exact vehicle, including the brake package it was built with, not just its make and model.
When replacing pads and rotors together makes sense
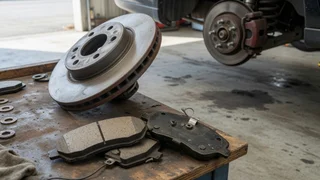
The rotor is at or below the minimum thickness stamped on it or listed in the service information for your vehicle. You feel a pulsing or vibration in the brake pedal or steering wheel when braking, which usually points to uneven rotor thickness or runout (side-to-side wobble). The rotor face has deep grooves or a pronounced lip at the outer edge. There are cracks, blue or dark heat spots, or heavy rust pitting on the braking surface. The old pads wore down to the backing plate and scraped metal against the rotor. Resurfacing would take the rotor below its minimum thickness, or the labor cost of resurfacing is close to the price of a new rotor.
Many modern rotors are relatively thin and light, which leaves little material for machining. That is one reason shops frequently quote new rotors with every pad job instead of resurfacing the old ones.
When new pads alone may be enough
If the rotors measure comfortably above minimum thickness, braking is smooth with no pulsation, and the surface shows only light, even wear, replacing just the pads is reasonable. Some owners and shops prefer to resurface rotors in this situation to give the new pads a fresh surface; whether that is worthwhile depends on how much material remains and what the machining costs locally. The decision should come from measurement and inspection, not from habit or a blanket rule.
What a brake pad and rotor kit includes
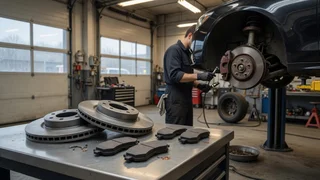
A pad and rotor kit is sold per axle and usually contains two rotors and one set of pads for both wheels on that axle. Depending on the brand, it may also include new pad clips or abutment hardware, anti-squeal shims, caliper slide pin grease and, on some vehicles, pad wear sensors. Contents vary, so read the listing rather than assuming hardware is included.
Option | Advantages | Trade-offs; Pad and rotor kit | Parts are pre-matched for one axle; single purchase; often includes hardware | Less freedom to mix a preferred pad brand with a preferred rotor brand; Pads and rotors bought separately | Choose each part on its own merits; can match pads to specific driving needs | More room for fitment mistakes; hardware may need to be bought separately
Front and rear kits are not interchangeable. Front brakes do most of the stopping on a typical vehicle, so front pads and rotors often wear faster and are larger. A front brake pad and rotor kit is the more common purchase, but the rear axle should be inspected at the same time.
How to confirm fitment
Brake parts can differ within the same model and year. A vehicle sold with a towing, heavy-duty, sport or performance package may use larger rotors and different calipers than the base version. Trim level, drivetrain, engine and market can all change the correct part. Before ordering, gather the following:
Model year, make, model, trim and engine. Drivetrain (front-wheel, rear-wheel or all-wheel drive), since some vehicles use different rear brakes by drivetrain. The vehicle identification number (VIN), which many parts sellers and dealers can use to narrow down the exact brake package. Rotor diameter, if the catalog lists more than one option for your vehicle; it may be marked on the existing rotor or listed in the owner or service information. Whether the vehicle uses electronic pad wear sensors, and whether they are front, rear or both. Whether the rear calipers use an electronic parking brake, which may require a scan tool or a specific procedure to retract the pistons. Whether the rear axle uses a drum-in-hat parking brake inside the rotor, which affects how the rotor is removed and whether parking brake shoes also need attention.
If a catalog shows two or more possible rotors for your vehicle and you cannot tell which applies, compare the new part's listed dimensions with your existing rotor or have the seller confirm by VIN. Ordering the wrong size is one of the most common brake-parts mistakes.
Choosing brake pads
The best brake pads and rotors for one driver are not necessarily the best for another. The main choice for pads is the friction material.
Pad type | Typical strengths | Typical trade-offs; Ceramic | Quiet operation, low visible dust, smooth feel for everyday driving | Usually costs more; may not suit sustained heavy loads or repeated hard stops as well as semi-metallic; Semi-metallic | Strong heat tolerance, good bite, common on trucks and vehicles that tow | Can be noisier, produce more dust and wear rotors faster; Organic (non-asbestos organic) | Soft, quiet, often inexpensive | Tends to wear faster and tolerate heat less well
For most daily drivers, a pad that matches the original equipment type is a sound default. Drivers who tow, carry heavy loads, live in hilly or mountainous areas, or drive aggressively may benefit from a pad rated for higher heat. Some vehicles specify a particular pad type from the factory, so check what your vehicle originally used before switching.
Choosing rotors
Smooth (blank) rotors: the standard design on most vehicles; quiet and generally the most economical choice for normal driving. Slotted rotors: grooves in the face help clear gas, water and debris from between pad and rotor; can increase pad wear and noise. Drilled, or drilled and slotted, rotors: often chosen for appearance or performance styling; on some lower-quality rotors the holes can be a starting point for cracks under heavy heat. Coated rotors: a protective finish on the hat and non-braking areas resists rust, which is useful in regions with road salt and on wheels that show the rotor. Vented versus solid: vented rotors have internal cooling vanes and are common on front axles; solid rotors are common on some rear axles. Replace like with like.
For a typical commuter vehicle, an original-equipment-style smooth rotor paired with a suitable pad usually delivers the best balance of quietness, wear and cost. Performance-styled rotors make the most sense when the vehicle and driving style actually call for them.
Where to buy
Brake pads and rotor kits are sold by national parts chains such as AutoZone, independent parts stores, online retailers and dealership parts counters. Retail stores make it easy to compare the old and new parts side by side and return an incorrect item quickly. Online sellers may offer a wider range of brands and kits. Dealers supply original-equipment parts and can match the brake package directly to your VIN.
Wherever you buy, check the return policy for parts that have been opened but not installed, the warranty terms on pads and rotors, and whether the seller offers fitment confirmation. Some retail chains also lend specialty tools, which can help with a do-it-yourself job; ask your local store what it offers.
What affects brake pad and rotor replacement cost
Prices vary widely by vehicle, region and shop, so any single figure would be misleading. What you can control is understanding the factors that move the total:
Vehicle type: trucks, large SUVs, performance models and luxury vehicles often use larger or more specialized brake parts. Axle: front and rear jobs are priced separately, and rear jobs with electronic parking brakes may take more time. Part quality tier: economy, original-equipment-equivalent and premium parts differ in price, materials and expected life. Additional parts: wear sensors, hardware kits, seized caliper slide pins or a sticking caliper add to the bill. Brake fluid service: some shops recommend a fluid flush at the same time, depending on fluid age and condition. Labor rates: these differ between dealers, independent shops and chain service centers, and from one area to another.
When comparing shop quotes, ask each one to itemize parts, labor and any additional recommended work, and confirm whether the quote covers one axle or both. That makes quotes directly comparable.
Doing the replacement: what the job involves
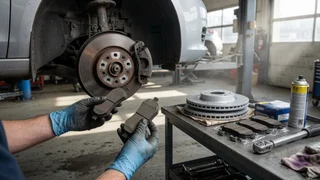
Replacing pads and rotors is a common do-it-yourself repair, but brakes are a safety system, so the work has to be done correctly. A typical job on one axle involves safely supporting the vehicle on jack stands, removing the wheels, removing the caliper and its bracket, removing the old rotor, cleaning the hub face of rust, installing the new rotor, fitting new pad hardware, lubricating the slide pins with the correct brake grease, retracting the caliper piston and reassembling.
Use the torque values from your vehicle's service information for caliper bracket bolts, caliper bolts and lug nuts; tighten lug nuts in a star pattern. Clean the new rotors of any protective oil with brake cleaner before installation unless the manufacturer states otherwise. Check the caliper for leaks, a torn piston boot or a piston that will not retract smoothly; a sticking caliper will quickly ruin new pads and rotors. Pump the brake pedal several times before moving the vehicle so the pads seat against the rotors. Follow the pad maker's bedding-in procedure, a series of controlled stops that transfers an even layer of pad material onto the rotor and helps prevent vibration and noise.
If the vehicle has an electronic parking brake, uses a drum-in-hat parking brake, or you are not comfortable with any of these steps, a professional installation is the safer route.
Pre-purchase checklist
Inspect or have someone measure rotor thickness and check for pulsation, grooves, cracks or heat damage before deciding between pads only and a full set. Decide which axle needs work and plan to service both wheels on that axle. Confirm year, make, model, trim, engine, drivetrain and brake package; use the VIN when possible. Pick a pad type that suits how you drive and what the vehicle originally used. Choose a rotor design that fits your needs; a coated, smooth rotor suits most daily drivers. Check what hardware and sensors the kit includes and buy anything missing. Review warranty and return terms before opening the box. Plan for bedding in the new pads after installation.