Brake Hose Replacement: Procedure and Checks
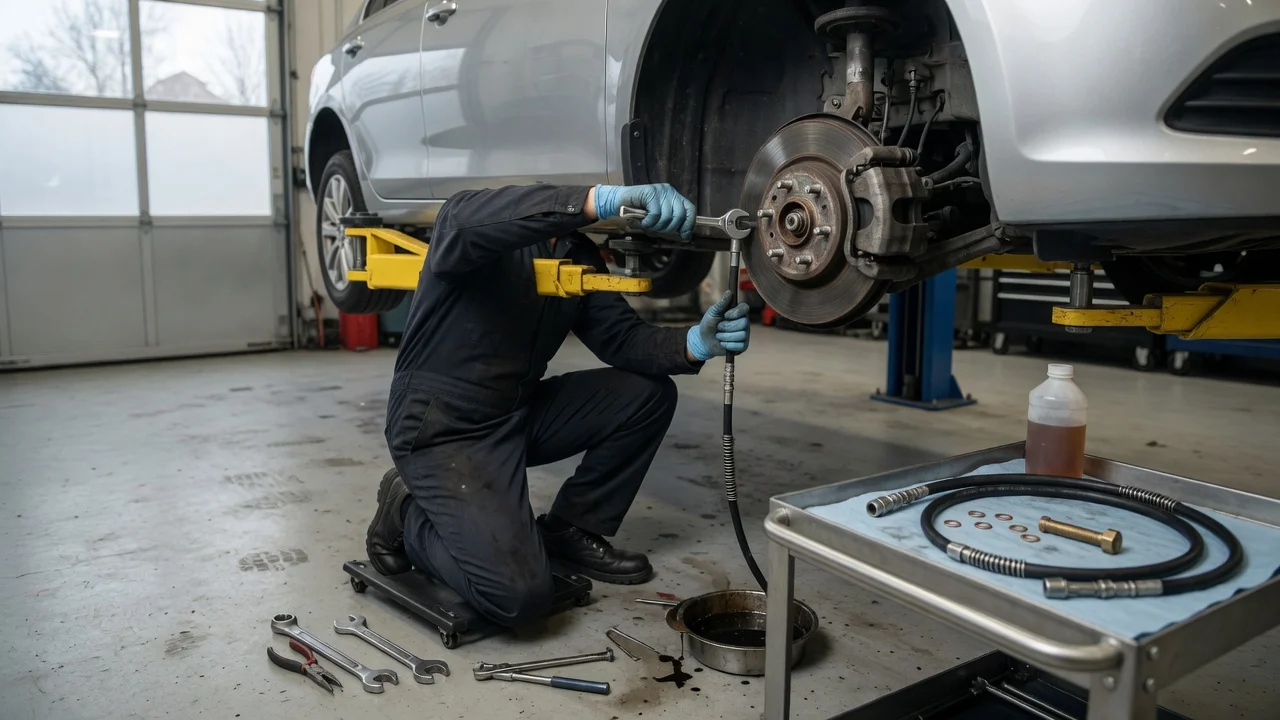
What a brake hose replacement involves
A brake hose is the flexible line that carries hydraulic fluid between a rigid brake pipe and a caliper or wheel cylinder. Replacement means disconnecting that hose, fitting a matching new hose, restoring a sealed hydraulic circuit, bleeding air from the system, and confirming that pedal feel and stopping performance are restored. The work is a safety-critical hydraulic repair, not a cosmetic parts swap.
The essential answer is: replace a damaged, leaking, swollen, cracked, or age-hardened hose as a complete assembly, then bleed and leak-test the circuit before the vehicle is driven. Hoses are vehicle-specific in length, banjo or flare fittings, mounting brackets, and whether they serve a front caliper, rear caliper, or drum wheel cylinder. Torque figures, bleed sequence, and fluid specification are set by the vehicle manufacturer and must be taken from that vehicle’s service information. This article describes the general procedure and checks; it does not replace a workshop manual for a named model, year, or market.
When replacement is the right next action
Inspect the hose along its full length, including the crimped ends and the area that flexes with steering and suspension travel. Common reasons to replace rather than continue in service include wet fluid seepage at a fitting or along the rubber, a bulging or blistered outer cover, deep cracking in the rubber, a hose that feels spongy or swollen, chafing through to the inner reinforcement, a crushed or twisted hose, or a failed crush washer or sealing flare that still leaks after a correct reseat. A hose that has been pinched by a clamp, stretched by a missing bracket, or contaminated by oil or fuel should also be replaced.
A soft or sinking pedal, a pull to one side under braking, or a visible wet wheel or inner fender after a stop can point to a hose, but those symptoms also overlap with master-cylinder, caliper, wheel-cylinder, and rigid-line faults. Confirm the leak or damage at the hose before ordering parts. Replace hoses in axle pairs when one hose on that axle is failed by age or weather, because the remaining hose has lived the same life. Do not reuse a hose that has been unclipped and left hanging under load, and do not repair a hydraulic brake hose with tape, clamps, or splices.
Parts, tools, and professional boundaries
Use a hose specified for that vehicle’s year, generation, powertrain, brake package, and market. Matching length and end fittings is not enough if the hose also carries a sensor lead, a wear-indicator wire, or a unique bracket. Banjo fittings typically require new copper or aluminum crush washers on both sides of the banjo; flare fittings require undamaged seats and the correct flare type. Have the manufacturer-specified brake fluid on hand. Do not mix fluid chemistries; if the reservoir label and the service data disagree, stop and resolve that from the current official specification rather than guessing.
Vehicle support: a lift or rated jack and stands on a level surface, with the parking brake and wheel chocks used as the procedure requires. Line wrenches (flare-nut wrenches) sized to the pipe nuts, plus sockets for banjo bolts and brackets. New hose, new crush washers or seals as specified, and any clips or brackets that were damaged. Catch pan, lint-free rags, and a method to keep dirt out of open ports. Brake-bleeding equipment appropriate to the system: a two-person pedal bleed, a vacuum or pressure bleeder, or a scan-tool bleed if the vehicle requires electronic control of an ABS or stability module. Torque wrench capable of the fastener range given in the service data. Torque values are not interchangeable across vehicles and are omitted here because they must be taken from the applicable manual.
Stop and use a qualified shop if the rigid pipe nut is seized or rounding, if a steel line is corroded at the union, if the vehicle uses an electronic parking brake or an ABS module that requires a factory bleed routine you cannot run, or if you cannot obtain the correct hose, fluid, and torque data. Opening a brake circuit on a vehicle you cannot bleed completely leaves the brakes unsafe.
Precautions that apply before any disconnection
Brake fluid damages paint. Protect bodywork and wipe spills immediately. Used fluid is contaminated; dispose of it according to local rules and never return bled fluid to the reservoir. Keep mineral oil, grease, and petroleum cleaners off rubber hoses and seals. Do not allow the master-cylinder reservoir to run dry while the circuit is open; that draws air into the master cylinder and can require a more extensive bleed. Support the vehicle so the suspension is in a position that does not stretch the hose while it is disconnected. Do not hang a caliper by the remaining hose.
Replacement procedure
Confirm the hose identity against the new part before you open the system. Photograph or note routing, clip positions, and which end is the chassis union versus the caliper or cylinder union. Raise and support the vehicle, remove the wheel if it blocks access, and clean the fittings so debris does not enter the line.
Cap or cover nearby painted surfaces. Place a drain pan under the union that will open first. If the service data calls for it, clamp the hose only with a tool designed for brake hoses, and only as a temporary measure. A sharp or overtight clamp can damage the hose you are removing and is not a substitute for a sealed system. Hold the hose end so it cannot twist the rigid pipe. Crack the pipe nut with a line wrench, or remove the banjo bolt, as fitted. Catch fluid. Plug or cap the open pipe and the caliper or cylinder port as soon as they are open. Remove the retaining clip, bracket bolt, or locating tab that holds the hose to the body, strut, or knuckle. Withdraw the old hose without bending the steel pipe. Compare old and new hoses: overall length, end types, clocking of the banjo, and bracket location. Fit new crush washers if a banjo is used. Install the new hose in the original routing, with no twist, no contact with the tire, spring, or steering linkage through the full range of lock and suspension travel, and with every clip and bracket refitted. A twisted hose can fail early and can make the steering feel tight at the lock stops. Start fittings by hand to protect threads and flare seats. Tighten the pipe nut or banjo bolt to the manufacturer’s specified torque. Tighten bracket fasteners to specification as well; a loose bracket lets the hose rub. Top up the reservoir with the specified fluid to the marked level. Do not overfill.
If a pipe nut will not turn, or if the steel line twists with the nut, do not force it until the pipe kinks. That is the point at which the repair often expands to a rigid-line replacement, which is a professional-service boundary for many owners.
Bleed the circuit and restore pedal feel
Air entered the circuit when the hose was opened. Bleed at least the corner you opened, and bleed additional corners if the pedal remains soft or if the manufacturer specifies a full-system sequence after any hose replacement. Many ABS-equipped vehicles require a scan-tool or pressure-bleed procedure so the hydraulic control unit is included. Follow that vehicle’s bleed order, usually starting at the wheel farthest from the master cylinder, unless the manual states a different order.
Keep the reservoir topped up throughout. Bleed until the fluid at the bleeder is free of bubbles and matches the appearance of new fluid for that specification. Close bleeders to the specified torque if one is published; overtightening can snap a bleeder in the caliper or cylinder. Recheck reservoir level and cap it. A firm pedal that holds under a steady press, with the engine running if the vehicle uses vacuum or other power assistance that affects pedal height, is the first functional check. A pedal that sinks, pumps up, or stays long and soft means air, a leak, or another hydraulic fault remains.
Completion checks before a road test
With the wheels hanging or the steering swept lock to lock as the design allows, confirm the new hose does not stretch, kink, or rub. Wipe all unions dry, then apply firm pedal pressure and watch the banjo, pipe nut, bleeder, and hose body for seepage. Recheck after the fluid has had time to find a weak seat. Confirm wheel speed sensors, pad-wear leads, and parking-brake cables that share the same corner are still routed and clipped. Refit the wheel and tighten wheel fasteners to the vehicle’s specified method and values. Check the instrument cluster for ABS, brake, or stability warning lamps after ignition on. A lamp that stays on after a hydraulic opening can mean a low-fluid condition, a sensor unplugged, or a bleed that did not include the hydraulic unit.
Road-test only after a dry static leak check and a firm pedal. In a clear, low-speed area, make a series of moderate stops to confirm the vehicle stops straight and the pedal height stays consistent. Then re-inspect the hose and fittings for wetness, because some leaks appear only after heat and pressure. If the pedal fades, the vehicle pulls, a warning lamp is on, or fluid is visible, do not continue to drive; reopen the diagnosis or have the vehicle towed to a shop.
What this guide cannot specify
Tightening values, bleed sequences, fluid types (including whether a vehicle is filled with DOT 3, DOT 4, DOT 5.1, or another specified fluid), electronic parking-brake retract procedures, and ABS modulator bleed routines vary by model year, generation, powertrain, trim, and market. Those figures and steps are not included here because they were not verified against a named manufacturer’s service data. Use the official procedure for the vehicle on the hoist before you open a fitting.