Brake Hose Replacement: Procedure and Installation Checks
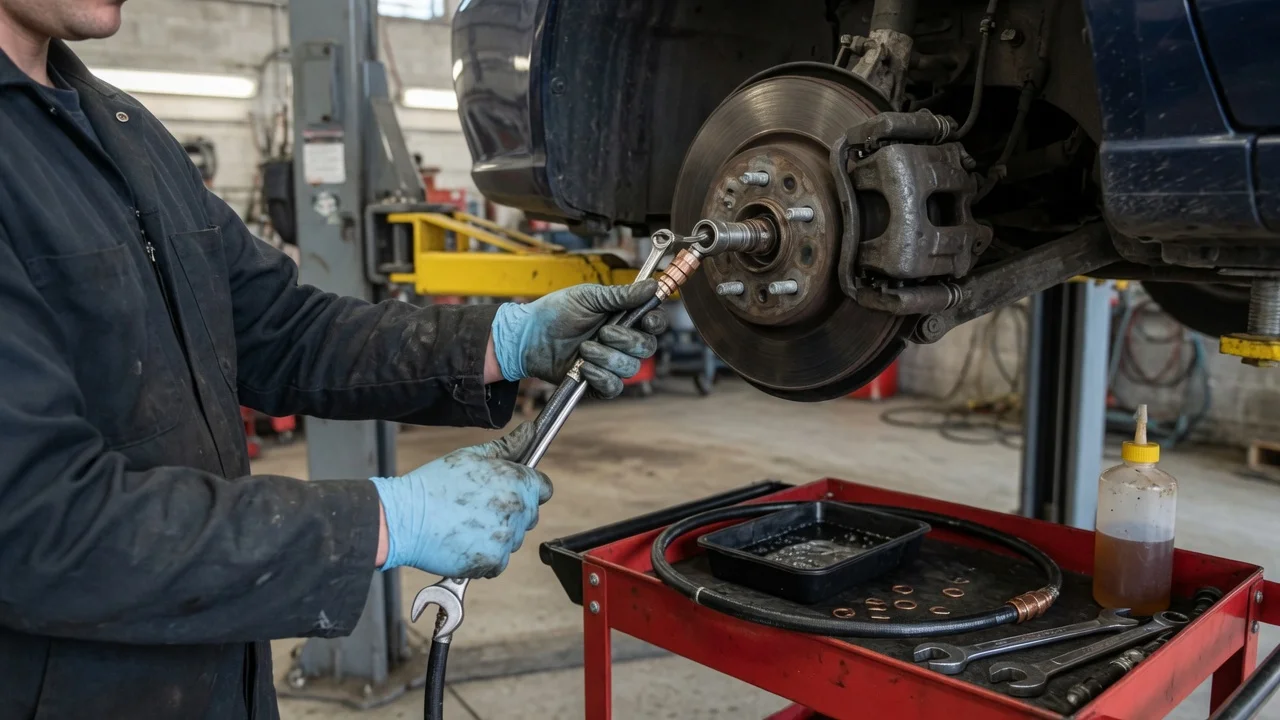
What brake hose replacement covers
A brake hose is the flexible hydraulic line that joins a rigid brake pipe to a caliper or wheel cylinder so the suspension and steering can move without stressing the metal line. Replacement means removing that hose, fitting a matching new hose on the original path, resealing both ends, and bleeding the affected circuit until the pedal is firm and dry. The job is usually one corner or one axle pair; the rest of the hydraulic system stays in place unless other damage is found.
Fitment is vehicle-specific. Hose length, end type (banjo, bubble flare, or inverted flare), thread size, bracket location, and whether the circuit feeds an ABS modulator all change the part and the bleed method. Tightening values, fluid specification, and bleed order are not universal. Use the values and sequence in the service information for that model year, generation, powertrain, and market. Those figures are not restated here because they cannot be verified from a single procedure that covers every vehicle.
When a hose is due for replacement
Inspect the hose with the wheel off and the steering and suspension moved through their travel so hidden abrasion and stretch become visible. Replace the hose if any of the following are present.
Cracks, crazing, or dry rot in the outer cover; bulging or a soft spot under pressure; wetness at a fitting, crimp, or along the cover; chafing against a wheel, strut, spring, or body panel; a kink, twist, or crushed section; a hose that is too short at full lock or full droop.
Cracks, crazing, or dry rot in the outer cover; Bulging, blistering, or a soft spot under pressure; Wetness, staining, or fluid at a fitting, crimp, or along the cover; Chafing against a wheel, strut, spring, or body panel; A kink, twist, or crushed section after impact or poorly routed work; A hose that is too short at full lock or full droop, or that pulls on a pipe
A spongy or sinking pedal can come from air, a master-cylinder leak, caliper issues, or a hose that expands internally. Confirm the hose itself is at fault before replacing it. Age alone is not a published interval in most owner literature; condition and damage decide the work. If only one hose on an axle is failed, replacing the pair on that axle is a common shop practice so both sides age together, but that choice is not required by every manufacturer.
Tools, parts, and prerequisites
Work on a level surface with the vehicle supported on a lift or stands at the designated points, never on a jack alone. The parking brake and wheel chocks must hold the vehicle before a driven or steered wheel comes off. Have the matching hose, new sealing hardware, and the specified brake fluid on hand before opening the system.
Correct replacement hose; new crush washers for banjo fittings; flare-nut wrenches and a socket for the banjo bolt; caps or plugs; a bleeder bottle or vacuum/pressure bleeder; the specified brake fluid; a torque wrench; service information for routing, torque, fluid type, and bleed sequence.
Correct replacement hose for that corner, including brackets and locating tabs; New crush washers for banjo fittings; do not reuse flattened washers; Flare-nut and line wrenches sized to the pipe nuts, plus a socket for the banjo bolt; Caps or plugs to limit fluid loss and keep dirt out of open ports; A brake bleeder bottle or vacuum/pressure bleeder and a catch container; The brake fluid named in the owner or service information for that vehicle; Torque wrench covering the range given for the banjo bolt, flare nuts, and hose bracket; Service information for routing, clip positions, torque, fluid type, and bleed sequence
Match the new hose to the old one by end fittings, overall length, and bracket geometry. A hose that is shorter, longer, or clocked differently can rub, stretch, or pull a pipe out of a union. Aftermarket braided hoses are only a substitute when they carry the correct fittings and a stated rating for hydraulic brake use on that vehicle. Glycol-based fluids (commonly labelled DOT 3, DOT 4, or DOT 5.1 in many markets) must not be mixed with silicone DOT 5. Confirm the bottle against the cap and the service data before pouring.
Safety limits and when to stop
Brake hydraulics are a safety system. Brake fluid damages paint and is harmful if swallowed; keep it off skin, finished surfaces, and the environment, and dispose of used fluid as required locally. Do not open the system if a line nut is rounded, a pipe is heavily corroded, or a fitting will not turn without twisting the tube. Stop and use a qualified workshop if an electronic parking brake must be placed in service mode, if an ABS or stability module needs a scan-tool bleed cycle, if a seized caliper or collapsed pipe is found, or if the pedal will not firm after a correct bleed. Driving with air in a circuit or a leaking hose is not a completion state.
Replacement procedure
The sequence below is the usual order for a single flexible hose at a caliper or wheel cylinder. Insert the manufacturer torque, routing diagram, and bleed method at the steps that call for them. If the vehicle uses a rear electronic parking brake, put that caliper in the published service position before spreading or hanging it.
1) Support the vehicle, remove the wheel, and note clip positions and hose clocking. 2. Clean the fittings. 3. Disconnect the hose-to-pipe union, cap the pipe, then remove the caliper or cylinder end; do not pump the pedal with the circuit open. 4. Match the new hose and fit new crush washers. 5. Start fittings by hand and route through original clips without twist. 6. Tighten to the published torques. 7. Fill with the specified fluid and bleed per service information. 8. Pressure-check joints and confirm clearance through steering and suspension travel.
Support the vehicle, remove the wheel, and turn the steering (front) or droop the suspension so the hose and both fittings are accessible. Photograph or note clip positions and the natural clocking of the banjo or union before loosening anything. Clean the banjo bolt, flare nut, and surrounding area so debris does not enter the port. Place a tray under the joint. Crack the hose-to-pipe union first, using a line wrench on the flare nut and a second wrench on the hose hex so the pipe does not twist. Cap the open pipe immediately. Then remove the banjo bolt or the hose from the caliper or cylinder. Catch fluid; do not pump the pedal with the circuit open. Compare the new hose to the old one: length, ends, locating tab, and bend. Transfer any separate bracket only if the new hose is designed to use it. Fit new crush washers on a banjo, one on each side of the hose eye unless the maker shows a different stack. Start the inner union or banjo by hand so threads are not crossed. Route the hose through the original clips and locating slot before final tightening. The hose must hang without twist: the painted or moulded stripe, if present, should run straight, and the hose must not be wound up against a bracket. Tighten the caliper or cylinder fitting to the published torque, then the pipe union to its published torque. Overtightening a banjo bolt crushes the washers unevenly and can crack the hollow bolt; undertightening leaks. Refit the bracket bolt to its specified torque so the hose cannot rotate in service. Fill the reservoir with the specified fluid to the marked level. Bleed the opened circuit using the sequence in the service information. Many vehicles bleed the wheel that was opened first, then follow a fixed order; ABS-equipped vehicles may require a scan tool to open isolation valves. Keep the reservoir from running dry. Hold a firm pedal and check every joint you opened for seepage. Cycle the steering from lock to lock and move the suspension through its travel, watching for stretch, contact with the tyre or spring, and pull on the metal pipe. Re-clip if the hose can touch a moving part.
If a flare nut will not break free, apply penetrating oil to the nut only and use a proper line wrench. Heating a joint near a rubber hose or a plastic liner is not appropriate. A pipe that round-offs or splits at the flare is a separate repair: replace or re-flare that section rather than forcing a leak path.
Installation checks before the wheel goes back on
These checks confirm the hose is sealed, clocked, and free to move. Skip none of them; a hose that is tight in the straight-ahead position can still tear or rub at full lock.
Both ends tightened to published values with new banjo washers; no twist and the locating tab seated; hose clipped and clear through full travel; no wetness after a held pedal; reservoir at the specified mark; firm pedal and no new warning lamps; wheel hardware torqued as specified.
Both ends seated and tightened to the published values, with new washers where a banjo is used; No twist in the hose body; locating tab fully in its slot; Hose captured in every original clip and clear of the tyre, disc, strut, spring, and steering stop through full travel; No wetness at the banjo, flare, crimp, or cover after a held pedal; Reservoir at the specified mark with the correct fluid; cap sealed; Pedal firm, high, and consistent after several applications, with no warning lamp for ABS, brake, or stability control that was not present before the work; Wheel and any sensor or shield hardware refitted to the published torque
A short, controlled brake application in a clear area is the last check: the vehicle should slow in a straight line with a solid pedal and no pull, grind, or lamp that appears under braking. If the pedal still sinks, the circuit still leaks, or a lamp stays on, do not treat the replacement as finished. Re-bleed, re-inspect the joints, and use diagnostic data for ABS faults rather than repeating random pedal pumps.
What this procedure does not settle
This guide does not supply a torque chart, a bleed order, a fluid specification, or a hose part number. Those values vary by model year, axle, brake package, and market, and they belong in the vehicle’s service information. It also does not cover rigid-pipe replacement, master-cylinder work, or ABS hydraulic-unit service. If any of those are required, or if the fittings will not assemble cleanly, the next action is a qualified brake repair rather than a further attempt with unmatched parts.