Brake Hose Replacement: Procedure and Requirements
The Short Answer
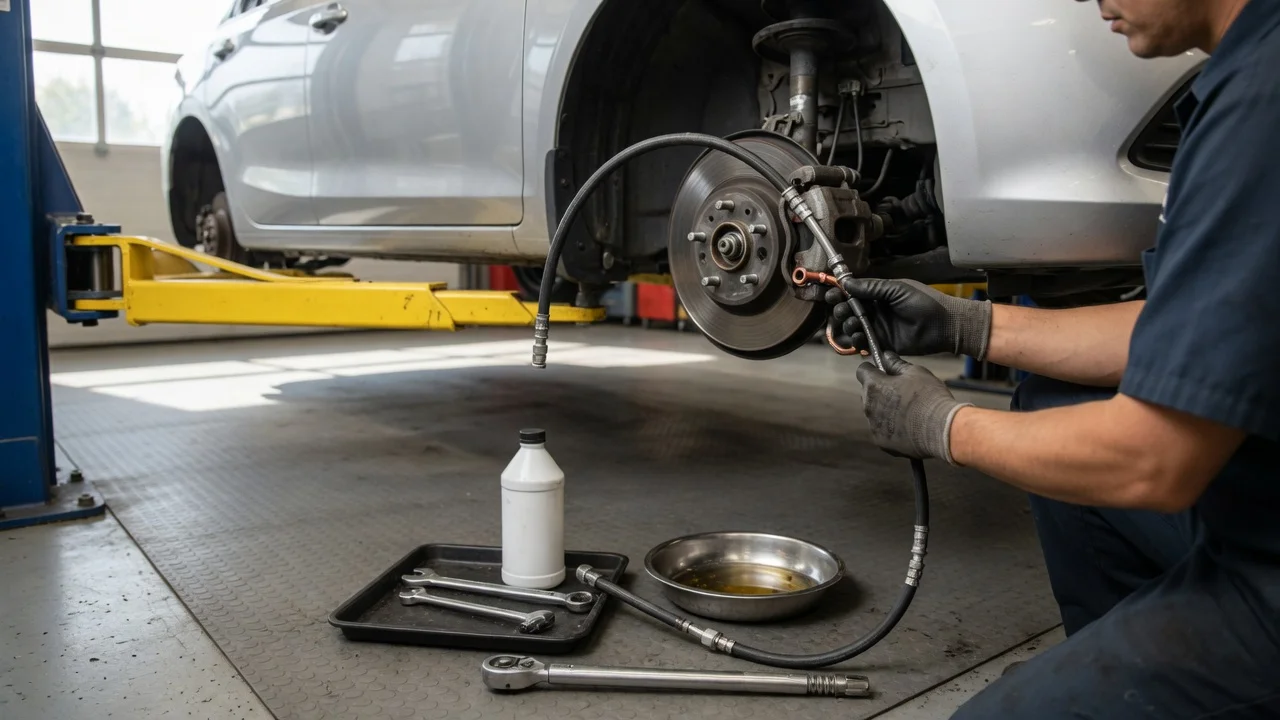
Replacing a brake hose means removing the flexible rubber or braided line that connects the rigid metal brake pipe on the body or chassis to the caliper or wheel cylinder. You fit a correctly specified new hose, tighten the fittings to the manufacturer's values, and bleed the air out of the hydraulic system. A competent home mechanic with the right tools can do it on many vehicles. It is still a safety-critical job, and the brakes must not be trusted until the system has been bled and checked for a firm pedal and no leaks.
The details depend on the vehicle. Hose length, end fittings, mounting brackets, tightening values, brake fluid type and bleeding method all vary by make, model, model year and brake system design. Some vehicles with ABS (anti-lock braking) or electronic stability systems need a diagnostic scan tool to bleed the system fully. This guide covers the general procedure. No vehicle-specific specifications were available for it, so confirm every value against the manufacturer's service information for your vehicle.
When a Brake Hose Needs Replacing
Hoses are usually replaced when inspection shows deterioration or damage. Common reasons include: • Cracking or crazing in the outer rubber; • Bulging or swelling, especially when the pedal is pressed; • Chafing or cuts; • Fluid weeping at the hose or its fittings; • Corroded or seized end fittings; • Damage from suspension or steering contact; A soft or spongy pedal, or a vehicle that pulls to one side under braking, can point to a failing hose. Those symptoms have other possible causes too, so a hose should be inspected rather than assumed to be faulty. Many owners replace hoses in axle pairs so braking stays consistent side to side. That is common practice rather than a universal requirement.
Prerequisites and Parts
Before starting, gather the following: • The correct replacement hose for your exact vehicle, matched by model year, axle and side where applicable. Hoses that look similar can differ in length, thread type and fitting style. • New sealing washers if the hose uses a banjo bolt connection. Banjo fittings commonly use crush washers that are intended to be replaced rather than reused. • Fresh brake fluid of the type the manufacturer specifies. The specification is usually printed on or near the reservoir cap and listed in the owner's manual. Do not mix fluid types the manufacturer does not approve. Silicone-based DOT 5 fluid in particular is not interchangeable with glycol-based DOT 3, DOT 4 or DOT 5.1. • The manufacturer's tightening values for the hose fittings, banjo bolt and any bracket fasteners.
Tools Typically Needed
• Jack and properly rated axle stands, or a vehicle lift; • Wheel chocks and a wheel brace or lug wrench; • Flare nut wrenches (also called line wrenches) in the sizes your fittings require. These grip more of the fitting than an open-ended wrench and reduce the risk of rounding soft brake fittings. • Standard sockets and wrenches for banjo bolts and bracket fasteners; • A torque wrench; • Penetrating oil for corroded fittings; • Brake hose clamp pliers, if you choose to clamp the old hose to limit fluid loss. Use only purpose-made clamps with smooth jaws, never ordinary pliers or locking grips, and do not clamp a hose that is being reused. • A drain container, rags, and a bleeding kit or a helper; • Eye protection and gloves
Step-by-Step Procedure
1) Prepare and Secure the Vehicle
Park on level, solid ground, engage the parking brake if it does not act on the wheel you are working on, and chock the opposite wheels. Loosen the wheel nuts, raise the vehicle at the manufacturer's lifting points, support it on axle stands, and remove the wheel. Never work under a vehicle held up only by a jack.
2) Protect Paint and Limit Fluid Loss
Brake fluid damages paint, so cover nearby painted surfaces and wipe up spills immediately with water. Check the reservoir level. Some mechanics place plastic film under the reservoir cap or fit a hose clamp to slow fluid loss. Do not let the reservoir run dry during the job. If air reaches the master cylinder, bleeding becomes more involved and may require bench or scan-tool procedures.
3) Clean and Inspect the Fittings
Clean dirt from around both ends of the hose so debris cannot enter the system. Apply penetrating oil to corroded fittings and give it time to work. Note how the hose is routed and which brackets and clips hold it, or photograph it, so the new hose goes back in the same position.
4) Disconnect the Rigid Line from the Hose
At the chassis end, hold the hose fitting steady and loosen the steel line's flare nut with a flare nut wrench. Some designs use a clip, nut or bracket to hold the hose end in place, and these must be released. Avoid twisting or kinking the rigid steel line. If the flare nut is seized and starts to round off or twist the pipe, stop. A damaged steel line also needs repair or replacement, which may involve flaring tools and skills beyond a simple hose swap.
5) Disconnect the Hose at the Caliper or Wheel Cylinder
Remove the banjo bolt, or unscrew the threaded hose end from the caliper or wheel cylinder, depending on the design. Keep the old sealing washers aside for comparison, but do not reuse them. Release any intermediate brackets on the suspension strut or knuckle, along with any attached sensor wiring clips, and remove the old hose.
6) Compare and Fit the New Hose
Check the new hose against the old one for length, fittings and bracket positions before installing it. Fit the caliper or wheel-cylinder end first. Use new sealing washers on each side of a banjo fitting, and make sure any locating tab sits correctly. Then route the hose exactly as the original was routed and secure it in its brackets. Make sure it is not twisted along its length. Many hoses have a printed line or marking that helps you spot a twist.
7) Reconnect the Rigid Line and Tighten Everything
Start the steel line's flare nut by hand to avoid cross-threading, then tighten it with the flare nut wrench. Tighten the banjo bolt, flare nut and bracket fasteners to the values in the manufacturer's service information. Those values vary by vehicle and none are given here. Over-tightening can crack fittings or crush flares. Under-tightening can cause leaks or loosening.
8) Bleed the Brakes
Opening the hydraulic system lets air in, and air compresses where fluid does not, which leads to a soft pedal and reduced braking. Top up the reservoir with the specified fluid and bleed the system using the manufacturer's recommended method and wheel sequence. Common methods are two-person pedal bleeding, pressure bleeding and vacuum bleeding. Keep the reservoir topped up throughout. On vehicles whose ABS hydraulic unit has been exposed to air, or where the manufacturer calls for it, an ABS bleed routine using a scan tool may be required. If you lack the equipment for that, the job belongs with a professional workshop.
9) Reinstall the Wheel
Refit the wheel, lower the vehicle and tighten the wheel nuts to the manufacturer's specified torque in the recommended pattern. Set the reservoir to the correct level and refit the cap securely.
Completion Checks
Before driving, confirm each of the following: • With the engine off, the pedal feels firm and does not sink slowly under steady pressure. If it stays soft or spongy, air remains in the system and bleeding needs to be repeated or diagnosed further. • There are no leaks at either end of the new hose after someone holds firm pedal pressure while you inspect the fittings. • The hose clears the tyre, wheel, suspension and body. Check with the steering turned fully to each lock and, where practical, through suspension movement. It must not stretch, rub or kink. • Brake fluid is at the correct level. • Bleed screws are closed and their dust caps are refitted. Then make a low-speed test in a safe, open area, checking that the brakes respond normally and the vehicle does not pull to one side. Recheck for leaks afterwards. If a warning light appears, or the pedal or braking feels abnormal, do not drive further until the cause is found.
When to Use a Professional
Hand the job to a qualified technician in any of these situations: • Fittings are badly corroded or seized, or the rigid brake lines are damaged. • The vehicle requires a scan-tool ABS bleed you cannot perform. • You cannot obtain the manufacturer's tightening values and procedure. • You cannot achieve a firm pedal after bleeding. • You are unsure of any step. Because brake failure can cause serious harm, there is no benefit in completing this job on guesswork.
Information Gaps
No vehicle-specific data was available for this guide. It therefore does not include tightening values, hose part specifications, fluid capacities, bleed sequences, or labor time and cost estimates. All of these depend on the make, model, model year and brake system. Take them from the manufacturer's service information or an equivalent repair manual for your exact vehicle.