Brake Fluid Testers and Test Strips: How to Check Whether Fluid Needs Changing
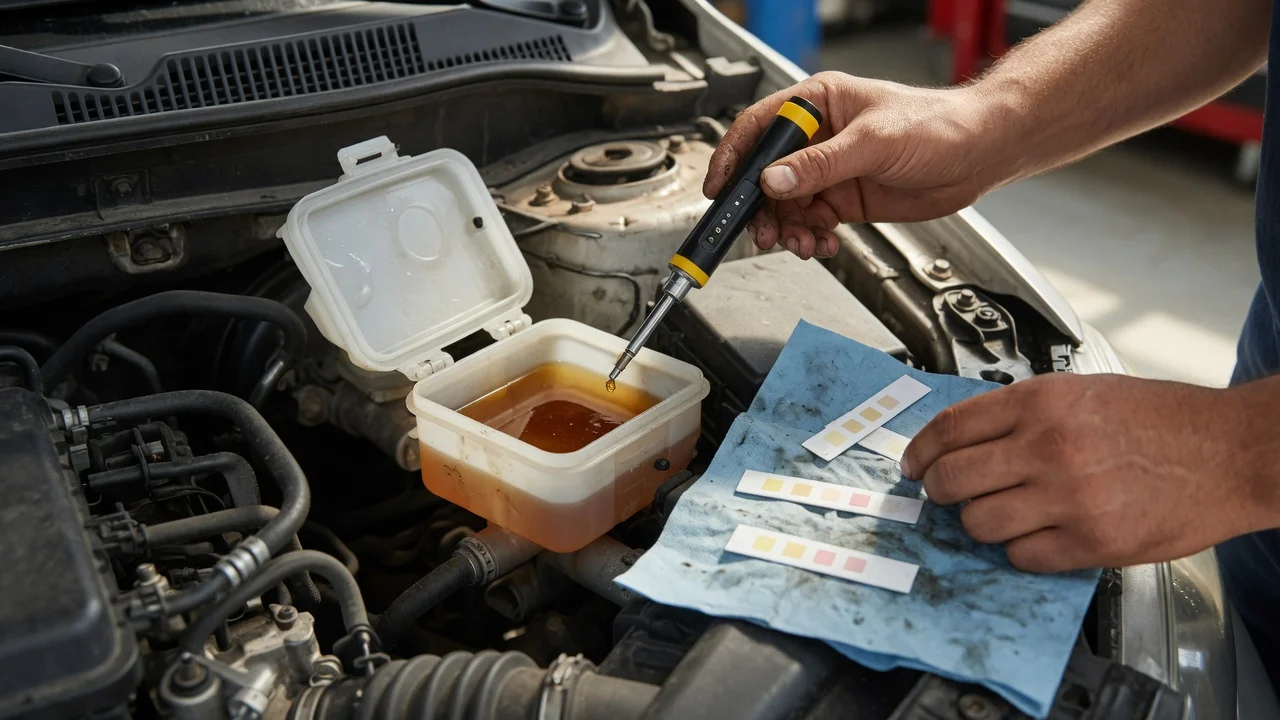
What is the essential answer?
The simplest way to check whether brake fluid is due for replacement is to measure its condition with a brake fluid tester or a brake fluid test strip. A brake fluid tester is a handheld electronic device that estimates the boiling point or moisture content of the fluid. A test strip is a disposable chemical indicator that changes color to show a specific fluid property, most commonly copper content or moisture. If the result is outside the acceptable range for your vehicle, the fluid should be changed. Neither tool fully replaces the vehicle manufacturer's service schedule, but both provide useful evidence for an ownership decision.
Why brake fluid condition matters
Brake fluid is hygroscopic, meaning it absorbs moisture from the surrounding air over time. As water content rises, the fluid's boiling point falls. Under repeated hard braking, overheated fluid with a reduced boiling point can form vapor bubbles. Because vapor compresses more easily than liquid, this can cause a longer or softer brake pedal and reduced braking effectiveness. Copper content is also used as an indicator because copper can enter the fluid as internal brake system components corrode. Many manufacturers recommend brake fluid replacement on a time or mileage interval even when the vehicle has not had obvious braking problems.
Types of brake fluid testers
Electronic brake fluid testers commonly work by measuring the electrical conductivity of the fluid. Because water conducts electricity differently from fresh brake fluid, the tool converts the reading into an estimated moisture percentage or a boiling-point result. Some testers are calibrated for specific brake fluid types, such as DOT 3, DOT 4, or DOT 5.1, while others provide a general reading. If the tester requires a fluid type to be selected, choose the grade listed in the owner's manual or on the reservoir cap. DOT 5 silicone fluid is different from glycol-based fluids and usually cannot be checked with a conductivity tester intended for DOT 3 or DOT 4.
How brake fluid test strips work
Brake fluid test strips give a chemical result rather than an electrical measurement. Copper test strips are dipped into a sample of brake fluid and then compared with a color chart. The degree of color change indicates the approximate copper concentration, which some service guidance uses as a sign of corrosion inhibitor depletion. Moisture test strips operate on a similar color-change principle, but they are less common than copper strips for brake fluid. The result is intended to support a replace-or-inspect decision, not to provide a laboratory-grade measurement.
What steps should I follow to check the fluid correctly?
Because brake fluid is corrosive and can damage paint, work carefully and protect nearby painted surfaces. Park the vehicle on a level surface and let the braking system cool before opening the reservoir. Brake fluid is also harmful if swallowed and should be kept away from skin and eyes.
1) Locate the brake fluid reservoir using the owner's manual if needed. 2) Clean the outside of the reservoir cap before opening it so dirt does not fall into the fluid. 3) Remove the cap and inspect the fluid level and appearance; compare the level with the reservoir markings. 4) For an electronic tester, insert the probe into the fluid according to the tool's instructions, without touching the reservoir bottom, and read the display. 5) For a test strip, dip the strip for the time specified by the strip manufacturer, remove it, and compare the color with the chart at the stated time. 6) Replace the cap securely and check that the fluid level remains within the vehicle's specified range.
Stop and seek qualified service if the fluid is visibly dark, contaminated, very low, or if the pedal feel is already poor. Low fluid can indicate a leak or worn brake linings, and a brake system fault is a safety-critical condition. Follow the specific tool's instructions for calibration, depth, temperature, and interpretation; the exact settings vary between testers and are not universal.
How to interpret the reading
Many electronic testers express the result as a moisture percentage. As a general reference, a water content around 3 percent or more is often considered a reason to replace glycol-based brake fluid, but the threshold should be checked against the vehicle manufacturer's recommendation and the tester's scale. Some tools instead or additionally show an estimated boiling point or a warning zone. A test strip result is normally compared with the strip manufacturer's color chart to decide whether the fluid falls into a normal, caution, or replace range.
The reading does not identify every possible problem. A low moisture or copper result does not prove that the fluid is clean or that the hydraulic system is free of air, contamination, or internal damage. The tester also cannot confirm that the correct fluid type is installed. If the vehicle's service history is unknown or the fluid has passed the manufacturer's interval, replacement may still be appropriate even if the tool shows an acceptable reading.
Choosing the next step
If the tester or strip indicates moisture, copper, or boiling-point values outside the acceptable range, the next step is to replace the brake fluid using the type specified for the vehicle. Flushing and bleeding the brake system can be more involved than a simple fluid top-up and may require a qualified service if you are not confident with hydraulic service procedures. If the result is acceptable but the fluid is due by age or mileage, follow the maintenance schedule. If you are unsure which fluid type was used previously or the result conflicts with the pedal feel or fluid appearance, have the braking system inspected rather than relying on the test alone.