Brake Caliper Grease: Where and How to Lubricate Slide Pins
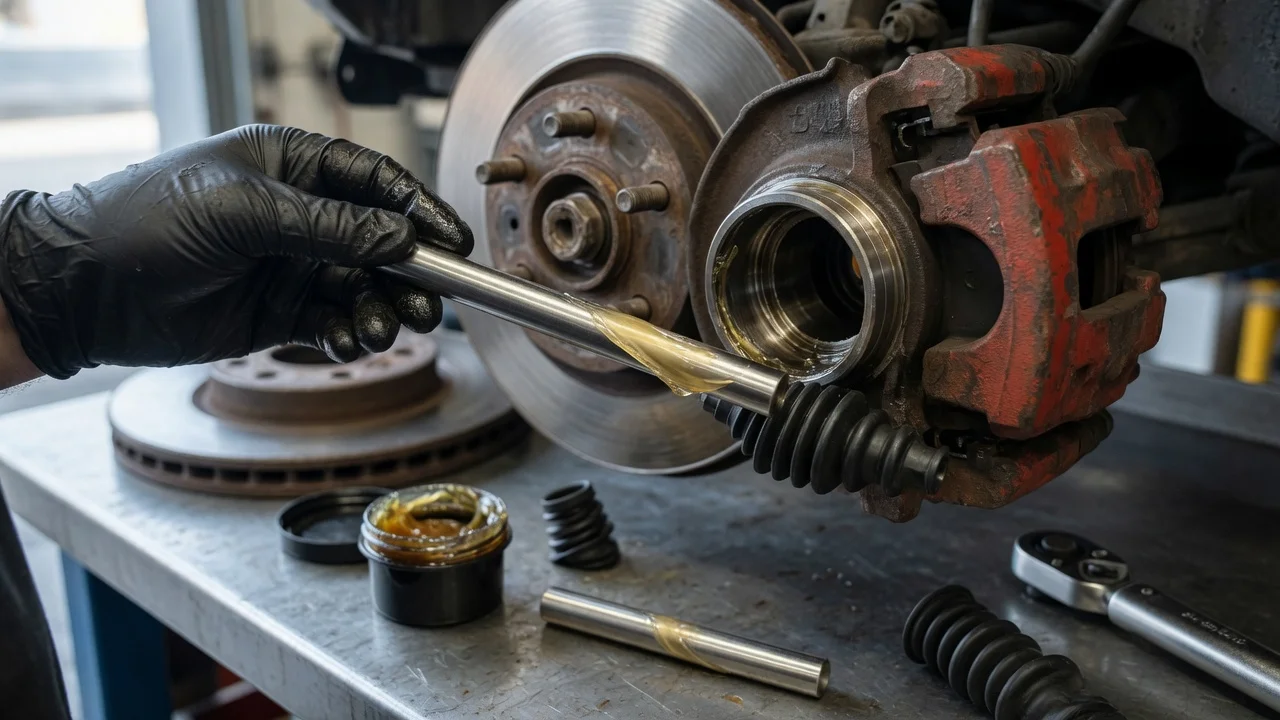
Brake caliper grease belongs on the sliding surfaces of caliper guide pins when the vehicle’s service instructions specify lubrication. These pins let a floating caliper move as the brakes apply and release. Use the specified lubricant, apply it sparingly, and keep it off brake disc friction surfaces and brake pad friction material. Some guide assemblies have different lubrication requirements, so confirm the procedure for your vehicle before starting.
Locate the slide pins and confirm the design
On many floating calipers, guide pins sit at the caliper’s mounting points and move within bores or sleeves protected by rubber boots. The boots help keep water and dirt away from the sliding surfaces. A retaining bolt may thread into a separate guide pin, so the visible bolt is not necessarily the surface that needs grease. Fixed calipers do not use this same sliding arrangement.
Confirm the parts using the service information for the applicable vehicle and brake equipment. No vehicle details, manufacturer procedure or identifying images were supplied here, so the exact pin locations, pin arrangement and lubrication requirements remain unverified.
Choose grease for the specific guide assembly
Use the manufacturer-specified grease or an explicitly approved equivalent for the slide pins and their rubber components. A product marketed as brake grease is not automatically suitable for every guide assembly. Lubricants intended for pad contact points or anti-seize applications may have different uses. Do not substitute general-purpose grease or assume that a high temperature rating establishes compatibility.
The correct product cannot be identified from the information supplied. Check both the vehicle’s service instructions and the lubricant’s stated application before use, including compatibility with any guide-pin sleeves or bushings.
Prepare for safe access
Have the applicable service procedure, specified lubricant, suitable cleaning materials, required replacement parts, correct hand tools and a torque wrench available. You also need approved lifting and support equipment and a way to support the removed caliper. Let hot brakes cool before working.
Follow the manufacturer’s lifting, vehicle-securing and wheel-removal instructions. Never work beneath a vehicle supported only by a jack. Check for any parking-brake or service-mode requirements before disassembly. If you cannot establish the correct procedure or support the vehicle securely, have a qualified technician carry out the work.
Clean, inspect and lubricate the pins
1) Remove the specified fasteners and access the guide pins according to the service procedure. Support the caliper so its weight does not pull on the brake hose. Keep each pin, sleeve and boot associated with its original position; upper and lower components may differ. Do not press the brake pedal while the caliper is removed.
2) Remove old lubricant and contamination using cleaning methods compatible with the assembly. Avoid creating airborne brake dust or using compressed air to blow it away. Inspect the pins, bores, boots and any rubber sleeves. Stop if you find seized movement, significant corrosion, pitting, damaged rubber or loose-fitting parts. Grease does not repair damaged components; replacement or qualified service may be required.
3) Where lubrication is specified, spread a thin, even film over the designated sliding surfaces. Follow any instructions for sleeves, bores and boot contact areas. Do not pack the cavity with grease: excess lubricant can interfere with assembly or boot seating. Do not apply grease to fastener threads unless the service procedure explicitly requires it.
4) Reinstall each pin and seat its boot correctly at both ends. Check that the guide assembly moves as the service procedure requires and that the boots are not twisted, trapped or displaced. Persistent binding needs diagnosis rather than additional grease.
Reassemble and check before driving
Reassemble the caliper and wheel using the specified fasteners, replacement requirements and tightening torques. No applicable torque values were supplied, so do not use a generic figure. Check hose routing, boot seating and all disturbed connections, and make sure no lubricant has reached the friction surfaces. If a pad’s friction material becomes contaminated, stop and follow the manufacturer’s replacement guidance.
Complete the manufacturer’s pedal, parking-brake and functional checks before moving the vehicle. Do not drive with an abnormal pedal, fluid leakage, binding or uncertain assembly. Once the stationary checks pass, follow the prescribed controlled brake check. Persistent pulling, drag or uneven pad wear requires further diagnosis because slide-pin lubrication addresses only one possible cause.