62TE Transmission Valve Body Identification
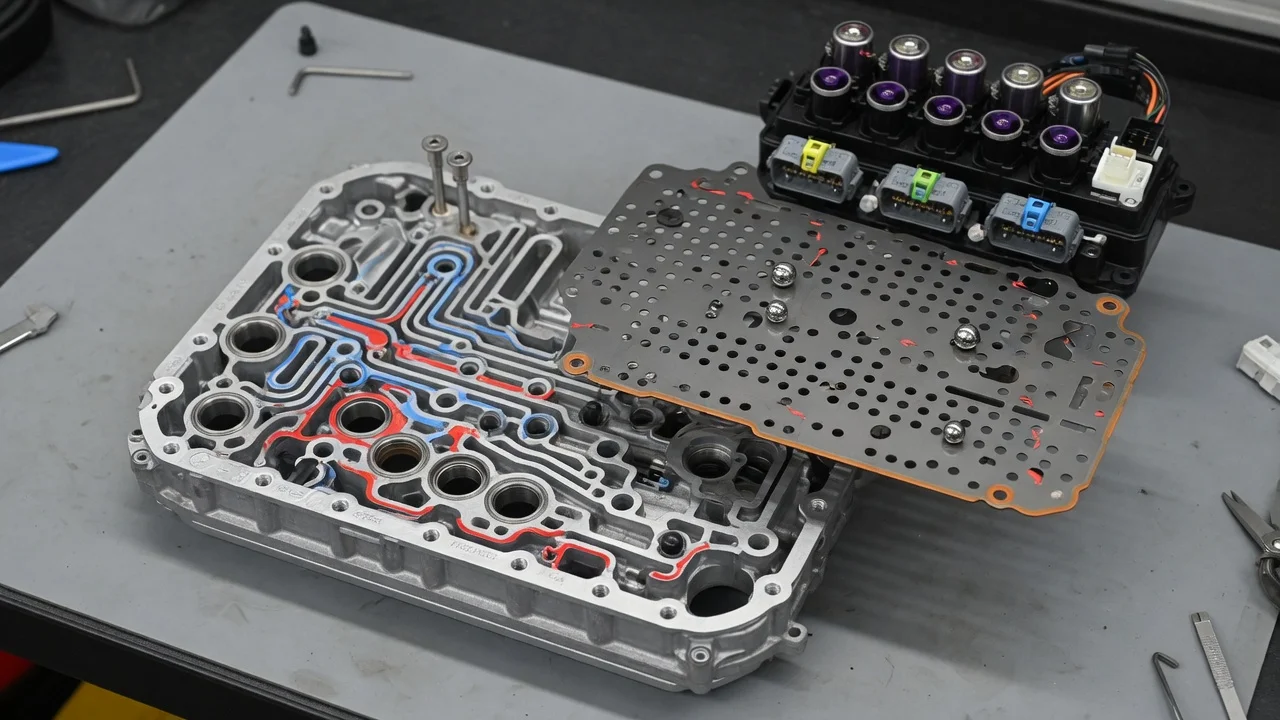
Identifying the correct valve body for a 62TE transmission matters because this six-speed front-wheel-drive transaxle was built in several configurations across different Chrysler, Dodge and related models. Two valve bodies can look nearly identical yet differ in calibration or supporting hardware. This guide explains how to confirm what your vehicle actually has, why the valve body is often blamed for problems it did not cause, and what information to gather before ordering a replacement or approving a repair.
The short answer on identifying a 62TE valve body
The most reliable way to identify the right 62TE valve body is to start with the vehicle, not the part. The VIN, model year, engine and drivetrain (front-wheel or all-wheel drive) narrow down the transmission configuration. The identification tag or stamping on the transmission case confirms which unit is actually installed. A dealer parts department or a parts catalog keyed to the VIN can then give you the current service part number, which may supersede the number originally installed at the factory. Casting numbers molded into the valve body halves are useful for comparison, but they are not enough on their own. The same casting can be machined, assembled or calibrated differently for different applications.
It also helps to confirm that the transmission really is a 62TE. Depending on engine and year, several vehicles in the same model lines were offered with four-speed units such as the 40TE or 41TE, and those valve bodies are not interchangeable. If the transmission has been swapped at some point, the original build data will not match what is under the car, so physical confirmation of the transmission type matters.
How the valve body works in this transmission
In the 62TE, the valve body is the hydraulic control center. Pump pressure enters it, and a network of passages, spool valves and check balls routes that pressure to the clutches that produce each gear. The transmission control module decides which gear is wanted based on vehicle speed, throttle position and other inputs. It then commands electrical solenoids that open or close the hydraulic circuits. Pressure switches report back so the module can confirm that a clutch circuit actually received pressure.
Each shift is made by releasing one clutch while applying another, so the timing and pressure of each circuit directly affect shift behavior. The control module also learns and adjusts clutch fill timing over time. Because of this, several different faults can produce similar symptoms, including harsh or flared shifts, delayed engagement or a default limp mode. The cause might be a worn valve bore, a sticking valve, a weak solenoid or simply outdated adaptive values. A symptom points to a circuit or a function, not automatically to a failed valve body.
What changes the correct part
Several factors determine which valve body fits and works correctly. Model year is the biggest one. The 62TE received updates during its production run, and replacement assemblies are often listed for specific year ranges. Engine pairing and drivetrain matter too, since calibrations and supporting hardware differ between applications. Listings also vary in what they include. Some include related electrical components, while others are the bare hydraulic body, so read the description carefully to see what is actually supplied.
Remanufactured and aftermarket units add another variable. A rebuilt valve body may include updated valves or sleeves intended to address known wear, which can help, but it should still be matched to the original application. A common source of wrong parts is a fitment claim based only on the vehicle model name, without year, engine and transmission confirmation. Software matters as well. The control module may need a software update or a relearn after the valve body is replaced, and an incorrect or outdated calibration can make a correct part feel wrong.
What the owner can check and gather
Before buying anything, collect the VIN, model year, engine size and drivetrain. If you can reach it, look for the identification tag or stamped code on the transmission case. Have the stored diagnostic codes read with a scan tool that can access the transmission module, not only the engine module. Write down the exact codes, along with freeze frame details if they are available. Describe the shift behavior in plain terms: which gear changes feel wrong, whether the problem appears cold or hot, and whether the transmission enters a limp mode with limited gears.
Check the fluid level and condition using the procedure for your specific vehicle. Some applications do not have a conventional dipstick, and an accurate reading usually depends on fluid temperature. The fluid specification for this family is typically Mopar ATF+4 or a fluid that meets that standard; confirm it in the owner's manual or service information. The wrong fluid or a low level can create symptoms that mimic valve body problems.
Finally, pull together the service history. Records of fluid changes, previous transmission work, software updates or an earlier valve body or solenoid replacement can change the diagnosis. With this information, a parts supplier can confirm fitment by VIN and part number. A shop can also recommend realistic repair options. These range from a fluid service and relearn, to valve body or solenoid replacement, to a full transmission overhaul if internal damage is found.
Limitations and the next step
Identification by owner observation has limits. Casting marks, labels and photos can confirm a match. They cannot prove the internal condition of a used or remanufactured part, and they cannot tell you whether the valve body is causing the problem. Confirming that requires diagnostic testing. This can include reviewing live pressure switch and solenoid data, checking clutch volume indexes where the scan tool supports them, and sometimes inspecting the fluid and pan debris. Debris from worn clutches can indicate damage that a new valve body will not fix.
Replacing a 62TE valve body normally means following the service procedure for the vehicle, using the correct fluid and performing the required adaptation or quick learn with a capable scan tool. A transmission specialist or dealer is the practical next step in three situations: you lack that equipment, the codes point to multiple circuits, or there are signs of mechanical damage. Bring the VIN, codes, symptom notes and service history. That lets the shop verify the configuration and recommend a repair based on evidence rather than assumption.