U-Joint Size Charts: How to Measure and Identify a Replacement
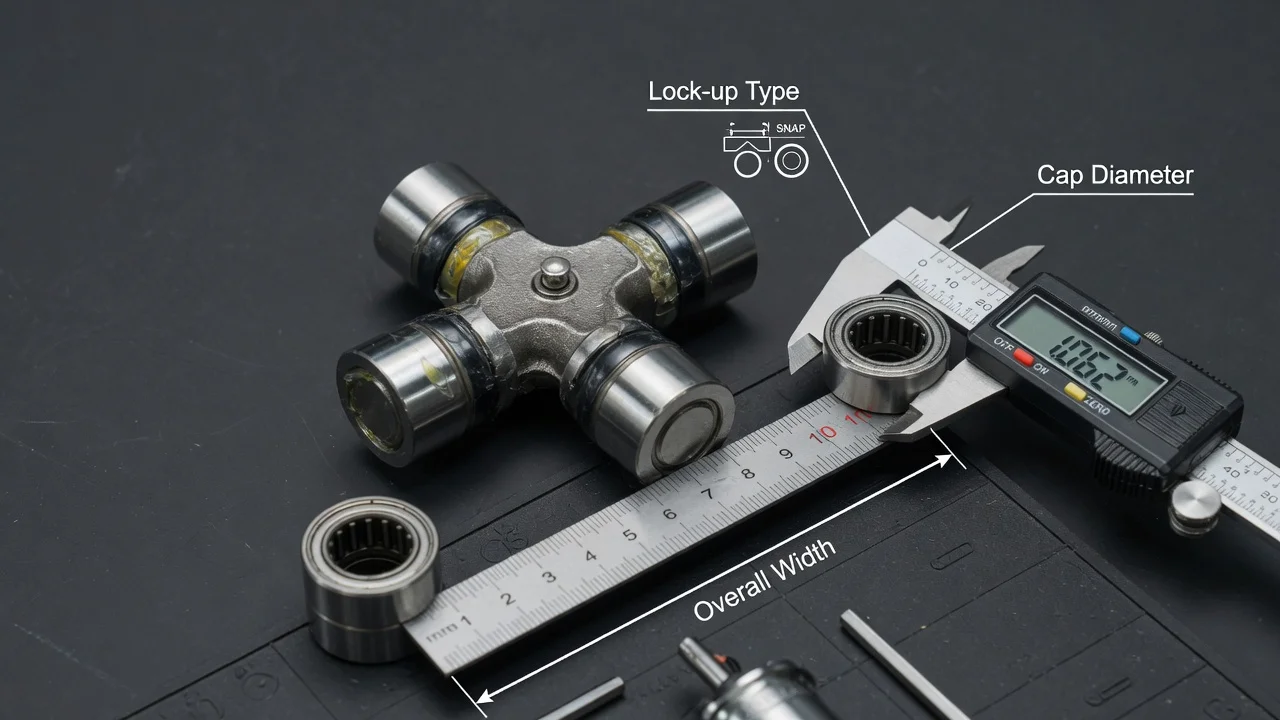
A U-joint size chart only helps if you know which dimensions it lists and how they relate to the joint in your driveline. Most replacement mistakes come from matching a joint by vehicle name alone or by eyeballing caps that look similar. This guide explains what U-joint dimensions mean, how to measure the old part accurately, where to find the correct manufacturer specifications for your vehicle configuration, and what to confirm before you buy or install a replacement.
What the specification means
Every U-joint dimension chart is built around a few physical measurements. The first is bearing cap diameter, the outside diameter of the cup that presses into the yoke bore. The second is span, the overall distance across two opposite caps when they are fully seated on the cross. Depending on the retention style, span may be listed as the distance across the outer cap faces or as the distance between snap ring grooves, so always check which reference the chart uses. Catalogs for the US market usually list these values in inches, though some makers also give millimeters. Many manufacturers group joints into series designations so that one series number stands for a specific combination of cap diameter and span within that maker's line.
Labels on a chart also describe how the joint is retained and serviced. Common retention styles include outside snap rings, inside snap rings, straps or U-bolts, and wing-style caps that bolt to the yoke. Some joints are combination or conversion designs with different cap sizes or retention methods on each pair of trunnions, which lets them connect two yokes of different series. Charts often note whether the joint is greasable or sealed and where the grease fitting sits. Keep in mind the limits of this information: a U-joint size chart describes physical fit, not torque capacity, allowable operating angle or service life. Those depend on the manufacturer specifications for the complete driveline.
Identify the applicable version
The same model name can use several different driveshafts and U-joint sizes. Model year, two-wheel or four-wheel drive, transmission, transfer case, axle, wheelbase, cab and bed length, and towing or heavy-duty packages can all change which joint is fitted. A single vehicle may also have separate joints on the front driveshaft, the rear driveshaft, a center support section and the front axle shafts, and these are not necessarily the same size. Use the VIN, build data, axle tag codes and any identification stamped on the driveshaft to narrow the parts lookup to your exact vehicle configuration rather than a broad model listing.
Service history matters as much as the factory build. A previous owner may have installed an aftermarket driveshaft, a lift kit, a swapped axle or a conversion joint to mate mismatched yokes. In those cases the factory listing no longer describes what is under the vehicle. When records are incomplete or the driveline has been modified, treat the installed hardware as the authority and confirm the size by measurement.
How to measure the old U-joint
Measuring is most reliable with the joint removed and cleaned. Use calipers to measure the bearing cap diameter across the cup's outer surface, checking in more than one spot. For span, keep the caps fully seated on the cross and measure across the outer faces of two opposite caps; on inside snap ring designs, also note where the ring grooves sit, since some charts reference that position. Measure both pairs of caps, because a combination joint will give two different sets of dimensions.
Record the retention style, the cap style, whether there is a grease fitting and where it is located. Worn or damaged caps can distort readings, so measure the best-preserved cap and compare it with the yoke bore if the joint is too far gone. Write all numbers in the same unit. If a measurement falls between two entries on a U-joint measurement chart, measure again instead of rounding to the nearest listed size; a joint that is slightly off will not seat or retain correctly.
Read the correct specification
The best record is the manufacturer service information or parts catalog for your exact vehicle configuration. Other useful sources of identification are a tag or stamped number on the driveshaft, part numbers stamped on the old cross or caps, and the joint maker's own application and dimension listings. When you have a part number, confirm that the listed cap diameter, span and retention style match what you measured before ordering.
Avoid relying on a generic U-joint sizes chart copied from an unrelated source. Values and series naming vary between manufacturers, and a chart that does not state its measuring reference can easily mislead. That is why this article does not reproduce a table of dimensions: the correct numbers come from the maker's documentation for the specific joint, checked against your own measurements.
Apply the limits correctly
Matching U-joint dimensions is necessary but not sufficient. The yoke bore and ear spacing must suit the new joint, snap rings must seat fully in their grooves, and strap or U-bolt fasteners must be tightened to the values in the service manual. Driveline angles and joint phasing also affect how long a joint lasts. Lifting or lowering a vehicle changes those angles, so a correctly sized joint can still wear quickly if the driveline geometry is outside the manufacturer's limits.
Operating conditions such as towing, frequent off-road use or heavy loads may justify a stronger joint, but moving to a larger series means the yokes must match that series too, not just the cross. For greasable joints, follow the lubrication interval in your maintenance schedule rather than assuming a universal figure. After installation, an inspection should confirm that the joint moves freely through its range without binding and shows no free play at the caps.
A short verification checklist
Before purchase, confirm the vehicle's model year, drivetrain, transmission, transfer case and axle details, plus which driveshaft or axle position the joint comes from. Check the service history for aftermarket driveshafts, lifts or conversion joints. Have your measured cap diameter for each pair of caps, the span and its measuring reference, the retention style, the cap style and the grease fitting location all written down in one unit.
Before installation, verify that the replacement part number lists the same dimensions you measured, that the yokes are undamaged and match the joint series, and that you have the correct snap rings, straps or bolts and their torque values from the manufacturer specifications. Afterward, check for smooth movement, secure retention and correct lubrication, and note the replacement in the vehicle's service history so the next lookup starts from accurate information.