U-Joint Repair: What Can Be Serviced and When Replacement Is Needed
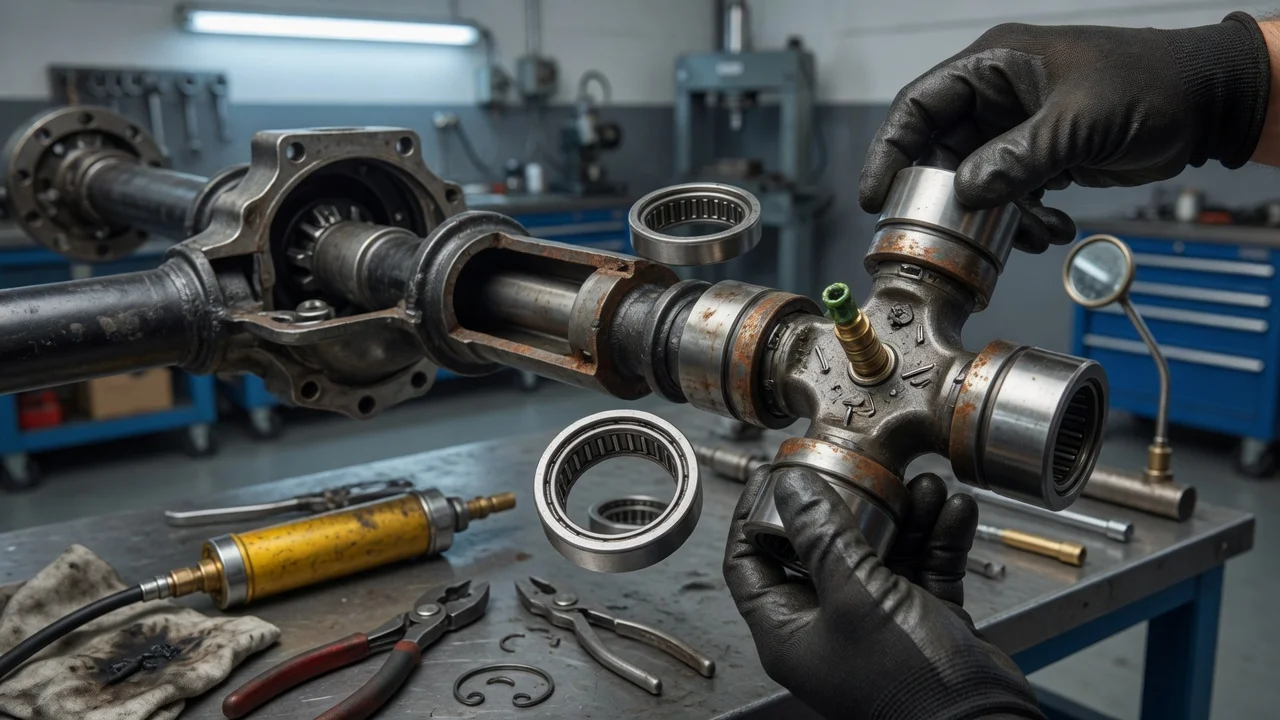
A worn universal joint usually makes itself known through a clunk when you shift into gear, a chirp or squeak at low speed, or a vibration that builds with road speed. U-joint repair rarely means rebuilding the joint itself. In practice, the work comes down to inspecting the joint, lubricating it if it is a serviceable design, or replacing the cross and bearing cups. This guide explains how to tell which applies to your vehicle and how to do the job without creating new problems.
Confirm the part and repair scope
A typical driveshaft U-joint is a cross with four bearing cups, each filled with needle bearings and sealed against dirt and water. Some joints, especially older and many aftermarket designs, have a grease fitting and can be lubricated on a schedule. Many factory joints are sealed for life and have no service provision. In either case, the joint is not rebuilt once it wears. Fresh grease can extend the life of a healthy serviceable joint, but it will not fix a joint that already has play or rough bearings. At that point, replacement is the repair.
Confirm the diagnosis before buying parts. With the vehicle secured, grab the driveshaft next to each joint and try to twist and lift it against the yoke. Any perceptible movement, a notchy or gritty feel, rust-colored dust around the caps, or torn or missing seals point to a worn joint. Similar symptoms can come from a center support bearing, worn engine or transmission mounts, differential backlash, a worn slip yoke, tire balance or axle joints. Replacing a U-joint only makes sense when the inspection shows the joint itself is the problem.
Fitment depends on more than year and model. U-joints differ in cap diameter, overall span and retention style, and some driveshafts use different joints at each end. Match the part to your exact vehicle configuration, including drivetrain, transmission, cab and bed length where relevant, and driveshaft type, using the manufacturer part information. Review the service history as well: a previously replaced joint may use a different retention style than the factory part. Some factory driveshafts hold the cups with staked metal or injected plastic, which requires a specific procedure, and the service information may call for replacing the shaft assembly instead.
Prepare tools and safe access
Start with the service information for your vehicle. It lists the removal steps, fastener torque values and whether bolts or straps can be reused. Typical tools include a floor jack, rated jack stands, wheel chocks, sockets and wrenches, snap ring pliers, a U-joint press or a sturdy vise with suitably sized sockets, a paint marker, a drain pan and a plug or cap for the transmission or transfer case output. Add a grease gun if the new joint has a fitting.
Work on level ground and chock the wheels that stay on the ground. On many rear-drive vehicles, removing the driveshaft disconnects the wheels from the transmission, so Park no longer holds the vehicle and it can roll. Never work under a vehicle supported only by a jack.
Some jobs are poorly suited to inexperienced owners. Front axle U-joints on many four-wheel-drive vehicles require hub and steering knuckle disassembly. Two-piece shafts with a center bearing, staked joints and shafts with balance weights also demand extra care. Pressing cups in a vise can damage yokes or send parts flying if done carelessly. A practical middle ground is to remove the driveshaft yourself and have a driveline shop press in the new joints.
Remove without avoidable damage
Before loosening anything, mark the driveshaft against the pinion flange or yoke, and mark the slip yoke against the shaft tube if it can separate. Reassembling in the same orientation preserves the joint phasing and the shaft balance. Remove the straps, U-bolts or flange bolts at the axle end, and wrap tape around the loose bearing cups so they cannot slide off and spill their needles. Slide the shaft off the transmission or transfer case output, expect some fluid to drip, and plug the opening. Support the shaft while you work and do not let it hang from one end.
On the bench, hold the shaft by the yoke or support it carefully so the tube is not crushed. Clean rust and paint from the retaining clips and grooves, then remove the inside or outside snap rings. Press one cup inward so it pushes the opposite cup out into a larger socket used as a receiver, then repeat for the other side. Avoid hammering on the tube or yoke ears, which can bend the ears, dent the tube and upset the balance. Once the joint is out, inspect the yoke bores for scoring, cracks or distortion. A damaged yoke will shorten the life of a new joint. On staked yokes, follow the specific instructions for removing the stakes before pressing.
Install and restore the system
Compare the new joint with the old one for cap size, span and clip type before going further. Leave the factory grease in the cups and keep the needles in place. Remove the caps, fit the cross into the yoke, then start each cap squarely while guiding the trunnion into it so no needle is knocked over. A dropped needle causes binding and early failure. Press the caps in only far enough to fit the clips, and confirm every clip is fully seated in its groove. If the joint has a grease fitting, orient it as the instructions direct, typically where it stays reachable after installation and does not contact surrounding parts.
A freshly pressed joint can feel stiff. Flex it through its full range; a light tap on the yoke often relieves the preload. Repeat until the joint moves freely without binding or play. For greaseable joints, pump grease through the fitting until fresh grease appears at all four seals, if the joint's instructions call for it.
Reinstall the shaft with your marks aligned. Slide the slip yoke onto the output shaft gently to protect the seal, and secure the axle end with new straps or bolts if the service information requires them. Tighten all fasteners to the manufacturer specifications, and use thread locker only where it is specified. Replace any transmission or transfer case fluid that was lost, checking the level by the method in the service information.
Check the completed work
Before lowering the vehicle, rotate the driveshaft by hand with the vehicle safely supported and confirm it turns without binding. Recheck that every clip is seated, every fastener is tightened and the output seal is not leaking. Remove all tools and the drain pan from under the vehicle.
Road test in light traffic. Shifting between Park, Drive and Reverse should not produce a clunk, there should be no squeak at low speed and no new vibration as speed rises. Recheck the fasteners after a short drive if the service information recommends it. If the new joint has a fitting, add lubrication to your maintenance schedule as directed by the manufacturer. Hard operating conditions such as off-road driving, water crossings and towing are a good reason to inspect the joints more often.
Some results call for further diagnosis. A vibration that remains or appears after the repair can point to incorrect phasing, a damaged yoke, shaft imbalance or changed driveline angles, for example after a suspension lift. A clunk that persists may come from the differential, mounts or worn slip yoke splines. Do not keep driving on a joint with visible play, because a failed joint can let the driveshaft drop, damage surrounding components and create a road hazard.