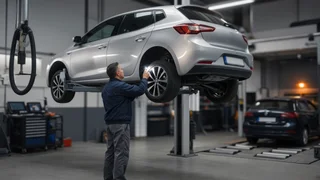
TÜV Inspection Checklist: What Gets Checked and How to Prepare
A TÜV inspection is Germany's mandatory periodic roadworthiness test. Its formal name is the Hauptuntersuchung, or HU, which means general inspection. "TÜV" is the everyday name because TÜV organizations are among the best-known testing bodies, but other authorized organizations, such as DEKRA, GTÜ and KÜS, carry out the same legally defined inspection. Passing it earns a test certificate and a sticker on the rear license plate, which lets the vehicle stay on public roads. For US readers, the main qualification is jurisdiction. The TÜV inspection applies to vehicles registered in Germany. It does not replace American state safety or emissions inspections, and US state rules do not satisfy German requirements. It matters to you if you are moving to Germany, are stationed there, are importing a car into German registration, or are buying a German-registered vehicle and want to judge its condition. If you serve with the US military, ask your installation's vehicle registration office which inspection your vehicle needs, because different arrangements can apply to vehicles registered through US Forces channels.
The Short Answer: What a TÜV Inspection Covers
The inspection combines a safety inspection of the vehicle's mechanical and electrical systems, an emissions test, and a check that the car matches its paperwork. Inspectors follow standardized inspection criteria. A pass does not depend on how clean or well kept the car looks. It depends on whether components work, are not dangerously worn, and conform to the vehicle's approved specification.
Area | What inspectors typically look at; Vehicle identification | VIN matches the registration documents; plates are legible and correctly mounted; Brakes | Braking performance on a test rig, even left-right balance, parking brake, lines, hoses, discs, pads, fluid leaks; Steering | Play in the steering, condition of tie rods, joints and boots, power steering operation; Suspension and axles | Worn bushings, ball joints, shock absorbers, broken springs, axle mounts; Tires and wheels | Tread depth, damage, correct size and approval for the vehicle, matching tires on an axle; Lights and electrics | Headlights including aim, brake lights, indicators, hazard lights, fog and reverse lamps, horn, warning lamps; Visibility | Windshield damage in the driver's field of view, wipers, washers, mirrors; Body and chassis | Structural corrosion, sharp edges, secure doors, hood and trunk latches; Exhaust and emissions | Leaks, secure mounting, emissions test or onboard diagnostic readout; Safety equipment | Seatbelts, airbag system warning lamps, onboard warning systems; Modifications | Aftermarket parts must be approved and, where required, entered in the vehicle documents
Pre-Inspection Checklist You Can Do Yourself
Many failures come from simple items an owner can catch in a driveway walk-around. These checks need no special tools and can save you a retest.
Walk around with a helper and test every exterior light: low and high beams, parking lights, brake lights including the center brake light, turn signals, hazards, reverse lights, rear fog light and license plate lights. Check the dashboard after starting the engine. Warning lamps for the engine, ABS, airbags or brakes that stay on are likely to cause problems. Inspect tire tread and sidewalls for cuts, bulges and uneven wear. Germany's legal minimum tread depth is 1.6 mm, and tires close to that limit are worth replacing beforehand. Look at the windshield for chips or cracks, especially in the area the wipers sweep in front of the driver. Test wipers and washers, and replace streaking wiper blades. Sound the horn. Pull each seatbelt fully out and let it retract. Check that it latches and that the webbing is not frayed. Look under the car for oil, coolant or brake fluid drips. Listen for exhaust leaks, such as a louder-than-normal or rattling exhaust, especially on a cold start. Check that mirrors are intact and adjustable. Top up brake fluid, coolant and washer fluid to the marked levels. Make sure the VIN plate and stamped VIN are readable and not obscured by dirt or rust.
Documents to Bring
Registration certificate (Zulassungsbescheinigung Teil I, the vehicle's registration document); The previous inspection report, if available; Approval papers for any aftermarket parts, such as wheels, suspension, exhaust or lighting, if the modification is not already entered in the registration; For imported vehicles going through first registration, any conformity or individual-approval documents the testing station asks for
Requirements can vary by vehicle type and situation, so confirm with the testing station when you book, especially for imports or modified vehicles.
The Emissions Test
The emissions test (Abgasuntersuchung, or AU) is part of the general inspection. Depending on the vehicle's age and powertrain, it may involve measuring exhaust gas at the tailpipe, reading the onboard diagnostic system, or both. A lit engine warning lamp or stored emissions-related fault codes can lead to a failure even if the car runs well. Fully electric vehicles have no tailpipe emissions to test, though they still go through the safety inspection. Their high-voltage system and other EV-specific components get their own checks.
Modifications: A Common Stumbling Block
German rules are stricter about modifications than most US states. Aftermarket wheels, lowered suspension, aftermarket exhausts, lighting changes and tinted front windows generally need a type approval or parts certificate. Some must also be formally entered in the vehicle's registration. A modification that is legal and common in the US can still cause a failure in Germany if it lacks German or EU approval. If you are shipping a modified American vehicle to Germany, plan for this before the inspection, not after.
How Defects Are Graded
Inspectors classify findings by severity, and the grade decides whether you leave with a sticker.
Category | Meaning | Outcome; No defects | Vehicle meets the inspection criteria | Pass; sticker issued; Minor defects | Faults with no significant effect on safety or the environment | Pass; you are expected to fix them promptly; Significant defects | Faults affecting safety or the environment | No sticker; repair and retest required, normally within one month; Dangerous defects | Direct risk to road safety | No sticker; repair before further use is strongly indicated, retest required; Unsafe for road use | Vehicle must not be driven | No sticker; the vehicle may be taken out of service until repaired
What Happens at a Retest
If the car fails, you receive a report listing the defects. After repairs, you return for a retest, which usually focuses on the items that failed instead of repeating the whole inspection. Returning within the deadline matters. If you miss it, the testing station may require a complete new inspection. Keep repair invoices, since they help show what was fixed.
Inspection Intervals and the Sticker
For ordinary private passenger cars, the first inspection of a new vehicle is generally due three years after first registration, and then every two years. Other vehicle categories, such as commercial vehicles, taxis and motorcycles in some cases, follow different schedules. The sticker on the rear plate shows when the next inspection is due. The number in the center gives the year, the orientation of the sticker shows the month, and the color changes on a rotating cycle so overdue vehicles are easy to spot. Driving past the due date can bring fines, and the longer the delay, the more likely the penalty grows.
How It Differs From US State Inspections
US inspection requirements are set state by state. Some states require annual safety inspections, some require only emissions testing in certain areas, and some require neither for private cars. The German inspection is nationwide, uniform and usually more thorough on structural corrosion, suspension wear, documented modifications and matching identification. A car that routinely passes a US state check is not guaranteed to pass a TÜV inspection, particularly if it has aftermarket parts or US-specific lighting.
Bottom Line
A TÜV inspection checklist comes down to four things. The car's identity must match its papers. The safety systems must work and not be excessively worn. Emissions must be within limits. Any modifications must be approved. A careful self-check of lights, tires, glass, fluids and warning lamps, plus the right documents in the glovebox, handles most of what an owner can control. Anything structural, brake-related or suspension-related that you are unsure about is worth having a workshop look at before your appointment.