Trailer Hitch Receiver Sizes and Types Explained
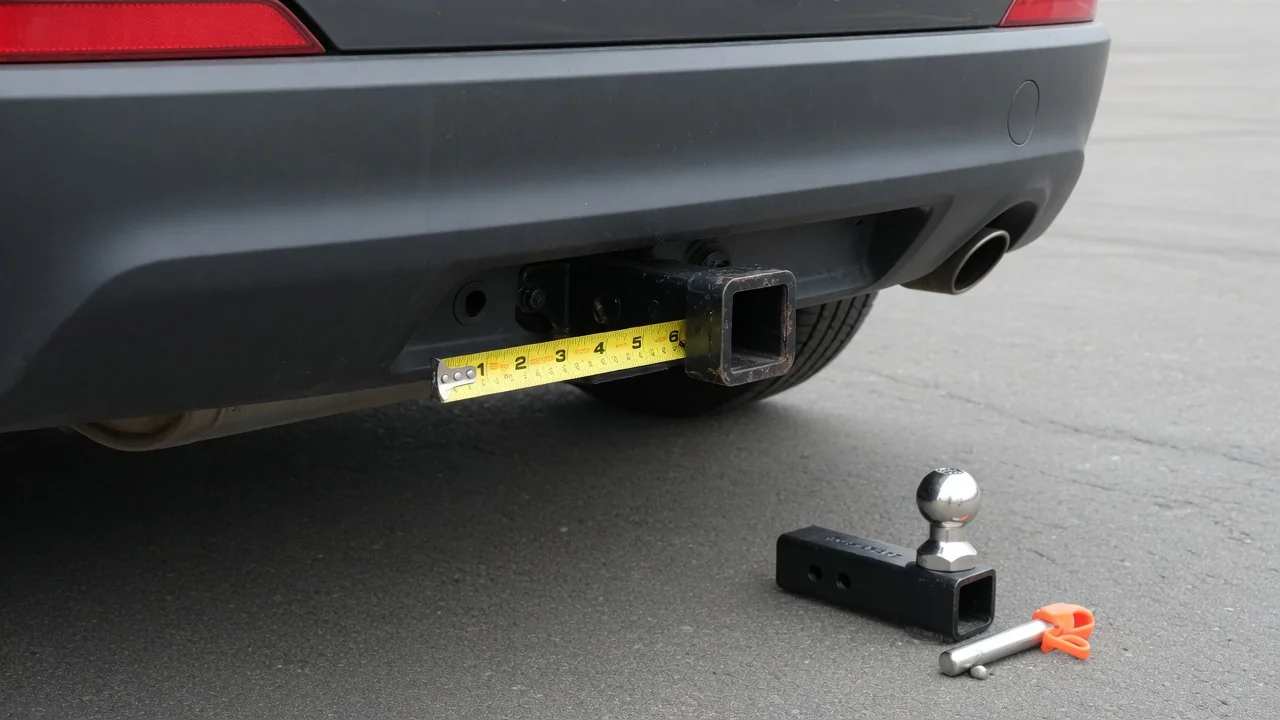
Understanding the types of trailer hitch receivers starts with one simple measurement and a handful of ratings. Trailer hitch receiver sizes determine which ball mounts and accessories will fit, but they do not tell the whole story about what a vehicle can safely pull. This guide explains receiver dimensions, mounting styles, hitch classes and the checks worth making before towing.
Common Trailer Hitch Receiver Sizes at a Glance
Most receiver hitches use a square tube, and four openings dominate the market: 1-1/4 inch, 2 inch, 2-1/2 inch and 3 inch. The size of trailer hitch receivers always refers to the inside measurement of the receiver tube opening, not the outer wall. Smaller openings generally appear on compact cars and crossovers, the 2 inch opening is common on midsize SUVs and pickups, and the larger two are typically reserved for heavy-duty trucks built for substantial loads.
Receiver size alone does not set towing capacity. Two hitches with the same opening can carry very different ratings, so the vehicle's stated towing capacity and the label on the hitch both need to be checked before anything is hooked up. The ball mount shank or accessory shank must also match the opening exactly; a shank that is too small will rattle and load the pin unevenly, and one that is too large simply will not go in.
How to Measure Trailer Hitch Receiver Dimensions
To confirm trailer hitch receiver dimensions, hold a tape measure across the inside of the tube opening, from one inner edge to the opposite inner edge. Measuring the outside wall adds the steel thickness and gives a misleading number. Next, locate the hitch pin hole on the side of the tube. Its diameter and its distance from the receiver mouth matter because an accessory's shank hole must line up with it for the hitch pin and clip to seat fully.
Most hitches carry a manufacturer label or stamping that lists the receiver size along with weight ratings, usually on the tube or the crossmember. If that label is missing or unreadable, treat the ratings as unknown instead of guessing, and identify the hitch through the maker's documentation or a hitch shop. Rust scale, thick powder coating or a dented tube mouth can throw a tape reading off by enough to cause confusion, so verify any doubtful measurement against published specifications.
Choosing the Right Receiver Size for Your Vehicle and Towing Needs
Choosing among trailer receiver hitch sizes begins with the owner's manual, which states how much the vehicle is rated to tow and how much tongue weight it can carry. That figure frames every later decision. Planned use comes next: a bike rack or cargo carrier puts modest vertical load on the hitch, a small utility trailer adds pulling load, and a larger camper demands a hitch, receiver and vehicle that are all rated well for the combined weight.
A towing setup is only as strong as its weakest component. The vehicle, hitch, ball mount, ball, coupler and safety chains each carry their own rating, and the lowest one governs the whole system regardless of how robust the other parts are. Because hitch designs are engineered around particular frames and bumper structures, confirm with the vehicle maker or a qualified hitch installer that a given hitch fits and is approved for the vehicle before buying.
Types of Trailer Hitch Receivers and Mounting Styles
Rear receiver hitches are the familiar type, mounted to the frame or body structure behind the rear bumper and used for towing and carriers. A front mount receiver attaches at the nose of the vehicle and typically serves winches, carriers or maneuvering a trailer in tight spaces instead of highway towing. Receivers differ from bumper-mounted setups, which place the ball directly on the bumper, and from gooseneck and fifth-wheel hitches, which sit in a pickup bed and carry load over the rear axle.
A bolt-on hitch is designed for one vehicle platform and usually attaches at existing mounting points, which keeps installation predictable. Custom or fabricated installations involve cutting, drilling or welding, so the result depends heavily on workmanship and should be handled by a professional who understands frame loading. Concealed or low-profile designs tuck the crossmember behind the bumper fascia for a cleaner look and better ground clearance, though the receiver can be harder to reach when inserting a shank or pin.
How Hitch Classes and Weight Ratings Relate to Receiver Size
Hitch class is a shorthand for grouping hitches by capacity, and the classes often line up with receiver sizes, with lighter classes using smaller openings and heavier classes using larger ones. Exact ratings vary by manufacturer and product, so the label is the authority. Gross trailer weight is the total weight of the trailer and everything loaded on it. Tongue weight is the downward force the trailer coupler places on the hitch ball, and it affects steering, braking and stability.
Both ratings matter because a trailer can be within its gross limit while still pressing too heavily, or too lightly, on the hitch. A weight distribution hitch uses spring bars to share tongue load across the axles, and some hitches list a separate rating for that configuration. Follow the hitch and vehicle documentation on whether such equipment is permitted and what figures apply. Whatever the setup, work to the lowest rating in the towing chain and never exceed it.
Using Adapters, Reducers and Extensions Safely
A receiver reducer is a sleeve that lets a smaller shank fit a larger receiver, such as using a light-duty bike rack in a truck's bigger opening. Adapters and extensions solve similar fit or clearance problems. Each one moves the load farther from the hitch or adds another joint, which may lower the usable tongue weight or towing rating. The product's own rating should be read and applied, since it can be lower than the hitch's.
Adapting a receiver upward, so that a larger shank fits a smaller opening, should never be used to get around a capacity limit. The hitch and the vehicle structure behind it remain rated for the original load, and a bigger ball mount does nothing to strengthen them. When fitting any adapter, look for a pin and clip that seat securely, a snug fit without excess play, and pin holes that align without forcing.
Safety Checks and When to Get Professional Help
Before each trip, look over the hitch for cracks, heavy rust, a bent or flared tube, loose mounting hardware and worn or missing pins and clips. Check that safety chains are attached and crossed beneath the coupler with enough slack for turns, that the wiring connector is fully seated, and that the trailer's running lights, brake lights and turn signals respond when someone operates them. Lights that fail to work call for diagnosis instead of improvised wiring fixes.
Some symptoms warrant a professional inspection: unusual clunking over bumps or when starting and stopping, a hitch that visibly shifts, or damage and corrosion around the frame mounting area. These can point to loosened fasteners or weakened structure that is hard to judge from underneath a vehicle in a driveway. Having installation done or checked by a qualified technician is sensible for any hitch, and especially for work involving drilling or welding, where mistakes can compromise the frame.