Replace a Brake Booster: Symptoms, Check Valve Tests, Replacement and Cost Factors
A brake booster multiplies the force your foot puts on the brake pedal so the car stops without heroic leg effort. When it fails, the brakes still work hydraulically, but the pedal becomes hard and stopping distances can grow because most drivers cannot push hard enough to make up the difference. Replacing a brake booster is a real repair, not a tune-up item, but it is often confused with cheaper problems such as a failed brake booster check valve or a cracked vacuum hose. This guide explains what the booster does, how to separate it from those smaller faults, what the replacement job involves, and what shapes the brake booster replacement cost.
The short answer
If your pedal is consistently hard, and you have ruled out the check valve, the vacuum supply hose and (on vehicles that use one) the vacuum pump, the booster itself is the likely culprit and should be replaced rather than repaired. On most conventional gasoline cars and light trucks the booster is a sealed vacuum unit bolted to the firewall between the pedal and the master cylinder. The main qualification is vehicle type: many diesels and heavier trucks use a hydraulic booster driven by the power steering system, and many hybrids and electric vehicles use an electric or electro-hydraulic brake system with no conventional vacuum booster at all. Diagnosis, parts and cost differ substantially between these designs, so confirm which system your specific model year, powertrain and trim uses before buying anything.
How a vacuum brake booster works
A vacuum booster is a round canister divided internally by a flexible rubber diaphragm. With the engine running and your foot off the pedal, both sides of the diaphragm are held at engine vacuum (or vacuum from a dedicated pump). When you press the pedal, a valve inside the booster lets outside air into the rear chamber. The pressure difference pushes the diaphragm forward, and that force is added to your foot's effort through a pushrod that acts on the master cylinder. The master cylinder converts the mechanical force into hydraulic pressure that travels through the brake lines to the calipers and wheel cylinders.
The brake booster check valve is a small one-way valve, usually located where the vacuum hose enters the booster or inline in that hose. It lets air be drawn out of the booster but stops it from flowing back in. This keeps a reserve of vacuum in the booster so you get a few assisted stops even if the engine stalls, and it protects the booster from pressure surges in the intake manifold.
Booster types and how they differ
Type | Power source | Commonly found on | What it means for replacement; Vacuum booster (single or tandem diaphragm) | Engine intake vacuum or a mechanical/electric vacuum pump | Most gasoline cars, SUVs and light trucks | Usually a bolt-on unit; the master cylinder is moved aside or removed to swap it; Hydraulic booster (often called hydro-boost) | Power steering pump pressure | Many diesel pickups, heavy-duty trucks and some vans | Involves power steering lines and fluid; symptoms can overlap with steering problems; Electric or electro-hydraulic brake unit | Electric motor and pump, controlled by a module | Many hybrids, EVs and some newer conventional vehicles | Often an integrated assembly that may require dealer-level software setup or calibration after installation
Symptoms of a failing brake booster
A hard or stiff brake pedal that takes much more effort than normal to stop the car; A hissing sound from under the dash when you press or release the pedal, which can indicate an internal diaphragm leak; Rough idle, a drop in idle speed or stalling when braking, since a leaking vacuum booster acts like a large vacuum leak on engines that supply it; A pedal that returns slowly or feels inconsistent from stop to stop; On hydraulic systems, a hard pedal combined with heavy steering or power steering noise; On electric systems, a brake warning light or stored fault codes, often alongside a change in pedal feel
Some of these symptoms have other causes. A hard pedal can come from a restricted vacuum hose, a failed vacuum pump, or a seized caliper. A spongy pedal, a pedal that slowly sinks to the floor, or a low brake fluid level points toward the hydraulic system (air in the lines, a leak, or a worn master cylinder) rather than the booster.
Simple checks before condemning the booster
These tests apply to vacuum boosters on vehicles with an internal combustion engine. They do not apply to electric brake systems, and hydraulic boosters have their own test procedures.
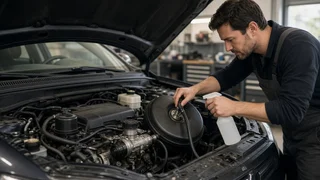
Basic function test: with the engine off, pump the pedal several times to use up any stored vacuum. Hold firm pressure on the pedal and start the engine. On a working booster, the pedal should drop slightly as assist comes in. No change suggests no vacuum is reaching the booster or the booster is not working. Vacuum reserve test: run the engine for a minute, shut it off, and wait a short while. Then press the pedal several times. The first one or two applications should feel assisted before the pedal firms up. If the pedal is hard on the first press, the check valve or booster may be leaking down. Hold test: with the engine running, press and hold the pedal, then shut the engine off while still holding it. The pedal should stay put rather than pushing back against your foot. Check valve test: remove the brake booster check valve and try to blow through it in each direction (or use a hand vacuum pump). Air should pass only one way, toward the engine side. If it flows both ways or not at all, replace the valve. Hose inspection: look for cracks, collapsed sections, loose fittings or oil saturation in the vacuum hose between the engine and the booster. Vacuum source: if the engine uses a separate vacuum pump, as many diesels and some turbocharged or direct-injection gasoline engines do, a gauge test of pump output helps confirm the supply side.
If the check valve, hose and vacuum supply all pass and the pedal is still hard, or you hear a hiss from the booster area under the dash, the booster's internal diaphragm or valve is the most likely failure.
What brake booster replacement involves
The exact procedure depends heavily on the vehicle, so the factory service information or a reliable repair database for your specific model is the guide to follow. The general shape of a vacuum booster swap looks like this:
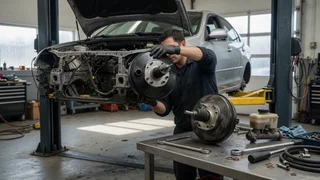
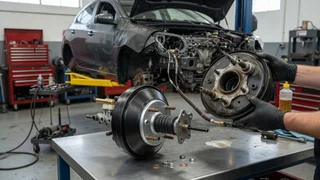
Disconnect the battery if the service procedure calls for it, particularly on vehicles with sensors or wiring attached to the booster. Remove components blocking access in the engine bay, which can range from nothing to air intake parts, wiring brackets or the cowl. Disconnect the vacuum hose and check valve from the booster. Unbolt the master cylinder from the booster. On some vehicles it can be eased forward without opening the brake lines; on others the lines must be disconnected, which means the system will need bleeding afterward. Working under the dash, disconnect the booster pushrod from the brake pedal arm and remove the nuts that hold the booster to the firewall. Access here is often the hardest part of the job. Remove the old booster and transfer any brackets, seals or gaskets that do not come with the new unit. Check and, where the design allows, adjust the output pushrod length to the specification for your vehicle. Too long can cause the brakes to drag; too short can create excess pedal travel. Install the new booster, reconnect the pedal linkage, reinstall the master cylinder, and reconnect the vacuum hose with a new check valve or grommet if needed. Bleed the brakes if any hydraulic line was opened, top up fluid to the correct level with the specified fluid type, and check brake light switch operation. Retest pedal feel and assist with the engine running, then road test at low speed in a safe area before normal driving.
This is a safety-critical repair. It suits experienced home mechanics with the right tools and service information for their vehicle. If you are not confident with brake hydraulics, pushrod adjustment or bleeding procedures, a professional shop is the better choice. Hydraulic and electric brake units add further complexity, and electric units in particular may require scan tool initialization that most home garages cannot perform.
Brake booster replacement cost: what drives the price
No verified price data is included here, and real costs vary widely by vehicle and region, so the most useful approach is to understand the factors and then get quotes for your specific car.
Booster type: a basic vacuum booster is generally the least expensive category; hydraulic boosters and integrated electric brake units usually cost considerably more. New versus remanufactured: remanufactured units are widely available for many vehicles and are often cheaper than new, typically with a core charge refunded when you return the old unit. Access and labor time: on some vehicles the booster comes out in a straightforward way; on others the job requires removing dash panels, pedal assemblies or engine bay components, which raises labor hours. Hydraulic work: if the brake lines are opened, the job includes a brake bleed and fresh fluid. Additional parts: a new check valve, vacuum hose, or a master cylinder that is replaced at the same time all add to the bill. Programming and calibration: electric brake systems may need software setup after replacement, which can require a dealer or a well-equipped independent shop. Cheaper possibilities: confirming that the fault is not just the check valve or vacuum hose before authorizing booster replacement can save a substantial amount.
Can you drive with a bad brake booster?
The brakes will still apply through the hydraulic system, but stopping takes much more pedal force, and in an emergency many drivers will not be able to brake as hard as the situation requires. Treat a hard pedal as a reason to limit driving and get the problem diagnosed promptly rather than something to live with.
Next steps
Start by confirming which boost system your vehicle uses, then run the simple engine-off and engine-on pedal tests and check the brake booster check valve and vacuum hose. If those pass and the pedal is still hard or the booster hisses, plan a booster replacement using service information for your exact model, or get quotes from shops that list the part type, whether brake bleeding is included, and whether any programming is required.