How to Install a PTP Turbo Blanket
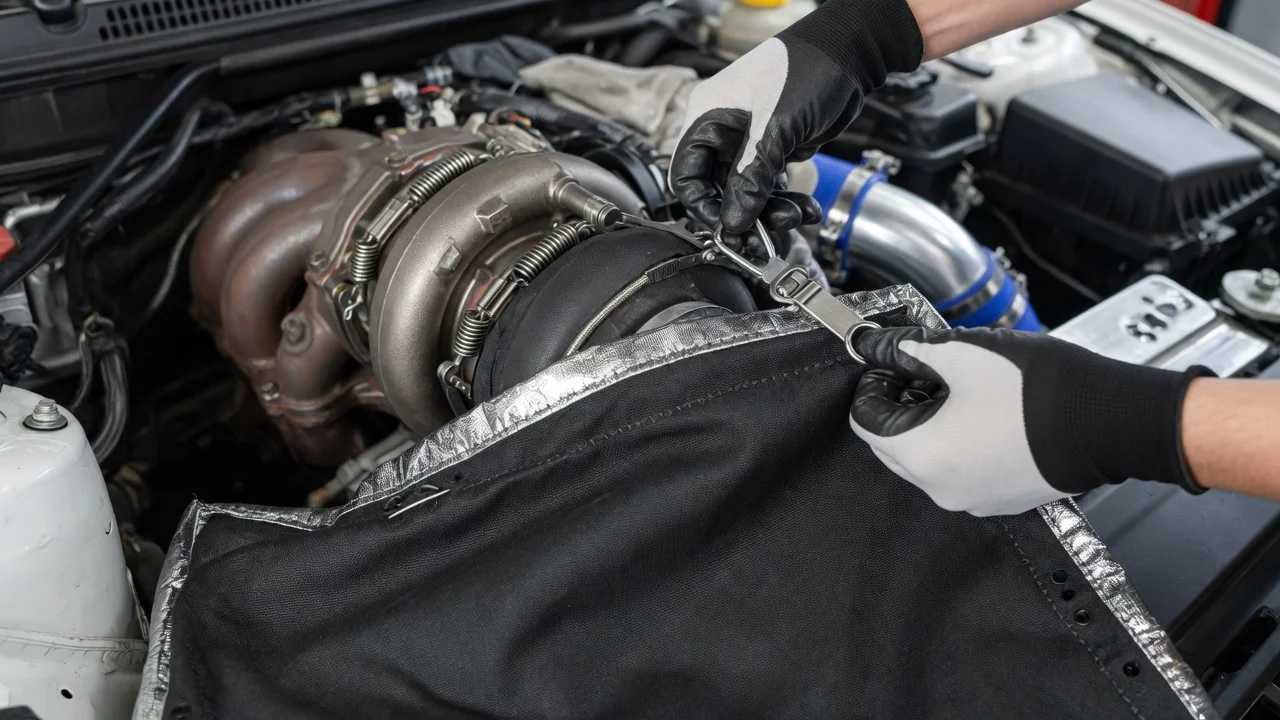
A turbo blanket wraps the turbine housing so more exhaust heat stays in the hot side and less radiates into the engine bay. A PTP blanket is usually held on with springs, hooks or straps rather than fasteners threaded into the turbo, but fitment, access and cooling time decide whether the install is quick or involved. This guide covers matching the blanket to your turbo, preparing the work area, removing what is in the way, fitting the blanket and checking the finished job.
Confirm the part and repair scope
Turbo blankets are shaped to a specific turbine housing, not to a vehicle in general. The same model can use different turbochargers across model years and engine variants, and an aftermarket upgrade changes the housing entirely. Before ordering or fitting, identify the actual turbo: check the tag or casting numbers on the housing, your service history for any turbo replacement, and the engine configuration, including whether the turbo uses an internal or external wastegate and a single or twin-scroll inlet flange. A blanket made for a different housing will leave gaps, interfere with the wastegate actuator or refuse to close around the inlet and outlet.
Also confirm that a blanket addresses your actual problem. It reduces radiant heat; it does not fix boost leaks, worn turbo seals or exhaust leaks. Separate symptom reports, such as high intake temperatures in traffic, heat-soaked performance or a softened wiring loom near the turbo, from verified failures like oil seeping from the center housing, soot at a flange or a cracked manifold. If there are stored diagnostic codes, smoke or oil residue on the housing, diagnose and repair that first. A blanket installed over an oil leak can absorb oil and become a fire hazard. Check whether your turbo or vehicle warranty terms say anything about thermal wraps before proceeding.
Prepare tools and safe access
Work only on a fully cold engine. The turbine housing holds heat long after shutdown, so plan the job after the vehicle has sat for several hours rather than right after a drive. Wear gloves, eye protection and long sleeves, and consider a dust mask, since insulation fibers can irritate skin and airways. Useful tools include needle-nose pliers or a spring hook tool for the retaining springs, the basic hand tools needed to remove intake piping and the factory heat shield, penetrating oil, a good work light and a torque wrench. Have the vehicle-specific service information on hand for component removal steps and fastener torque values, and disconnect the battery if you will be working around sensor connectors and the service manual calls for it.
Some installs are not a good first project. If reaching the turbo requires removing the downpipe, exhaust manifold or other exhaust components, or if the turbo is accessed from under the car, the risk of snapped studs and exhaust leaks rises sharply. Corroded exhaust hardware is common on older or high-mileage engines. If that describes your vehicle and you lack experience extracting broken fasteners, a shop is the safer choice. When working underneath, support the car on proper stands, never on a jack alone.
Remove without avoidable damage
The usual sequence is to remove the intake or charge piping that blocks access, then the factory heat shield over the turbine housing. Photograph each stage and label vacuum lines, boost control hoses and electrical connectors before disconnecting them. Take care around the oxygen sensor wiring, the wastegate actuator and its rod, and the oil and coolant lines feeding the turbo; bending or loosening any of these creates a new problem. Heat shield bolts are often seized, so apply penetrating oil, use steady pressure and stop if a bolt starts to twist rather than turn. Cap or cover the open compressor inlet and charge pipes so nothing falls into the turbo.
Whether the factory heat shield goes back on depends on the blanket instructions and available clearance, so keep the shield and its hardware either way. With the housing exposed, inspect it closely for cracks, oil residue at the center section and soot or discoloration around the flanges that would point to an exhaust leak. Clean off any oil film before fitting the blanket, and if you find evidence of a leak, resolve it before going further.
Install and restore the system
Test-fit the blanket loosely before securing anything. Orient it so the openings line up with the turbine inlet flange and the outlet toward the downpipe, and position any cutouts around the wastegate actuator rod, wastegate port or other features on your housing. The blanket should cover the turbine side only unless its design specifically says otherwise; it should not trap the oil feed, oil return or coolant lines or wrap the compressor housing. Once it sits correctly, attach the springs or straps as the included instructions describe, tensioning them so the blanket cannot shift without overstretching the springs. Route spring ends away from sensor wires and hoses, and if safety wire is used, twist it tight and tuck the tails.
Reinstall the factory heat shield if it is retained and fits without contacting the blanket, then refit intake piping, clamps, vacuum lines and connectors in the reverse order of removal, tightening to the values in your service information. The blanket adds bulk, so check that it does not touch brake lines, wiring, plastic covers or hood insulation. A blanket needs no electronic setup, but if you disconnected the battery, follow the service manual for any idle or other relearn procedure your vehicle requires.
Check the completed work
Before starting the engine, recheck every clamp, connector and hose you touched. Start it in a well-ventilated area, let it idle and look and listen for intake or exhaust leaks around the disturbed joints. New thermal blankets commonly give off light smoke or odor during the first heat cycles as coatings cure; follow the guidance packaged with the blanket. That even, short-lived smoke differs from smoke concentrated at one spot or a burning oil smell that persists, which points to a leak.
After the first drive and a full cool-down, check spring tension and blanket position, since the material can settle and loosen slightly. Scan for diagnostic codes even if no warning light appears. Signs that need further diagnosis include a check engine light, boost-related codes, a persistent oil smell, dark oil-soaked patches on the blanket, exhaust ticking or a wastegate that rattles or no longer moves freely. Make a visual inspection of the blanket part of routine service, and replace it if it becomes torn or contaminated with oil.