Parking Brake Shoes: Fitment and Selection
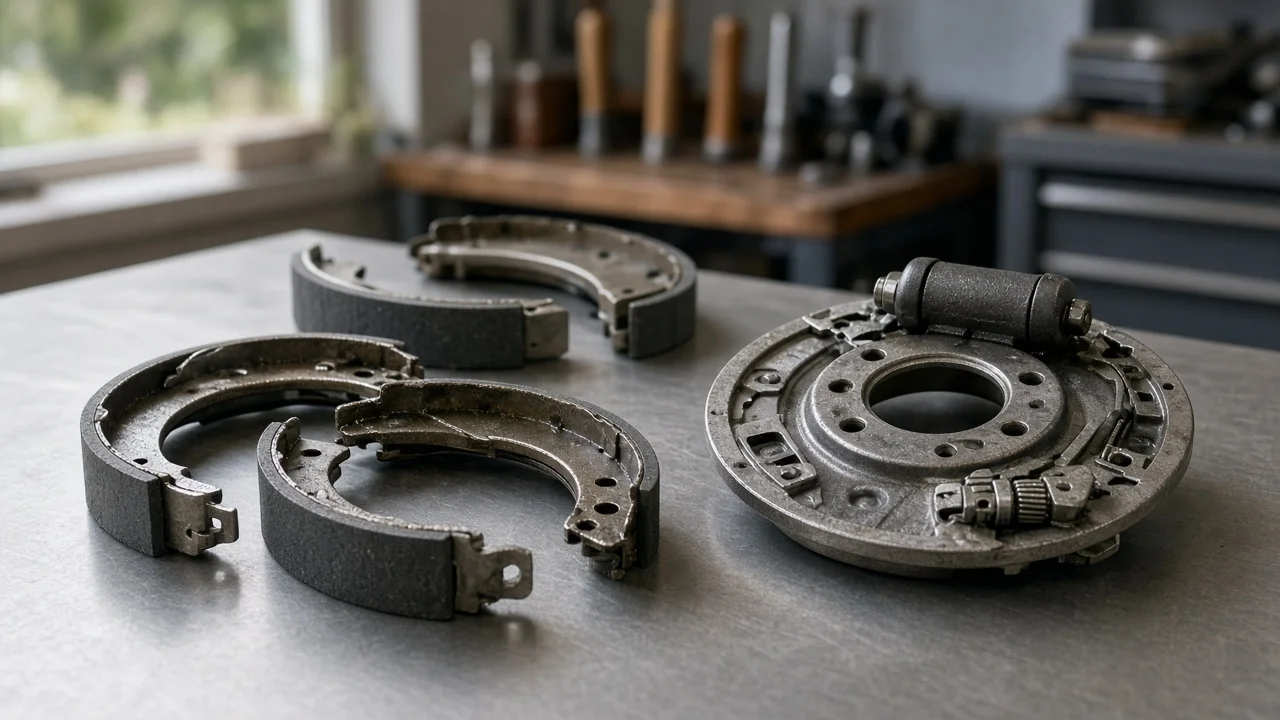
Parking brake shoes hold a parked vehicle in place. On many cars and trucks they work separately from the brake pads that do the everyday stopping. Choosing the right set depends less on brand claims than on exact vehicle fitment, the design of the rear brake and the condition of the parts around the shoes. This guide explains how to confirm compatibility, judge the features that matter and plan for the real cost of the job.
Define the job the parking brake shoes must do
Start by identifying which parking brake design your vehicle uses. Many vehicles with rear disc brakes use a small drum-in-hat system. In that design, a pair of shoes sits inside the hat section of the rear brake rotors and expands against it only when the parking brake is applied. Vehicles with conventional rear drum brakes usually use the same service shoes for both normal braking and parking, so on those vehicles the job is really a rear drum shoe replacement. Some electronic parking brakes act through the rear caliper instead, and those vehicles have no separate shoes at all. Your owner's manual, a parts lookup by VIN or a look behind the rear rotor will show which arrangement you have.
Next, define why you are replacing the rear parking brake shoes. Common reasons include a vehicle that rolls on a slope with the brake set, a lever or pedal that travels too far, linings contaminated by oil or brake fluid, and shoes found at or below the wear limits during a rotor job. Also consider how the vehicle is used. Frequent parking on grades, towing and a manual transmission place more demand on the parking brake than occasional use on level driveways. If the vehicle will not hold, or you find a broken spring, a loose shoe or fluid inside the brake, stop relying on the parking brake and have the system inspected professionally before further use.
Check compatibility before you order
Vehicle fitment is the deciding factor. Parking brake shoes are sized to a specific drum or hat diameter and shoe width. The shoe web, the anchor points and the cable lever position must also match the backing plate on your axle. Even within one model year, the correct part can change with trim level, drive type, rear brake size, towing package or production date. Enter the full vehicle details, ideally the VIN, and compare the listed dimensions and the shape of the replacement with your original shoes. Do not rely on the model name alone.
Check the interfaces around the shoes as well. Confirm whether the set includes the adjuster, springs, hold-down pins and retainers, or whether those parts must be ordered separately as a hardware kit. Note whether the left and right sides use different adjusters or a shoe with an attached lever. Before ordering, measure the inside diameter of the drum or rotor hat. Compare it with the maximum diameter stamped on the part or listed in the service information. If the surface is beyond that limit, deeply scored or out of round, new shoes alone will not restore holding power, and the rotor or drum needs replacement.
Where the parking brake shoes double as the service brakes, inspect the wheel cylinders for brake fluid leaks before buying. A seeping cylinder will quickly contaminate new linings, so it belongs on the same order.
Features that affect the choice
The friction material matters, but its role depends on the design. Drum-in-hat parking brake shoes see little heat in normal use because they are applied mostly when the vehicle is stationary. For that reason, a premium high-temperature compound offers less benefit on these shoes than it would on brake pads. What counts is a lining that matches the original type, is firmly attached to the shoe and has adequate thickness. Bonded linings are glued to the shoe table, while riveted linings use fasteners. Either can be correct if it matches the application. Look for clean edges, consistent thickness and a straight shoe table with no rust showing under the lining.
Treat packaging labels with caution. Phrases such as heavy duty, severe service or premium say nothing about how a part fits or holds on your vehicle. Useful evidence includes: • a clearly stated application list; • published dimensions; • a statement of whether hardware is included; • whether the part is new or relined; • installation instructions that reference the correct adjustment procedure; A warranty is worth comparing, but it does not replace correct fitment. Chamfered or arced linings can help new shoes seat. They still need proper adjustment, and many drum-in-hat designs also require the burnishing procedure in the service information.
Limitations and ownership costs
The shoe price is often the smallest part of the job. Reaching drum-in-hat shoes usually means removing the caliper and rotor. Seized rotors, corroded hardware, worn rotors and stiff parking brake cables can therefore add parts and labor. Springs and adjusters weaken and corrode with age, which is why many technicians replace the hardware along with the shoes. A frayed, kinked or binding cable will keep the brake from applying or releasing fully, no matter how good the new linings are. Also budget for brake cleaner, high-temperature brake lubricant for the contact points and possibly a shoe adjusting gauge.
New shoes also have limits. They cannot cure a leaking axle seal or a seized rear caliper on a rear disc system. After installation, the shoes must be adjusted to the drum according to the service information and the cable set to the specified travel. On many designs, the shoes must also be bedded in using the manufacturer's procedure before they reach full holding power. Vehicles with an electronic parking brake may need a scan tool or a specific service mode before the system is worked on. If you are not confident completing these steps, professional service is the safer choice, because a parking brake that fails to hold can let a vehicle roll away.
Build a practical shortlist
Narrow your options with a checklist rather than a ranking. For each candidate set, check the following: • It lists your exact vehicle, model year, drive type and rear brake size. • Its dimensions match your original shoes. • It covers both rear wheels. • It states whether springs and adjusters are included. • Left and right parts are clearly identified. • Its lining attachment and thickness are comparable to the original. Also note the warranty terms and the return policy in case the part does not fit.
Then price the complete job. Add a hardware kit if one is not included. Add rotors or drums if yours are past their wear limits, along with any cable or wheel cylinder that inspection shows is faulty. A slightly more expensive set with correct hardware and clear instructions can cost less overall than a cheap set that needs extra parts. Keep the old shoes until the new ones are installed and adjusted so you can compare them side by side. Finally, test holding power as the service information describes, in a safe area with the service brakes ready to apply.